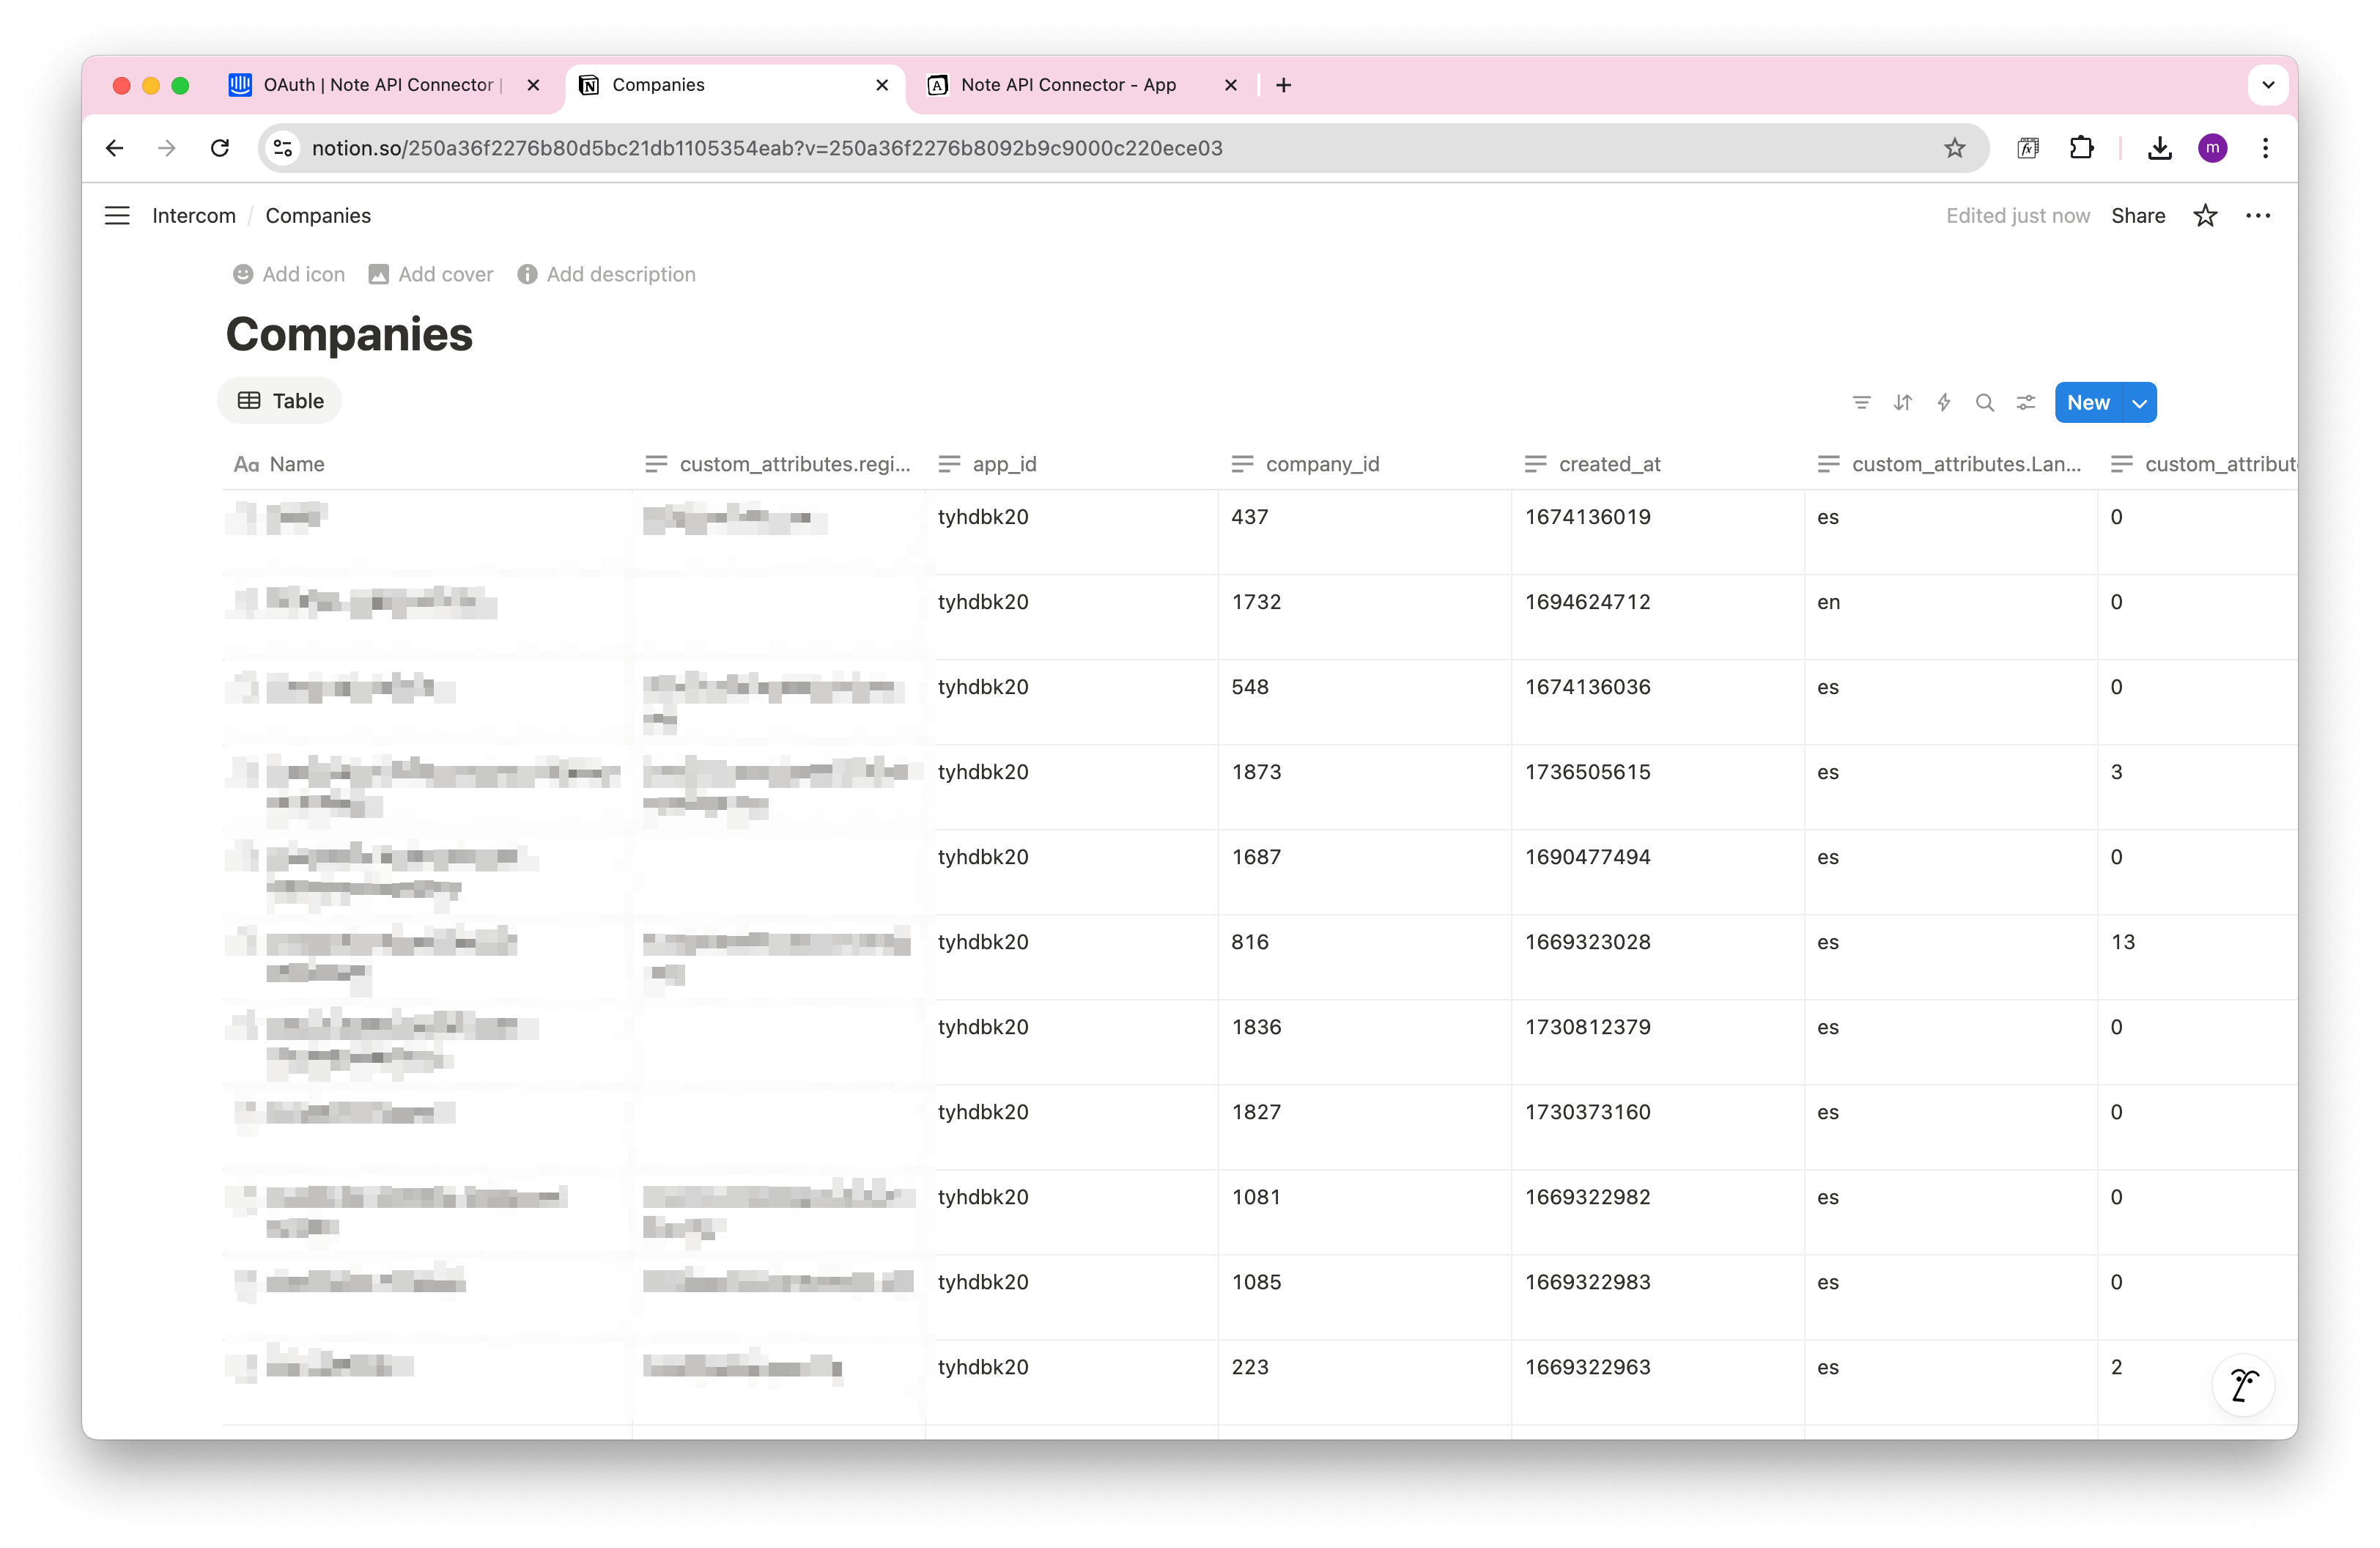
How to Import and Sync HelpScout Data into Notion
Want to import HelpScout data to Notion and keep your support tickets and customers always up to date? This guide will show you exactly how to set up a Notion HelpScout integration in 5 simple steps. You’ll be able to sync HelpScout with Notion automatically, no coding required.
With Note API Connector, you can seamlessly connect HelpScout's API and import data into Notion. Follow along to centralize your customer conversations and insights in one place.
TL;DR
- Connect HelpScout to Note API Connector by creating a HelpScout app and setting up OAuth.
- Add the OAuth connection in Note API Connector with your App ID and Secret.
- Import HelpScout customers into a Notion database.
- Import HelpScout conversations into another Notion database.
- Optionally link customers and conversations with Notion Relations for a CRM-style view.
- Explore other HelpScout API endpoints (mailboxes, users, tags, reports) to expand your integration.
- Automate updates with scheduling so data stays synced automatically.
Quick start with Note API Connector
Start syncing your data to Notion in just a few clicks. Connect your Notion workspace, grant the necessary permissions, and you’re ready to build a full HelpScout + Notion workflow integration.
👉 Follow the official setup guide to get started in minutes.
Step 1: Connect HelpScout to Note API Connector
Before you can import HelpScout data into Notion, you need to connect your HelpScout account.
Create a HelpScout App
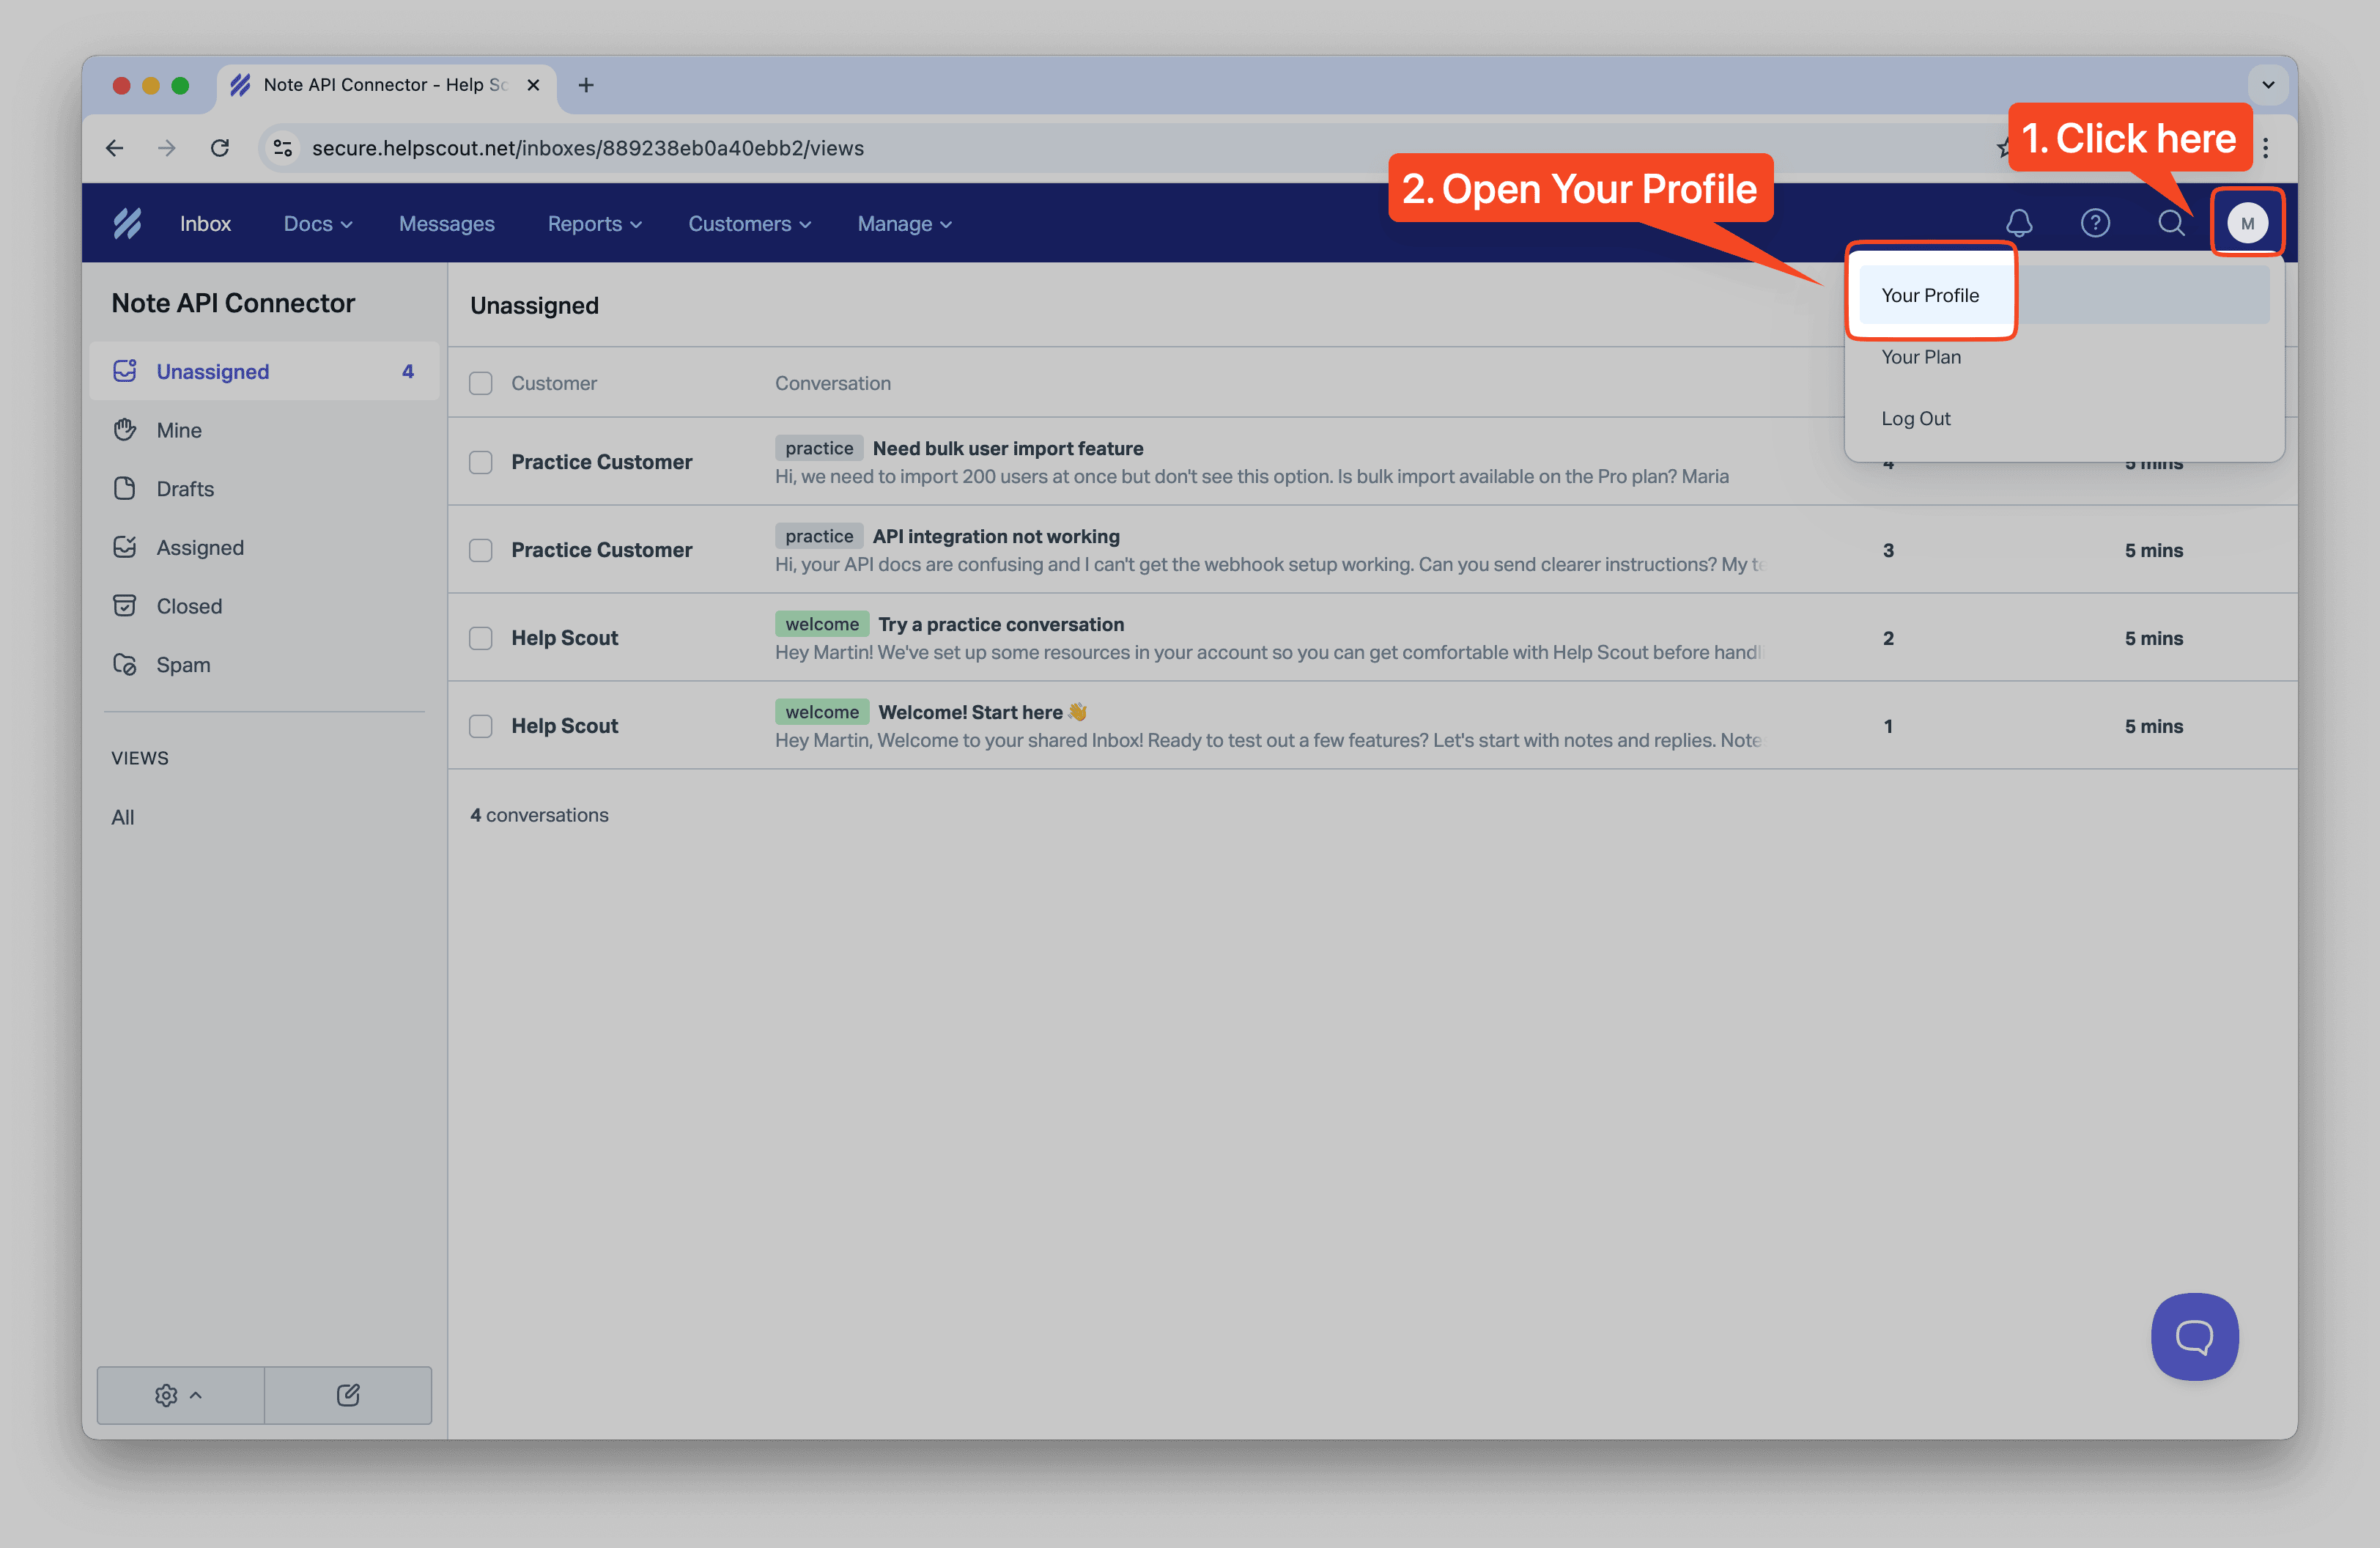
Log in to HelpScout and click on your profile in the top right corner, then select Your Profile.
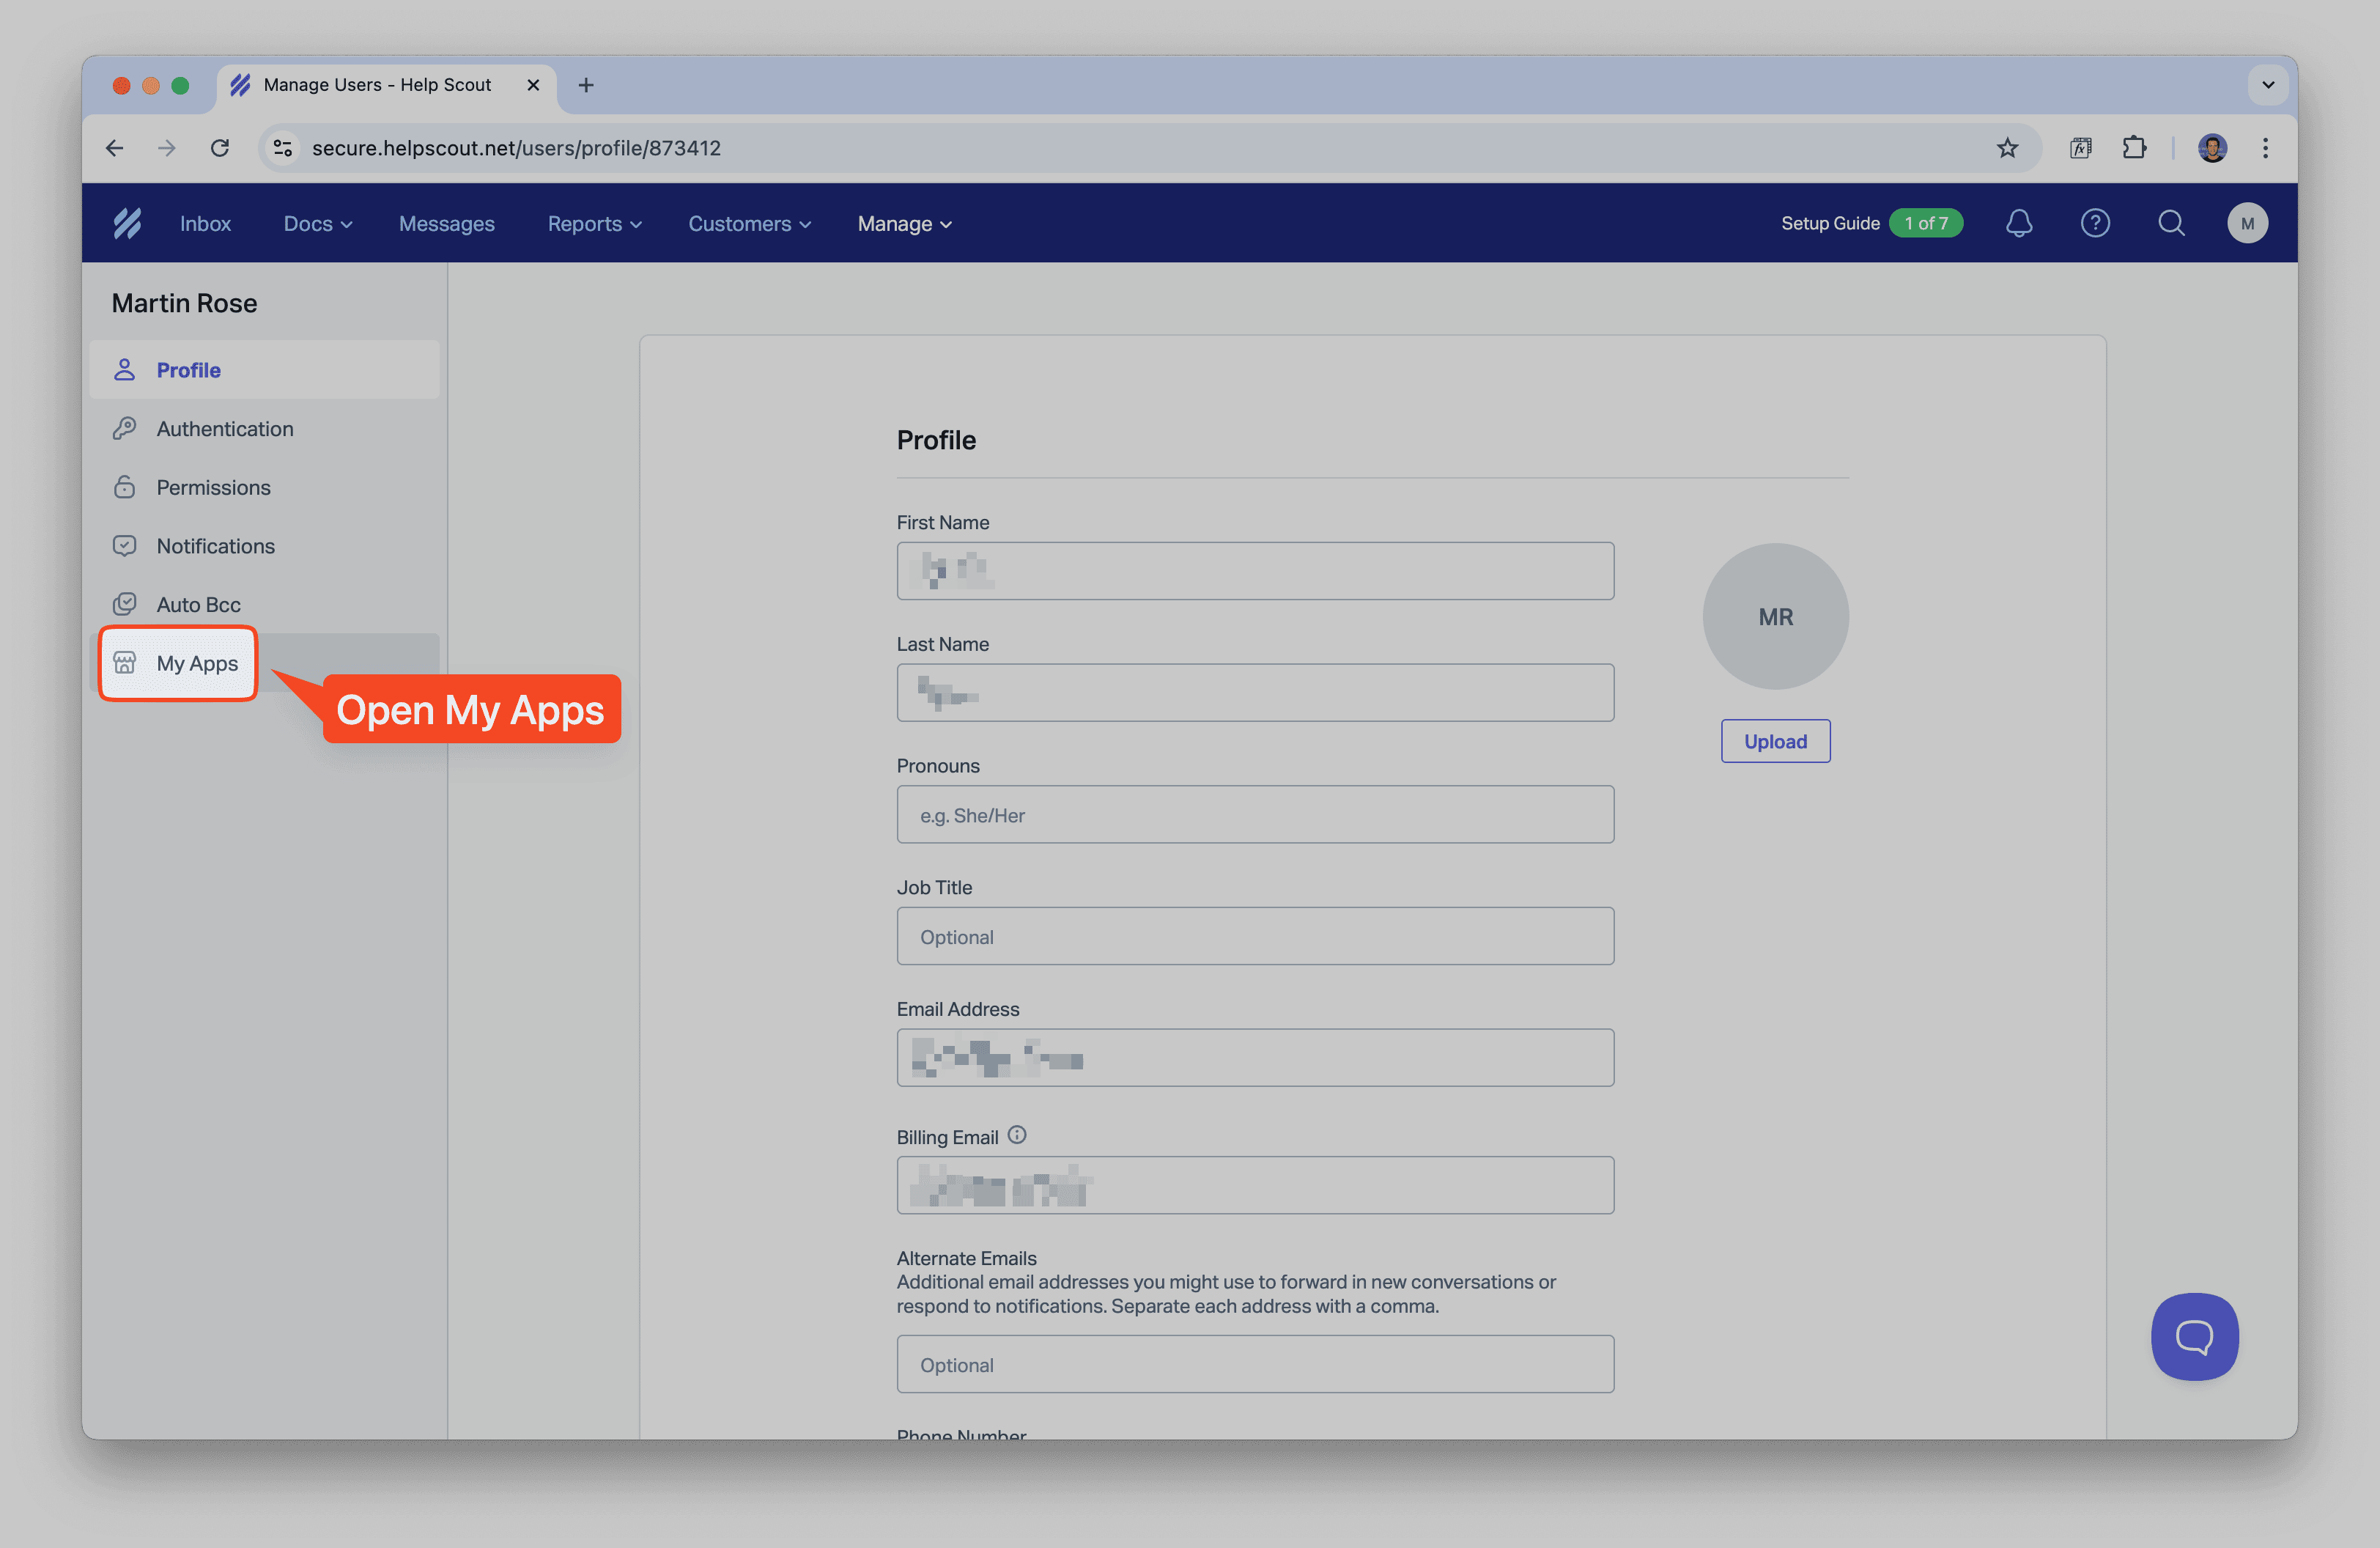
Navigate to My Apps in the left sidebar.
Click Create App to create a new application.
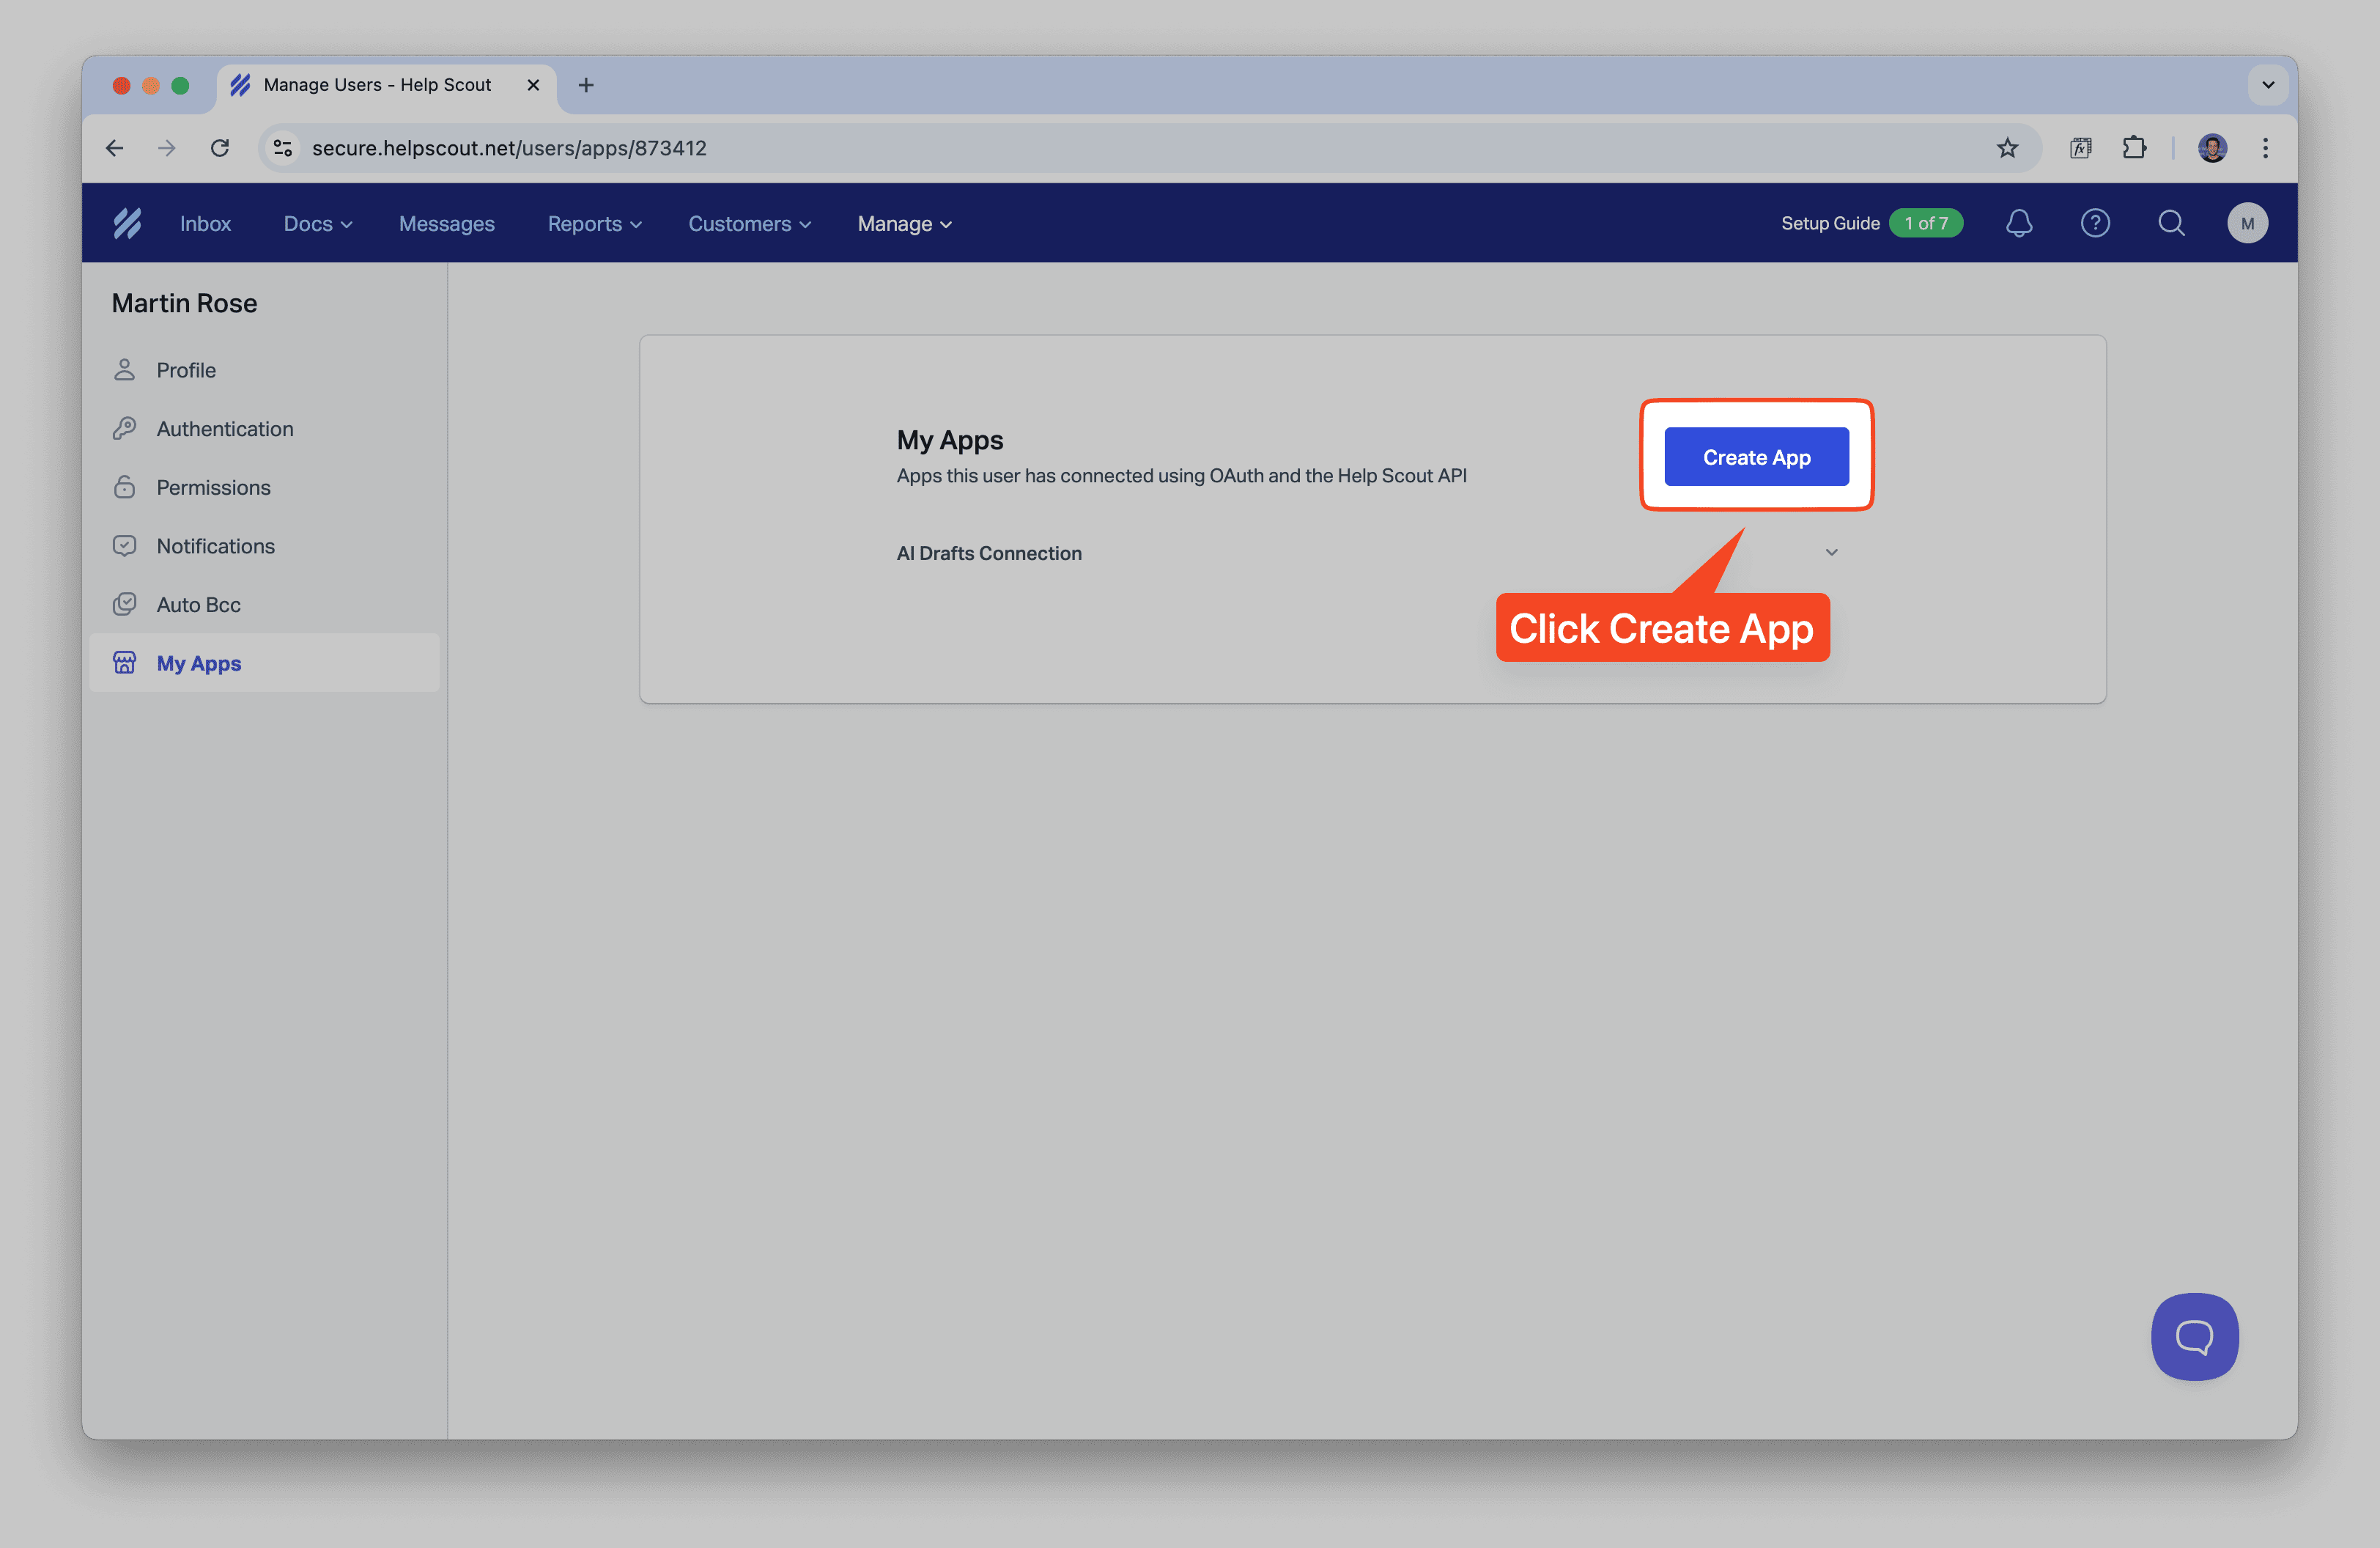
Fill in your app details:
- App Name: Note API Connector (or any name you prefer)
- Company: Your company name
- Redirect URL:
https://api.noteapiconnector.com/oauth/callback
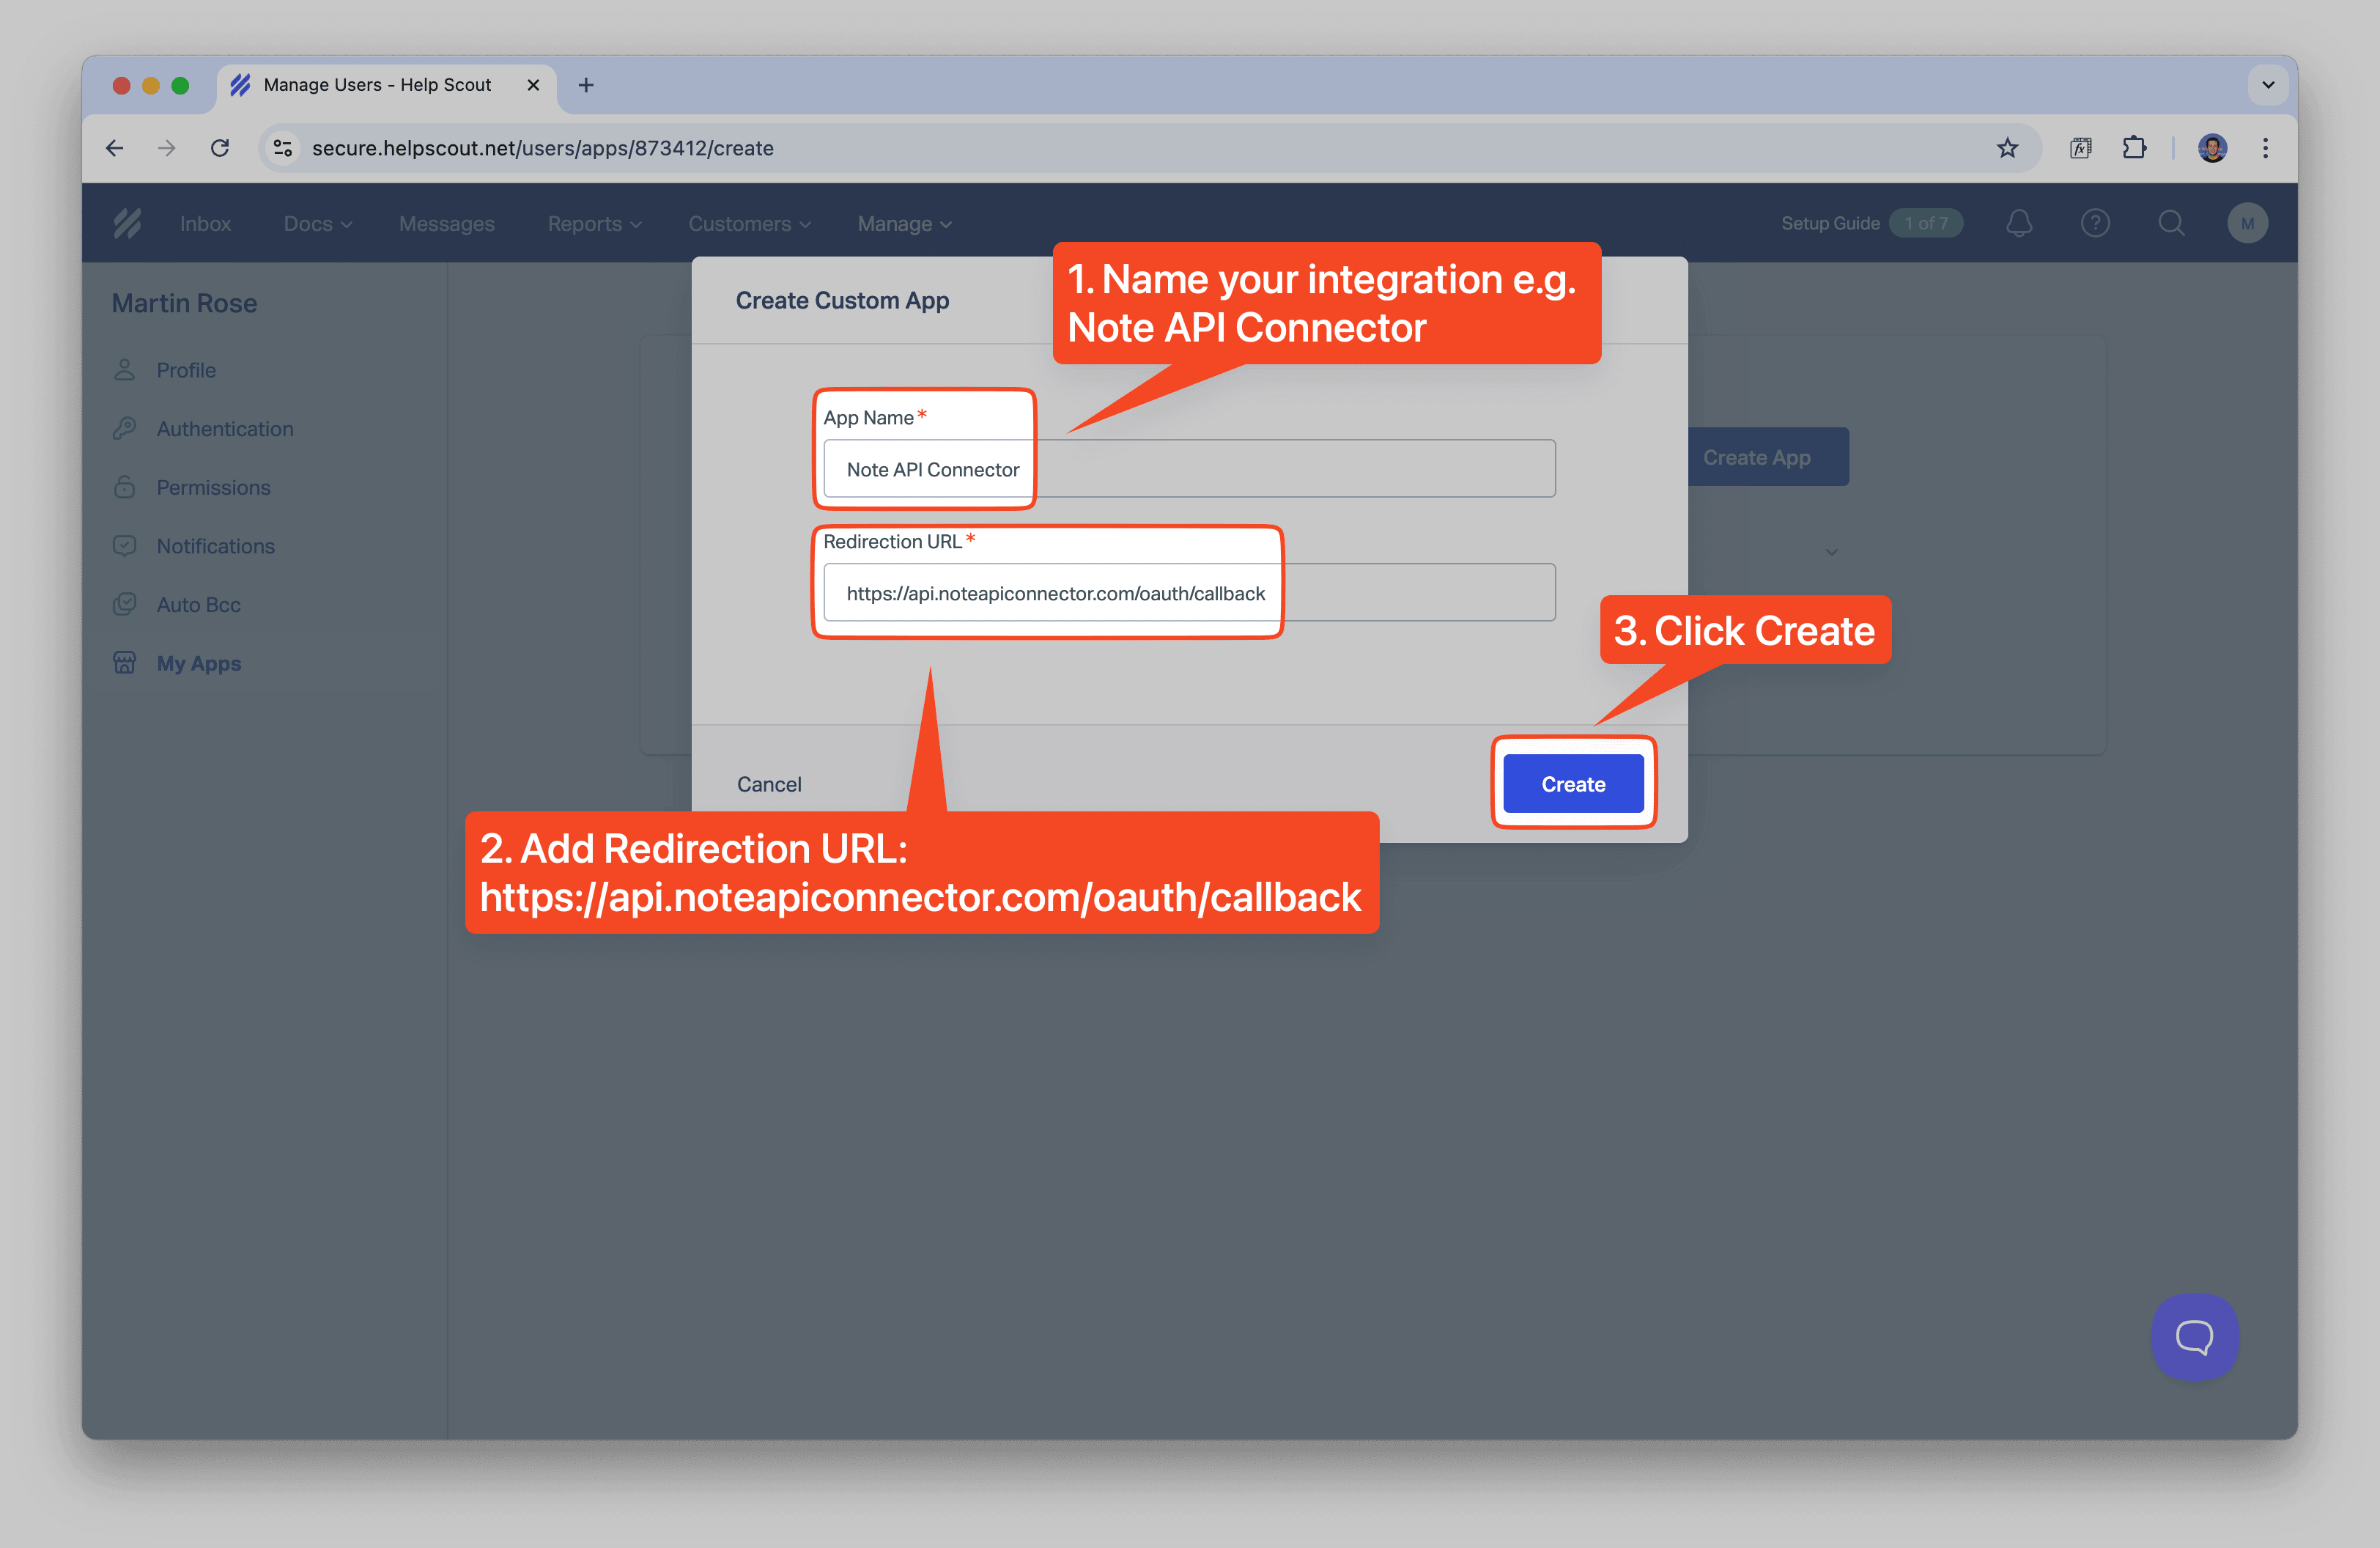
After creating the app, you'll see your App ID and App Secret . Copy these values as you'll need them later for the OAuth connection.
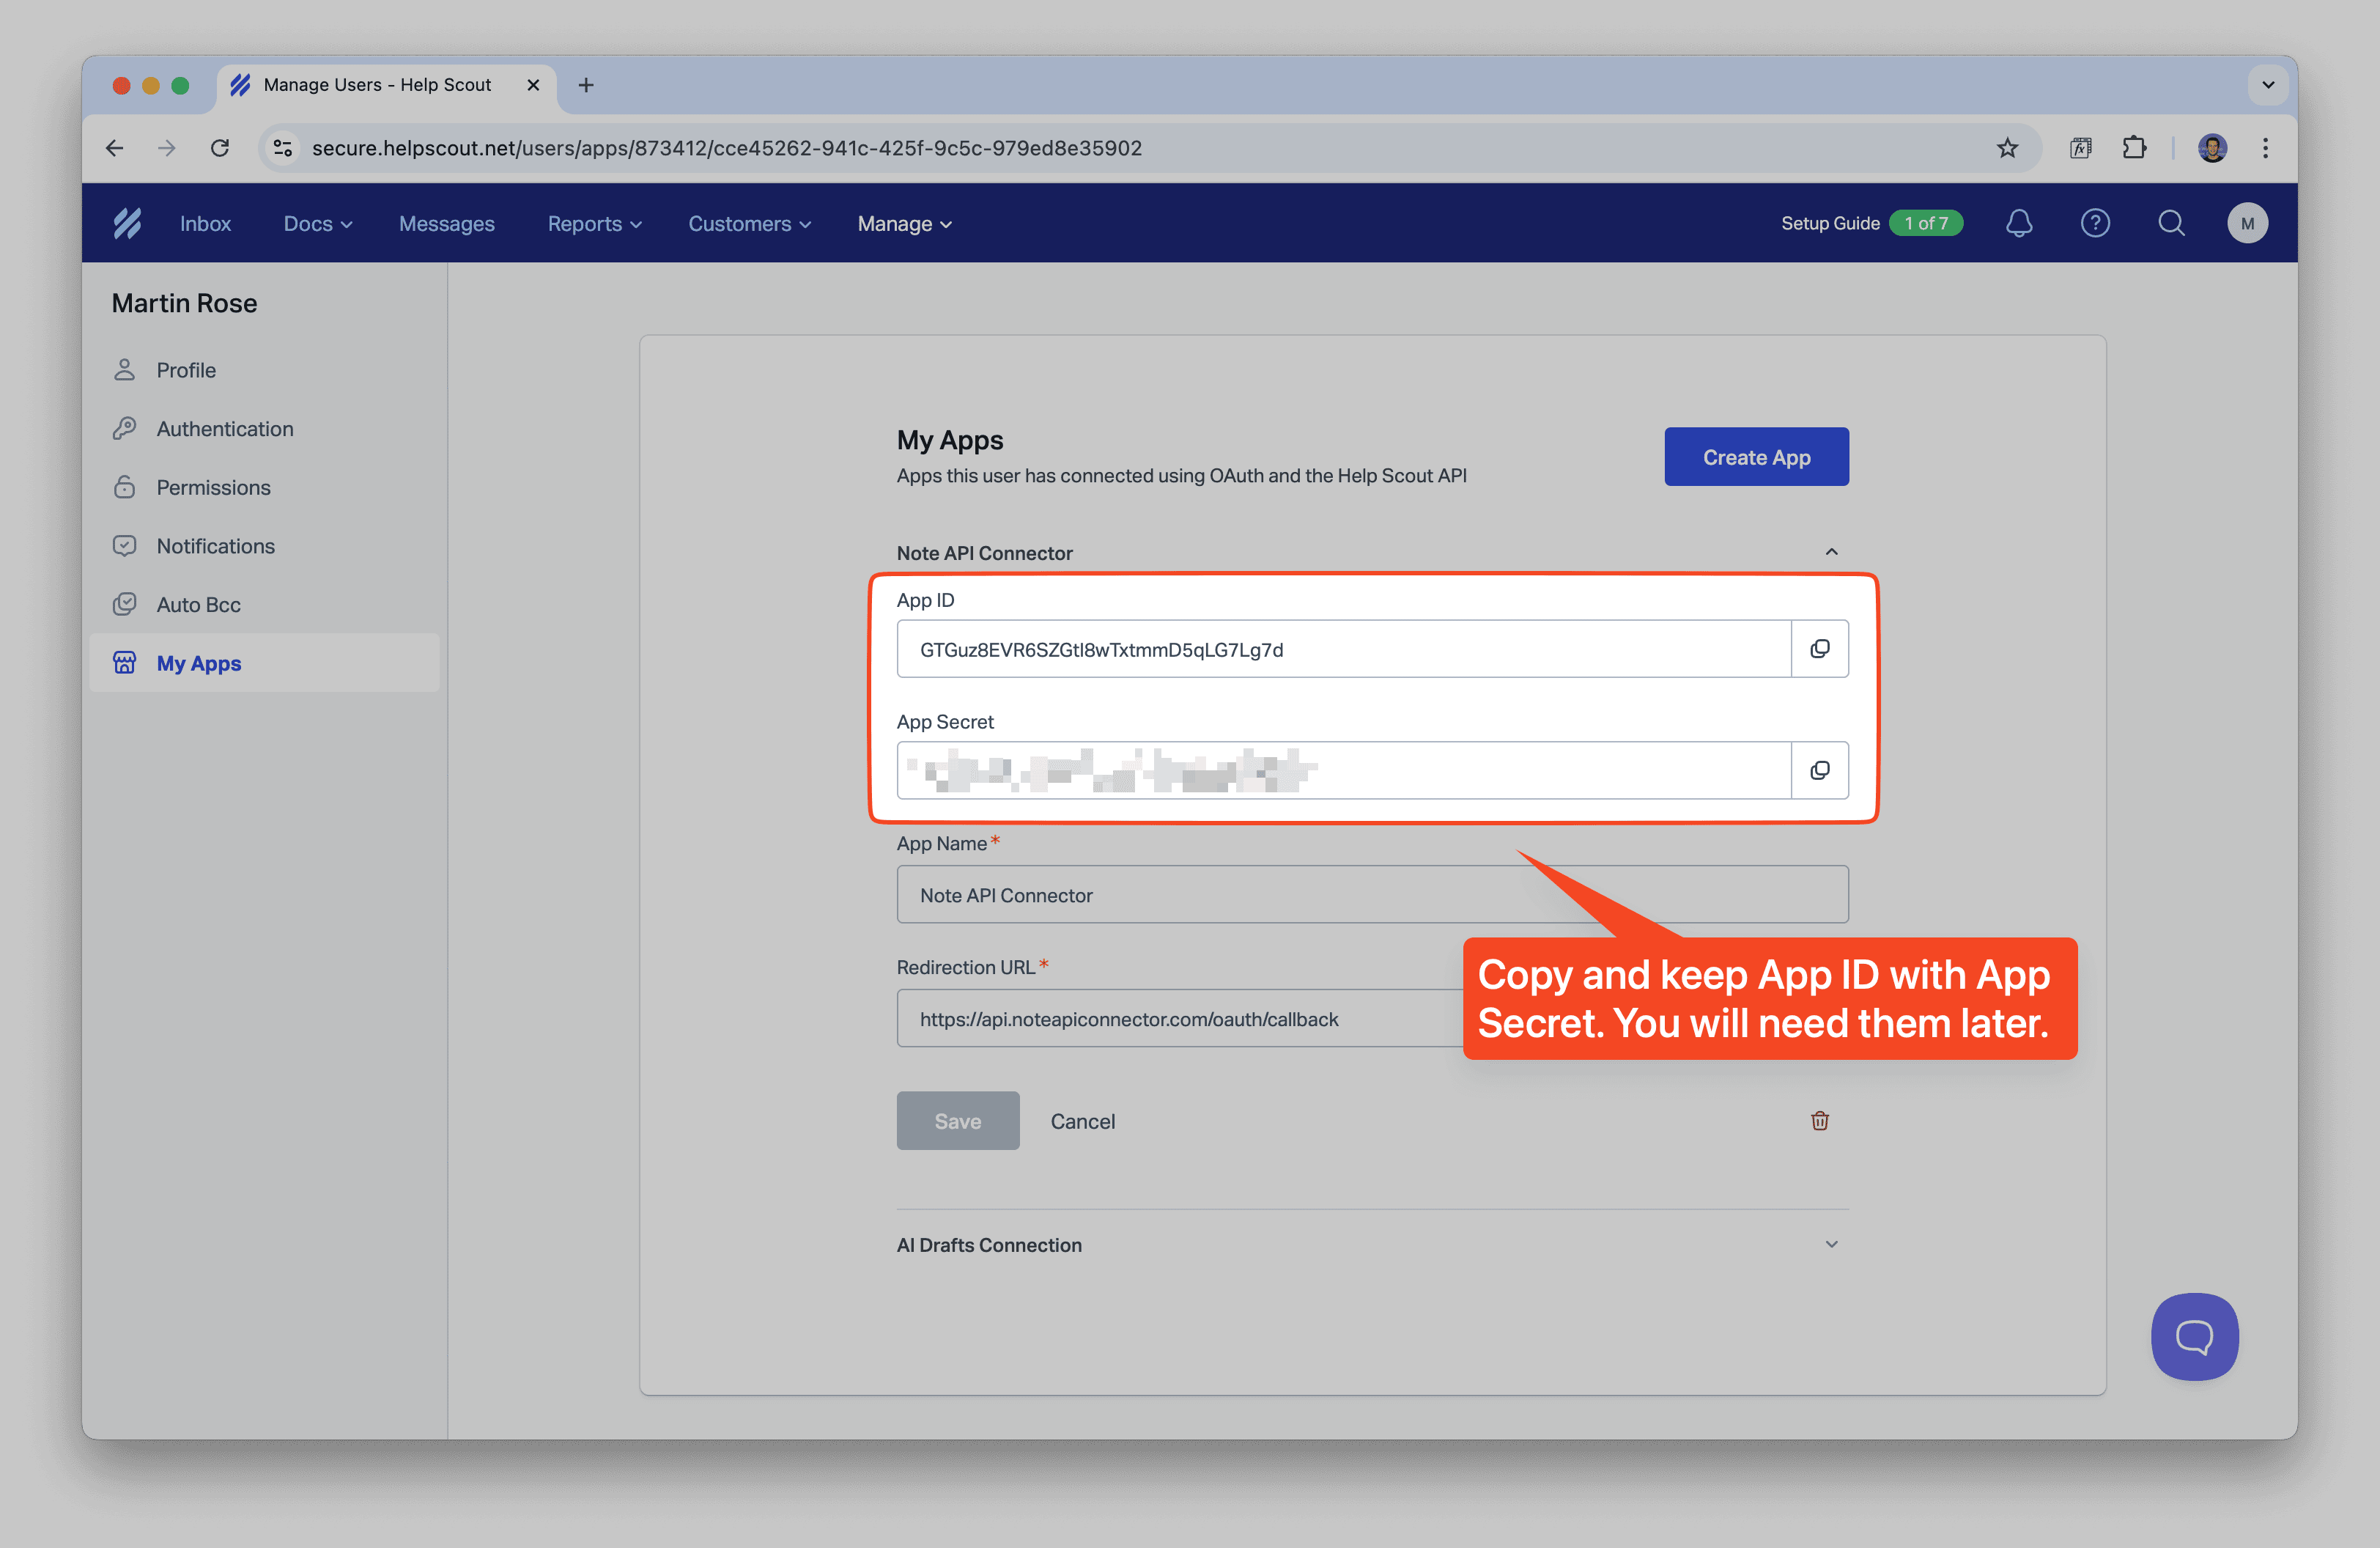
Add HelpScout OAuth Connection to Note API Connector
Now it's time to connect HelpScout to Notion through OAuth. Click Create request and select Authorization → OAuth → Add Custom OAuth.
For HelpScout integration, you need to configure the OAuth connection.
Enter the following details in Note API Connector:
- Name: HelpScout
-
Authorization Base URL:
https://secure.helpscout.net/authentication/authorizeClientApplication -
Token URL:
https://api.helpscout.net/v2/oauth2/token - Client ID: Your HelpScout App ID
- Client Secret: Your HelpScout App Secret
- Scopes: Leave empty (HelpScout doesn't use scopes)
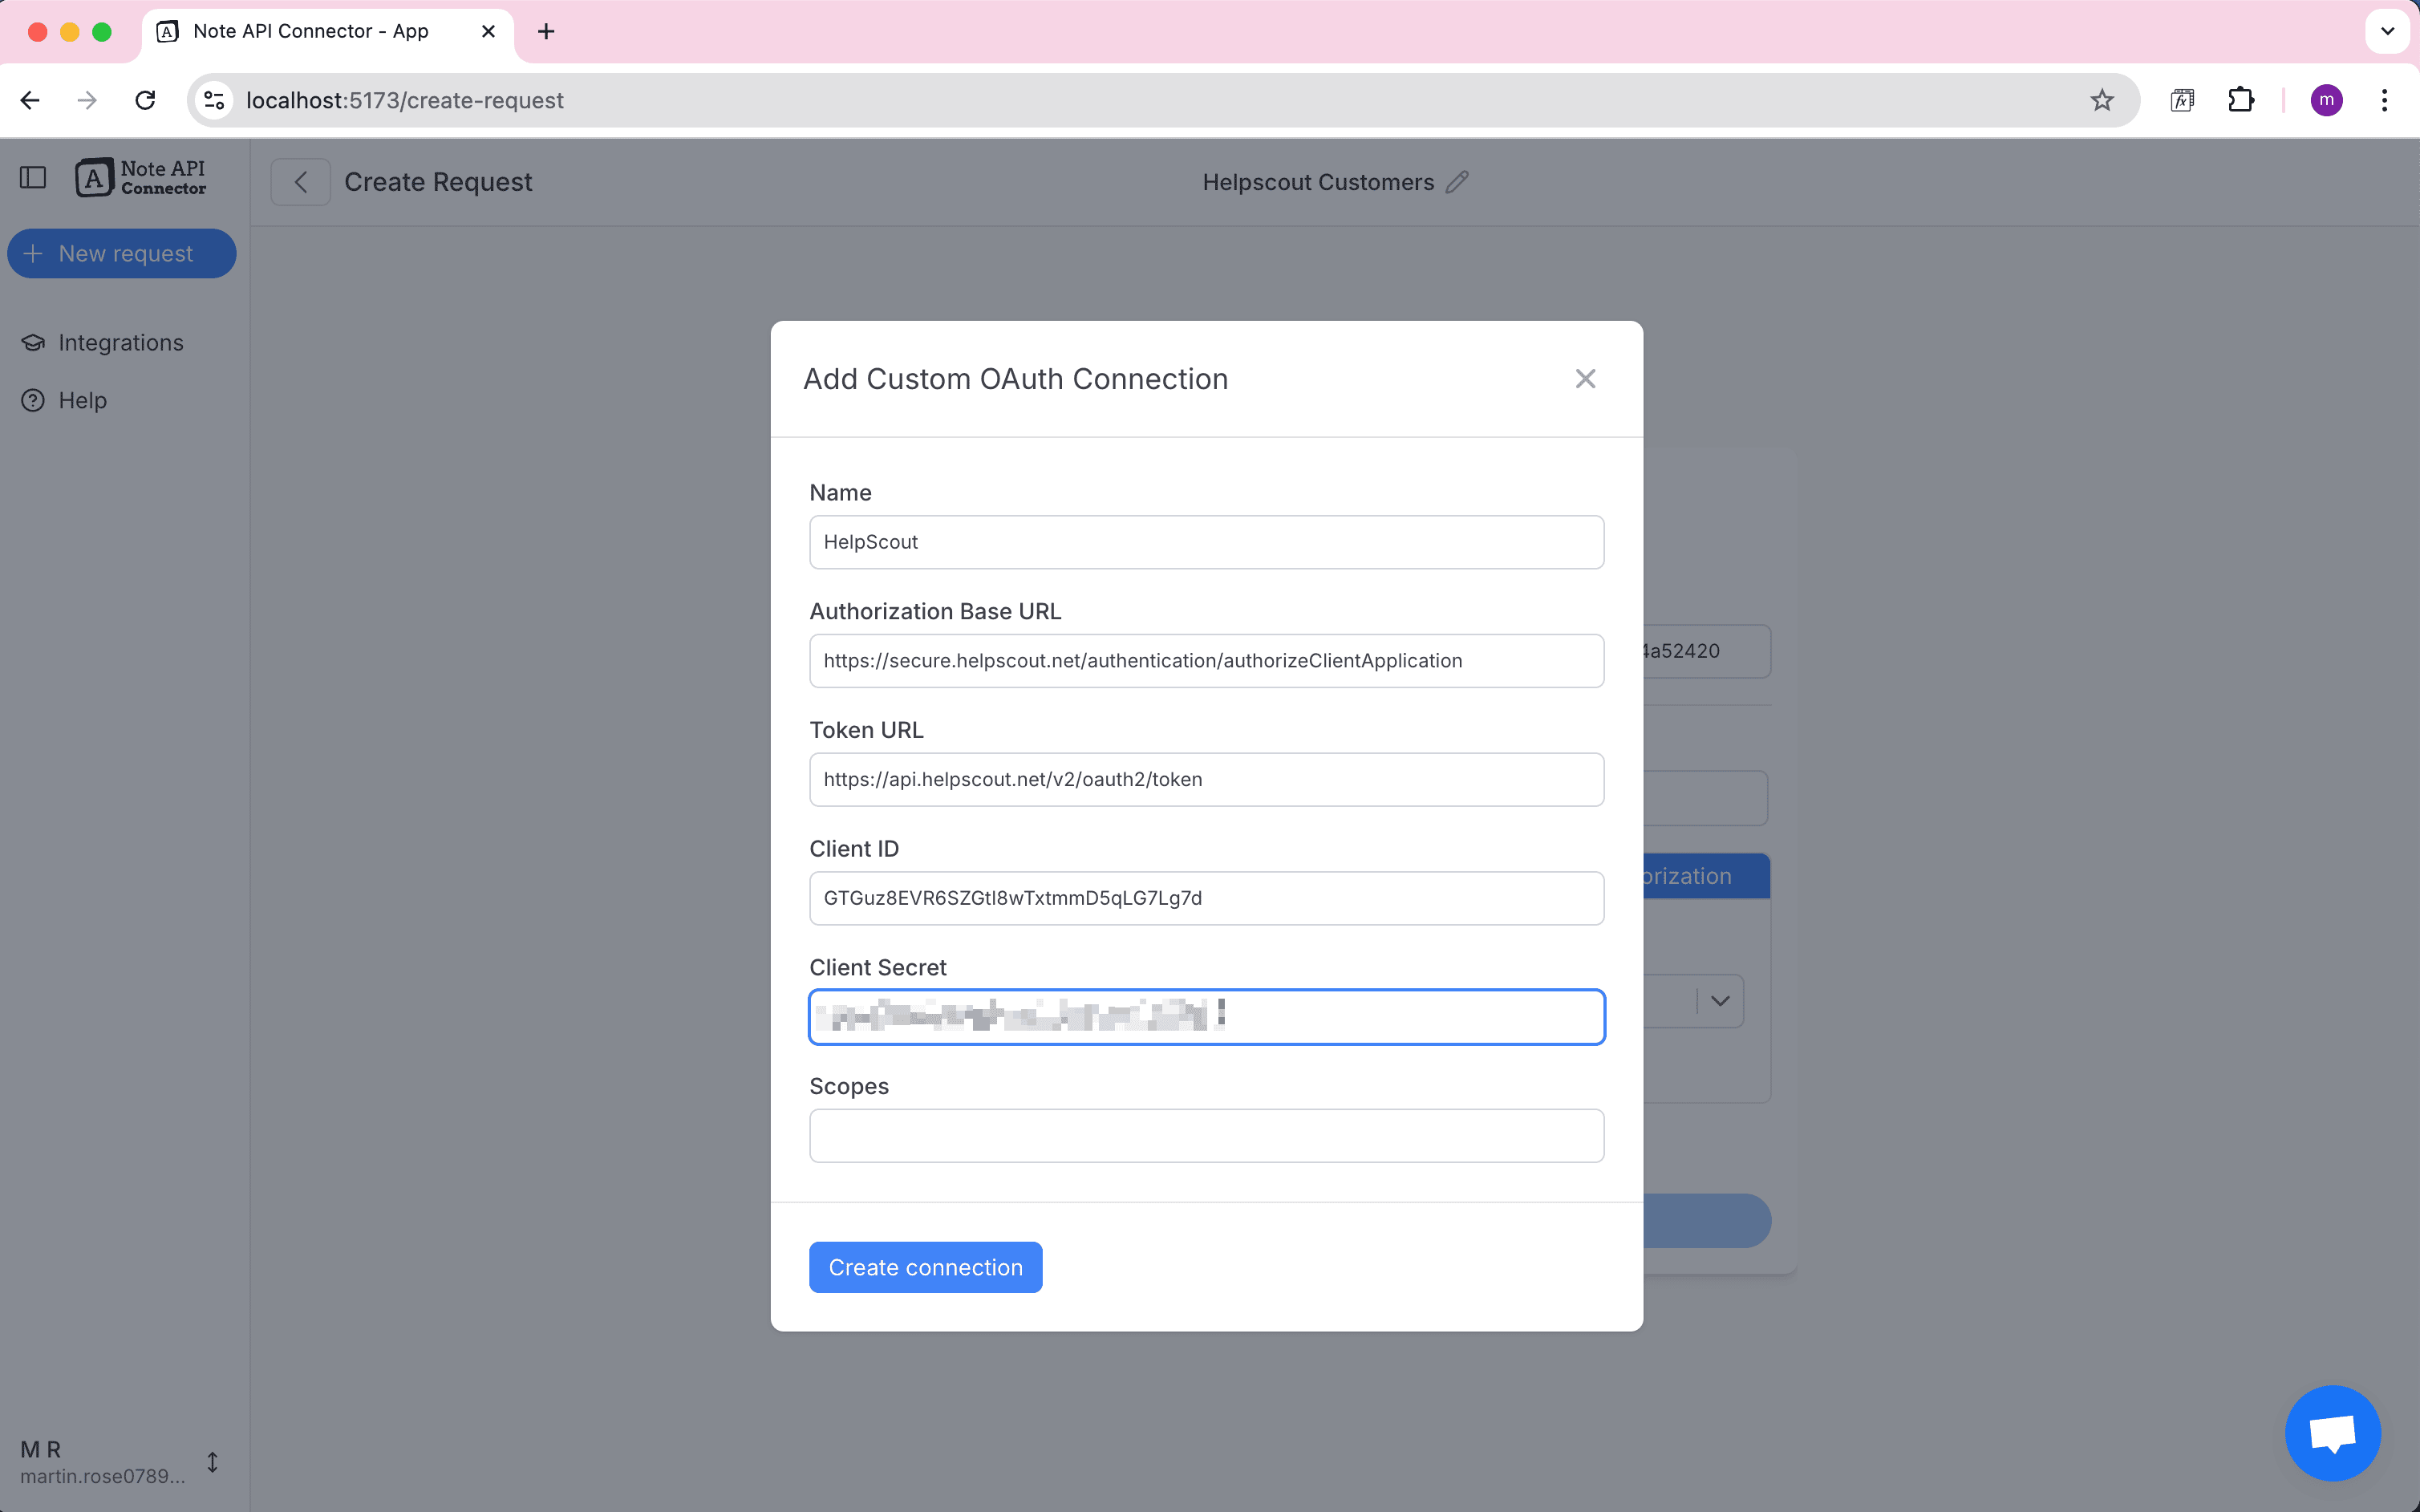
Click Create connection and use your HelpScout account to sign in.
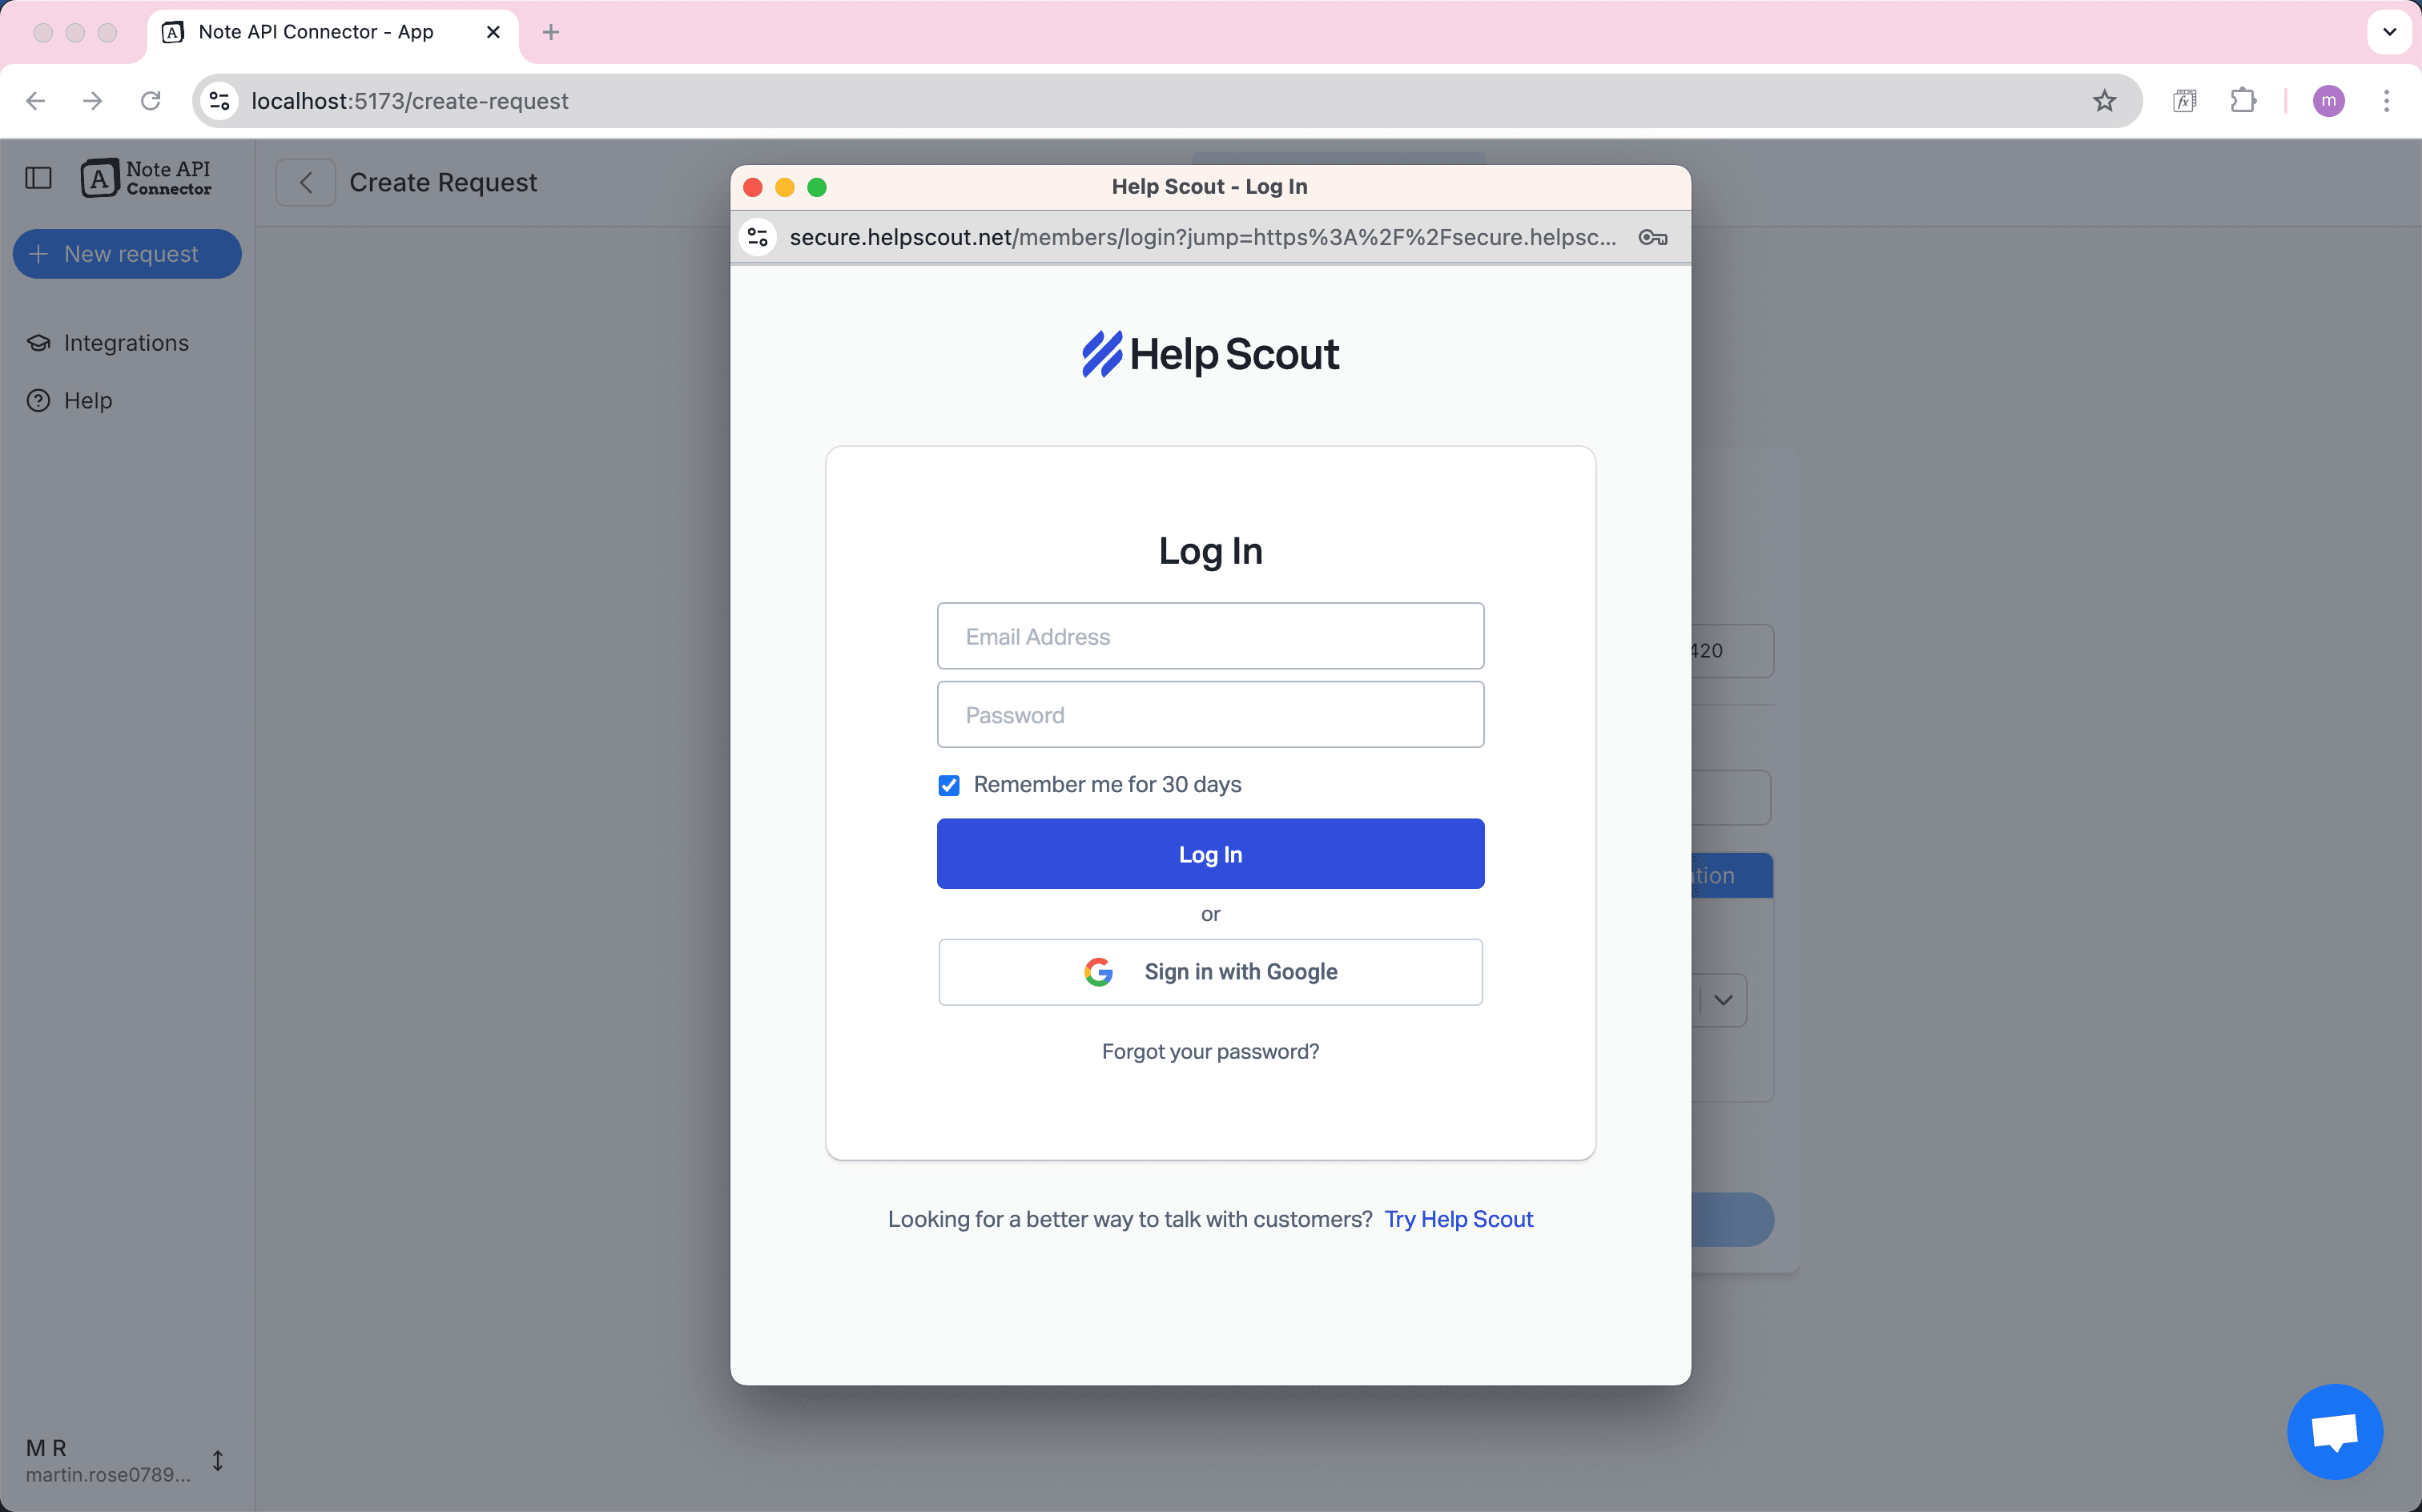
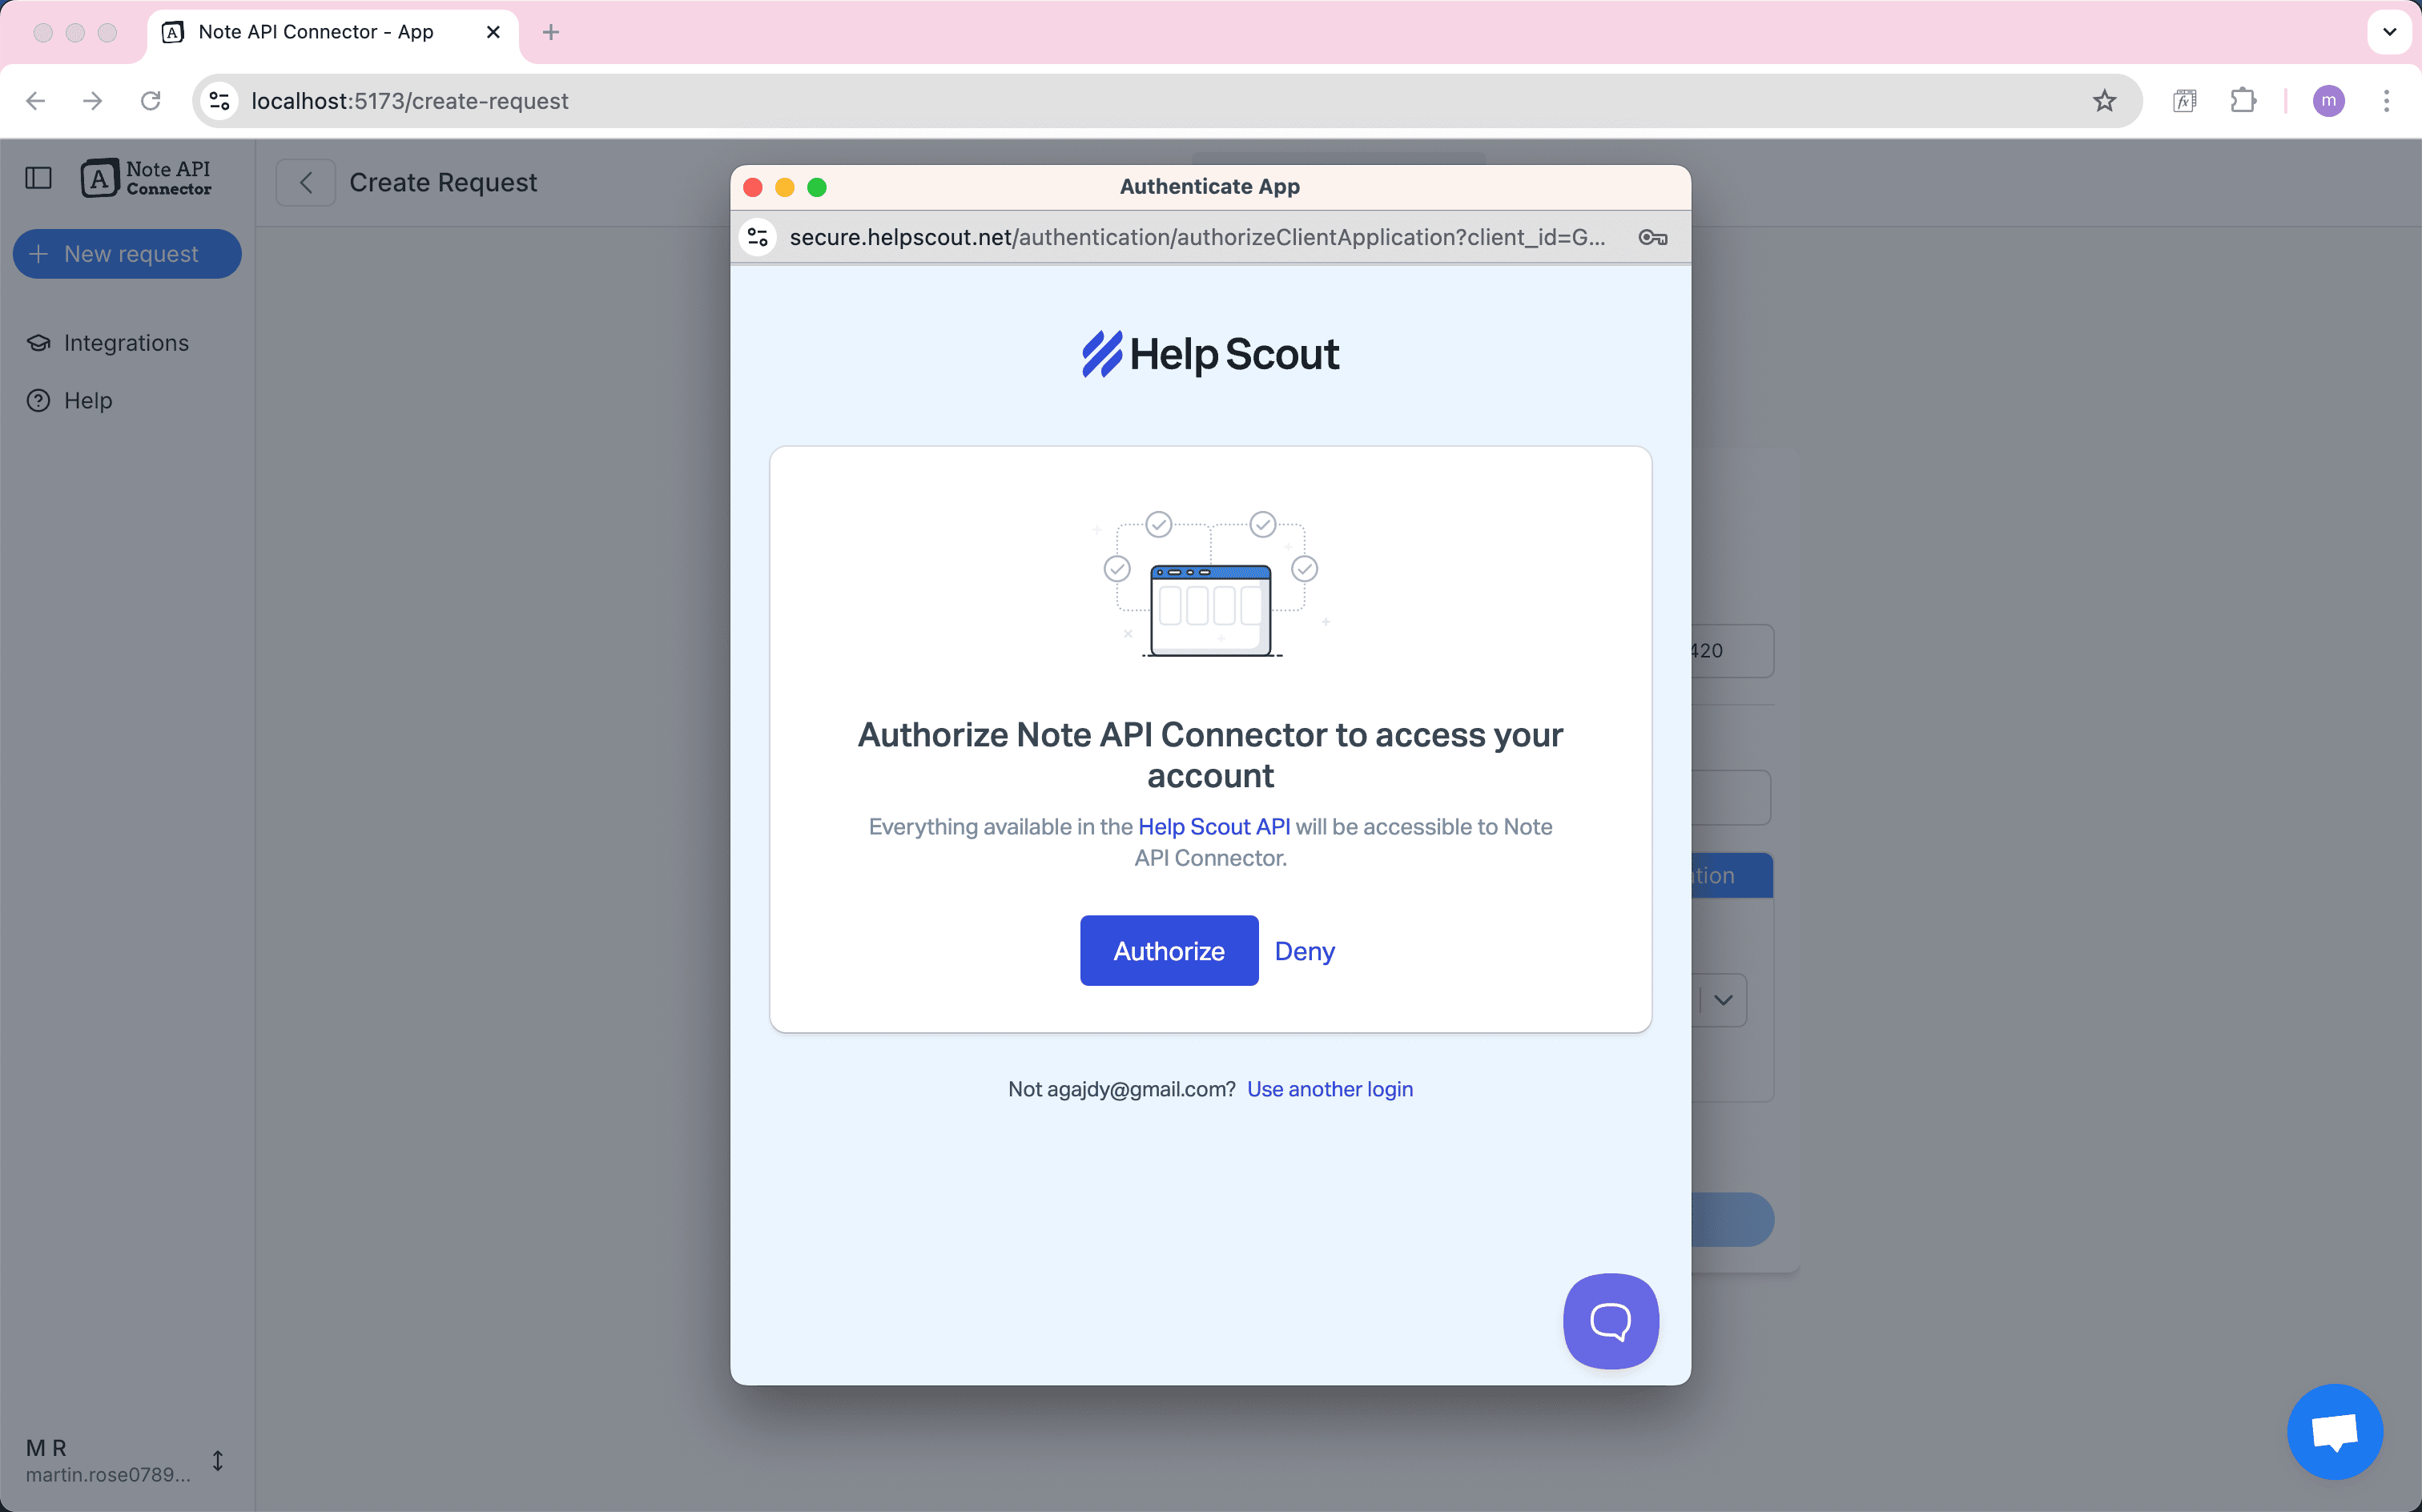
💡 This is just a secure way to let the tool read your data, your password isn’t stored.
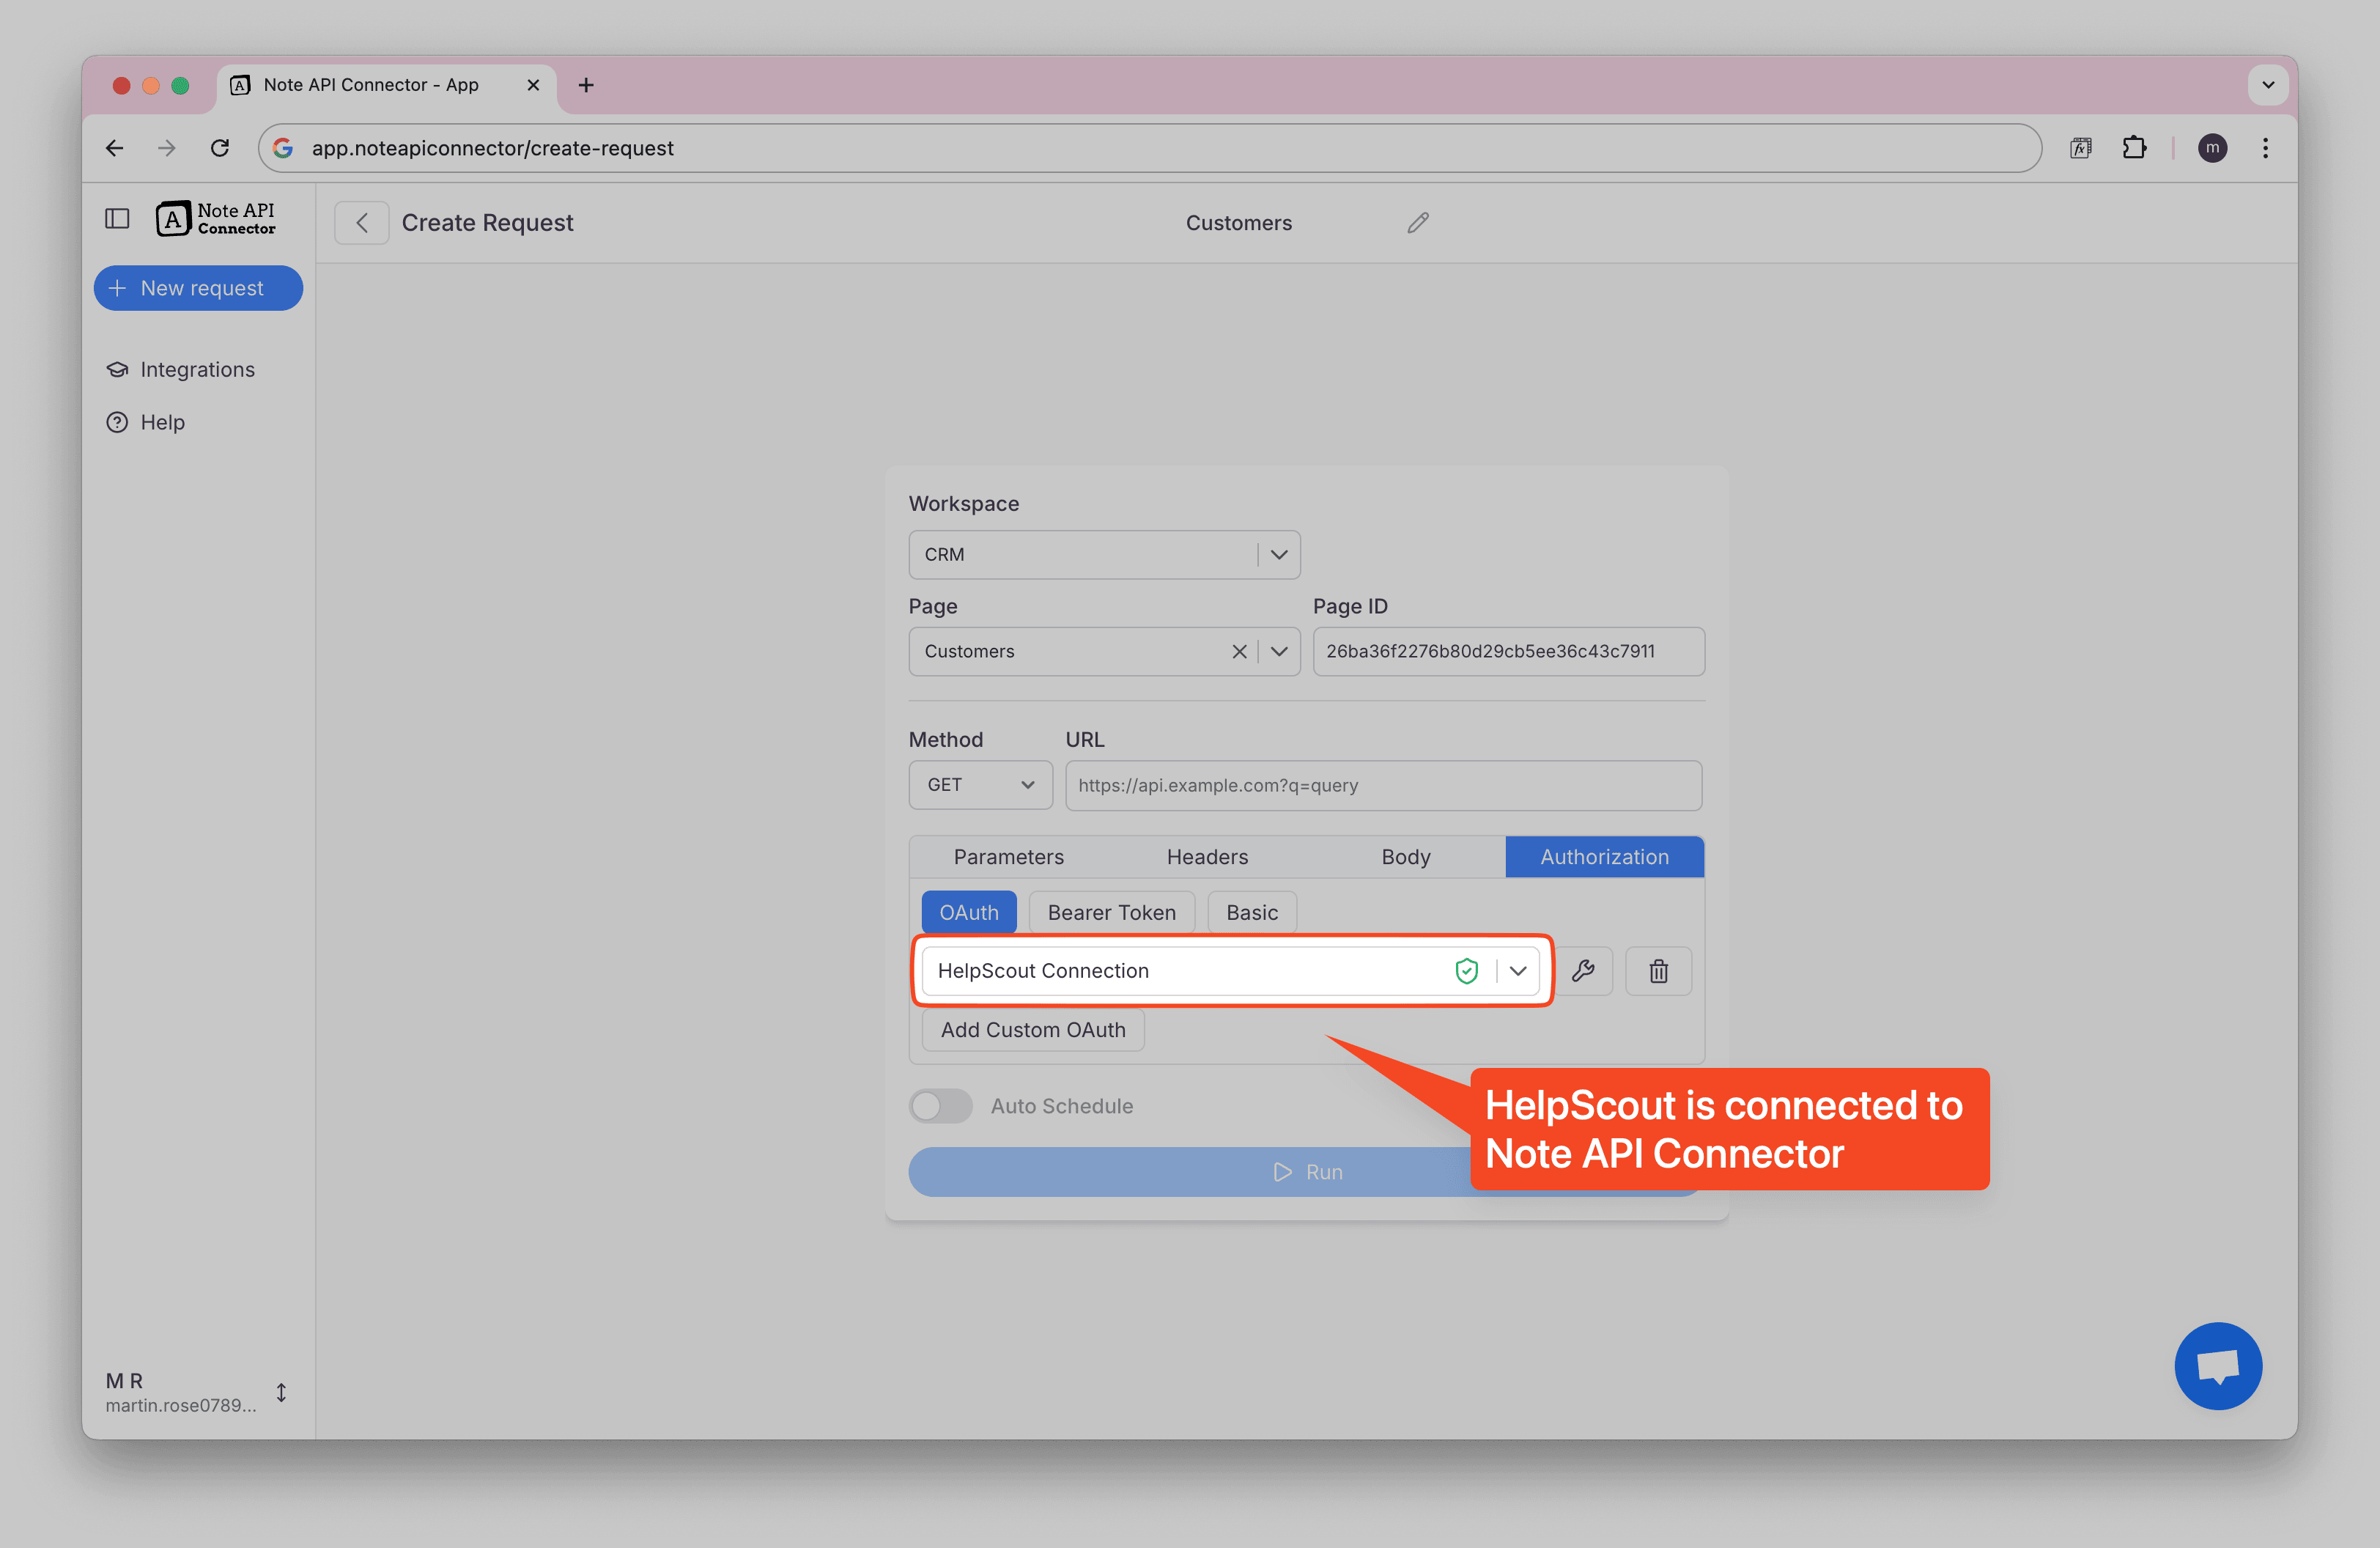
✅ Done! Your HelpScout account is now connected to Note API Connector.
Step 2: Import Your Customers from HelpScout into Notion
In this step, you’ll import HelpScout data to Notion using Note API Connector so your customer records are ready for your Notion HelpScout integration.
(Optional) If you’re curious what’s available, browse the HelpScout API docs. We’ll start with customers via:
https://api.helpscout.net/v2/customers
Open Note API Connector and click Create request .
Name the request (e.g., Customers) and choose the Notion database where you want to import the data.
In the URL field, paste the API link above. Under Authorization, select the HelpScout connection you set up in Step 1.
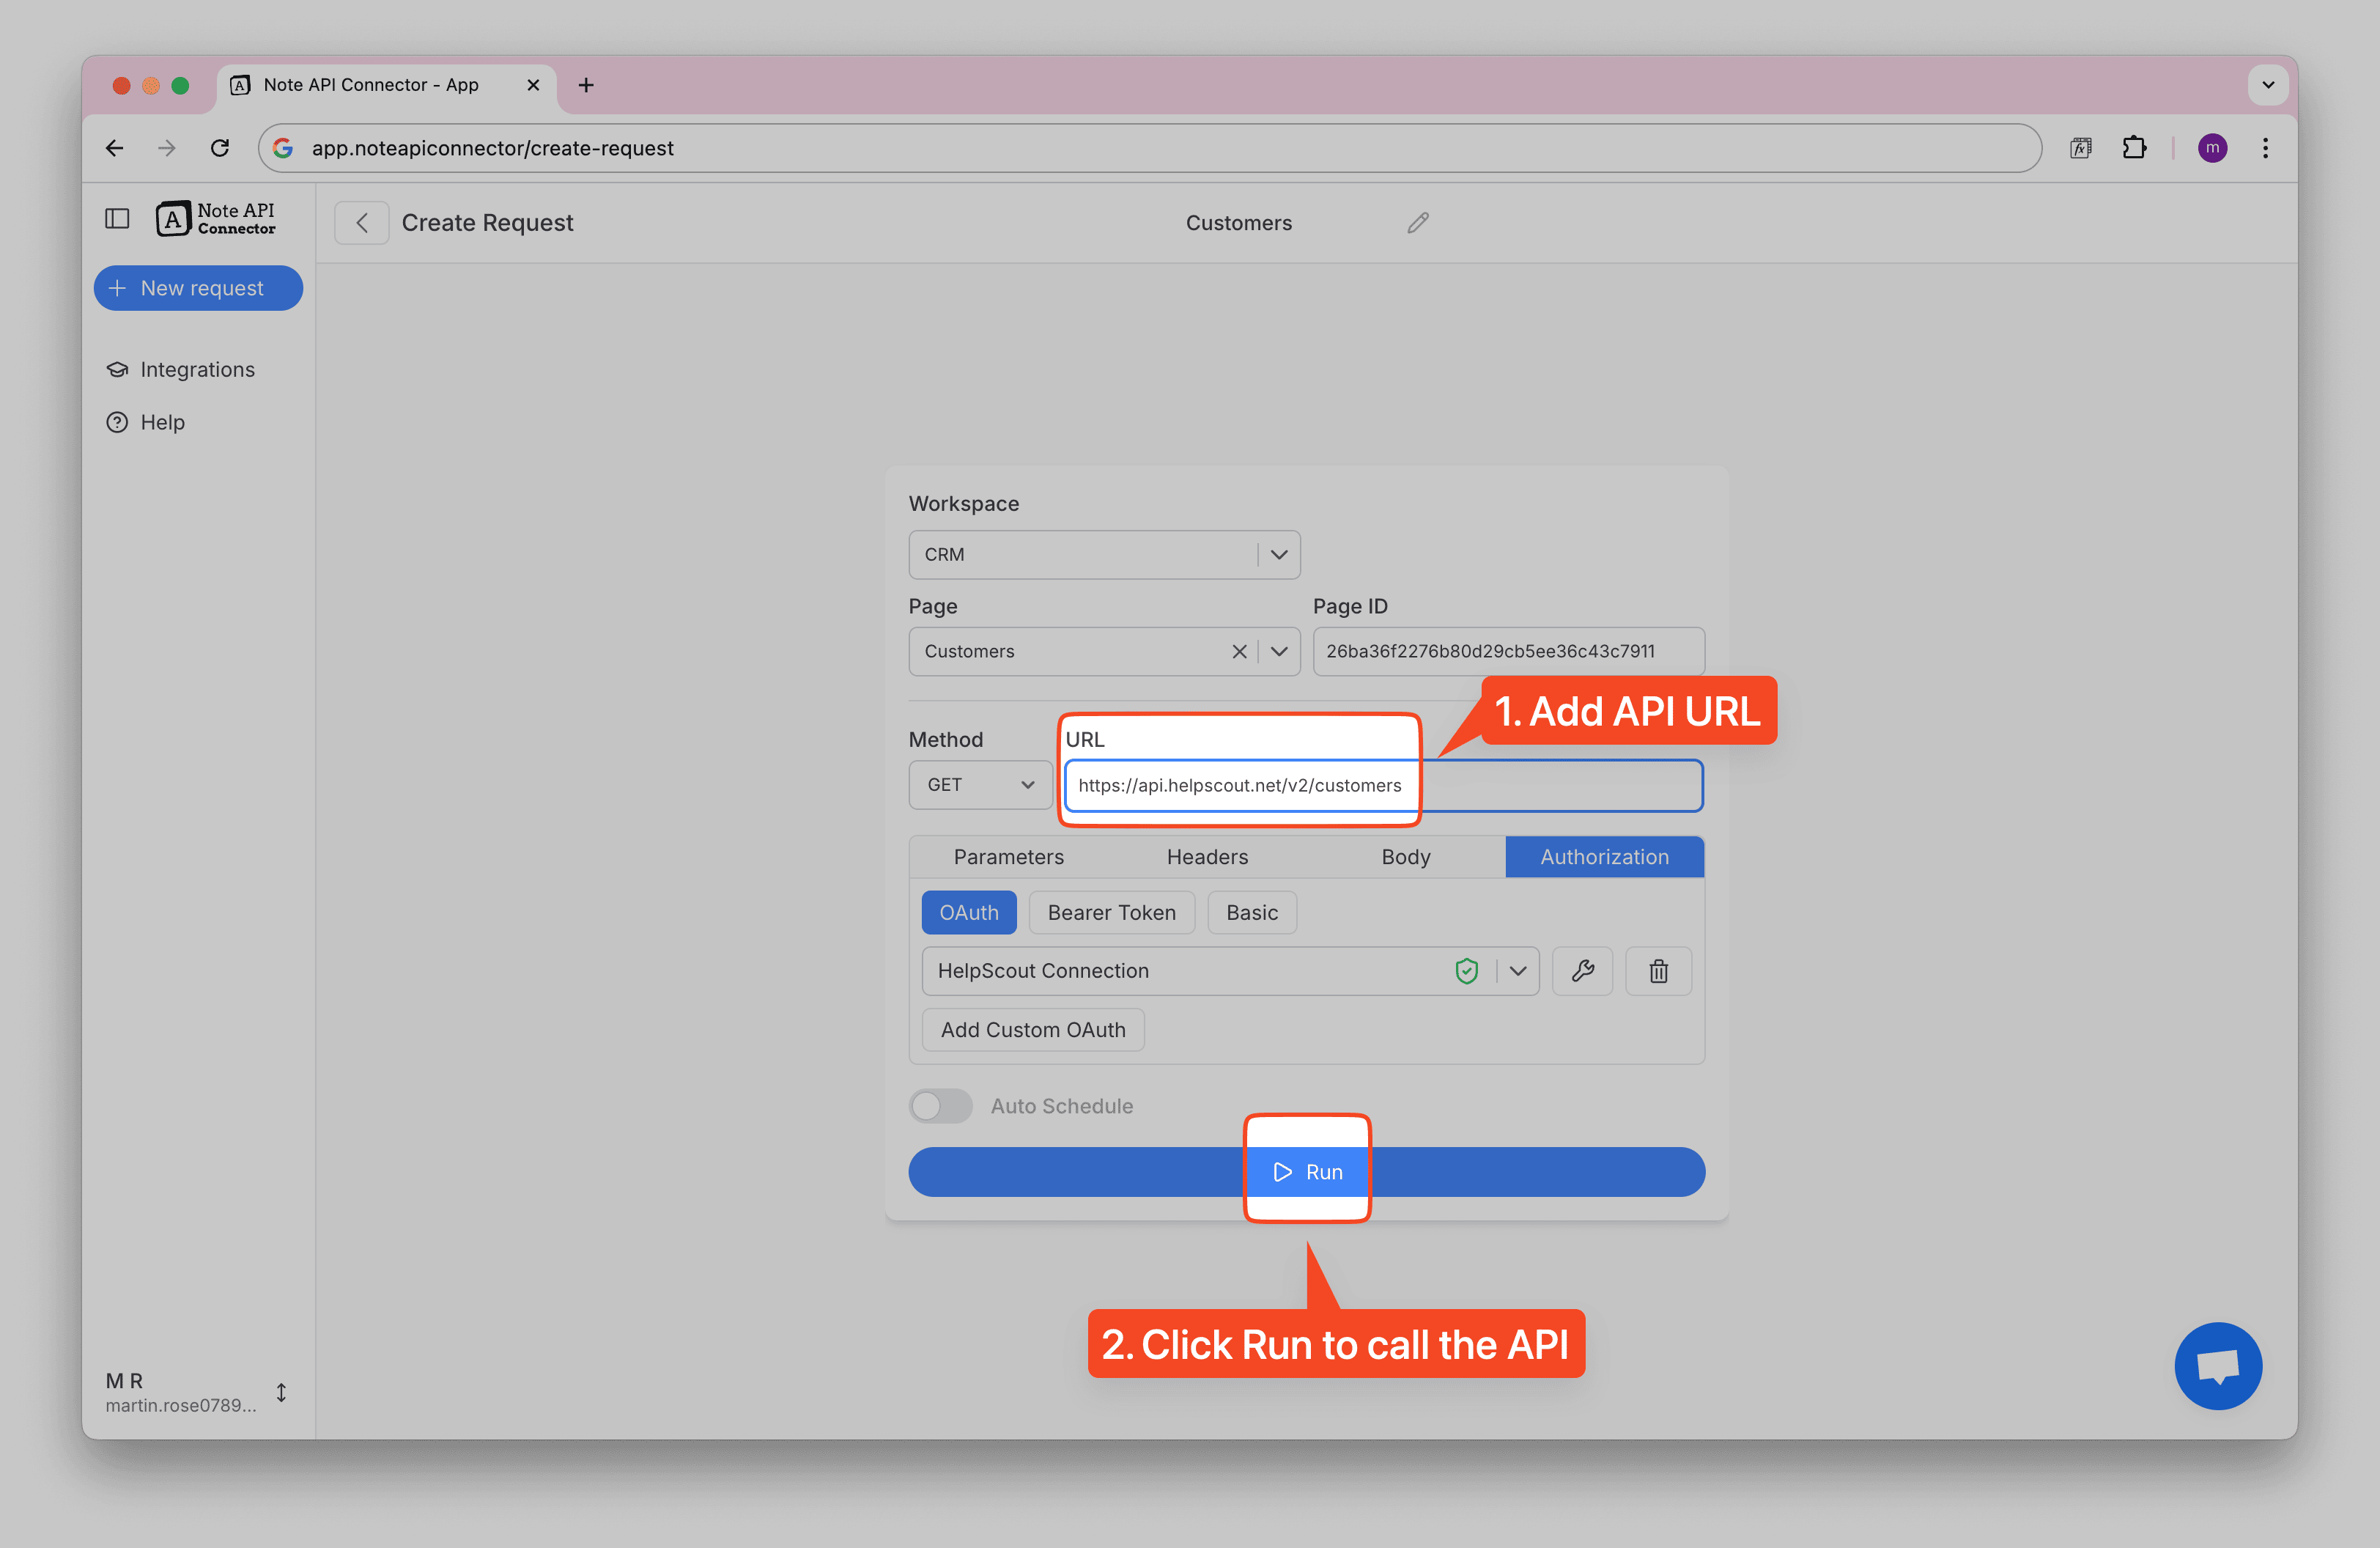
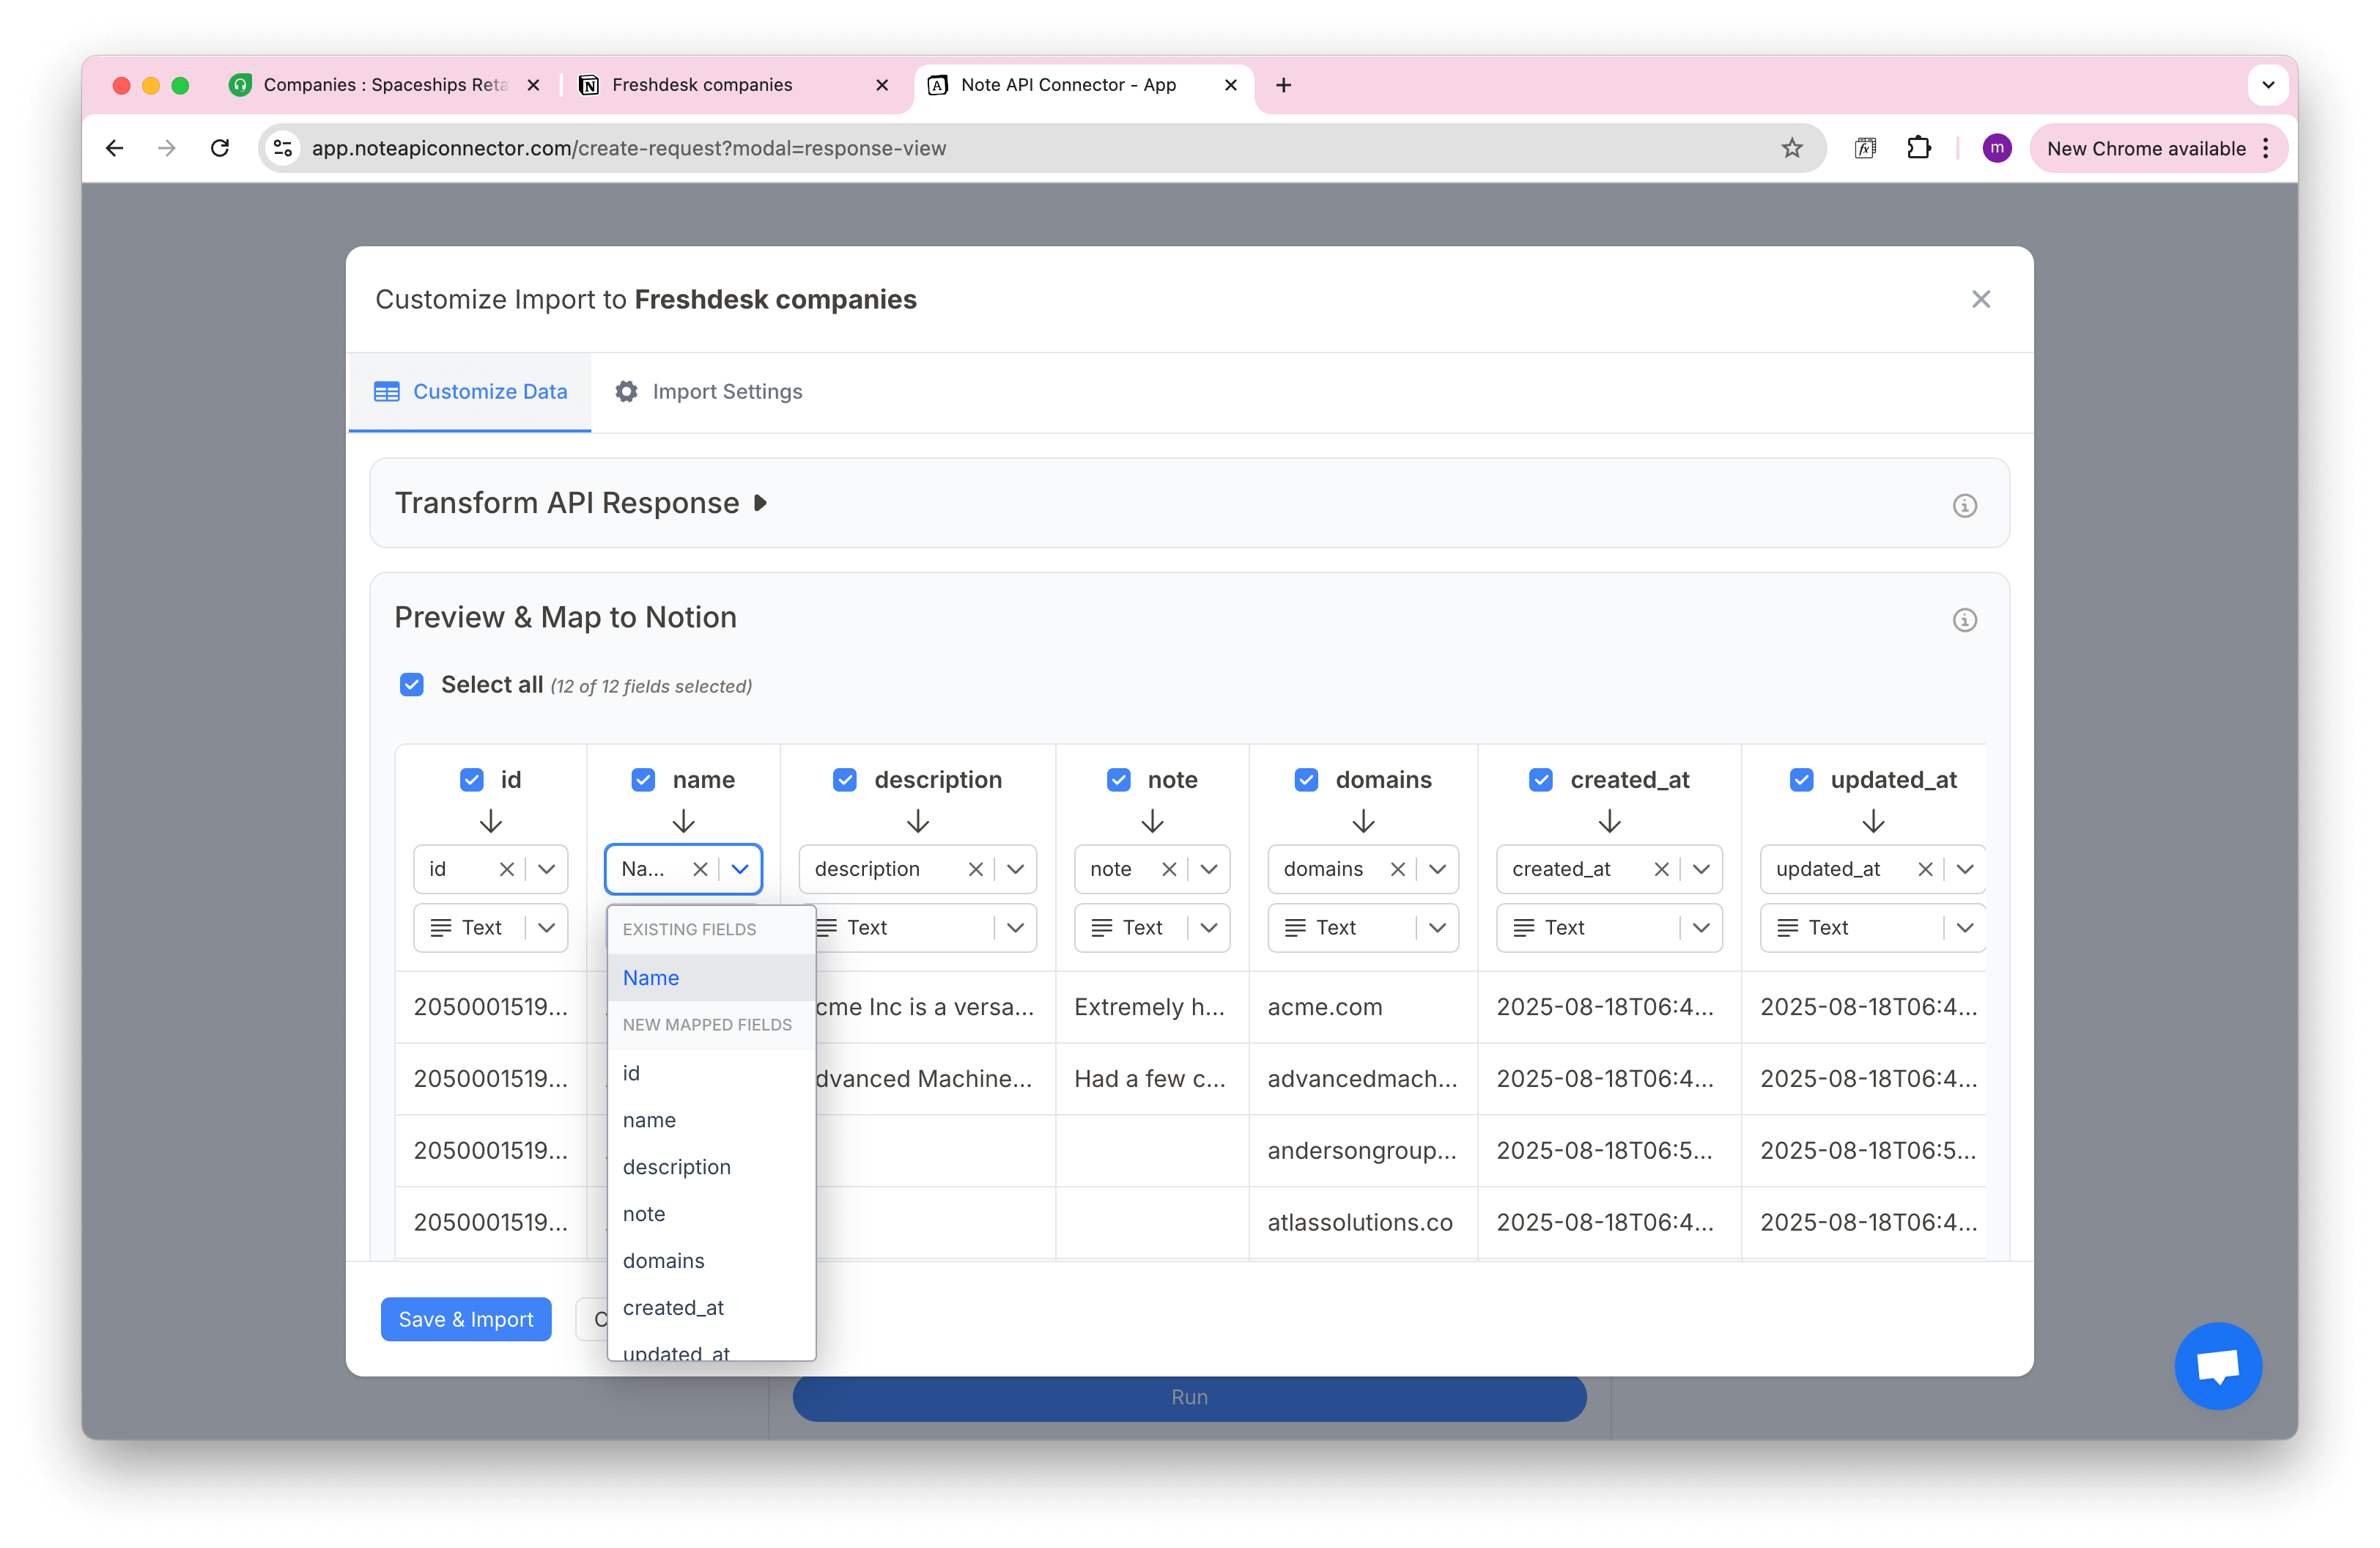
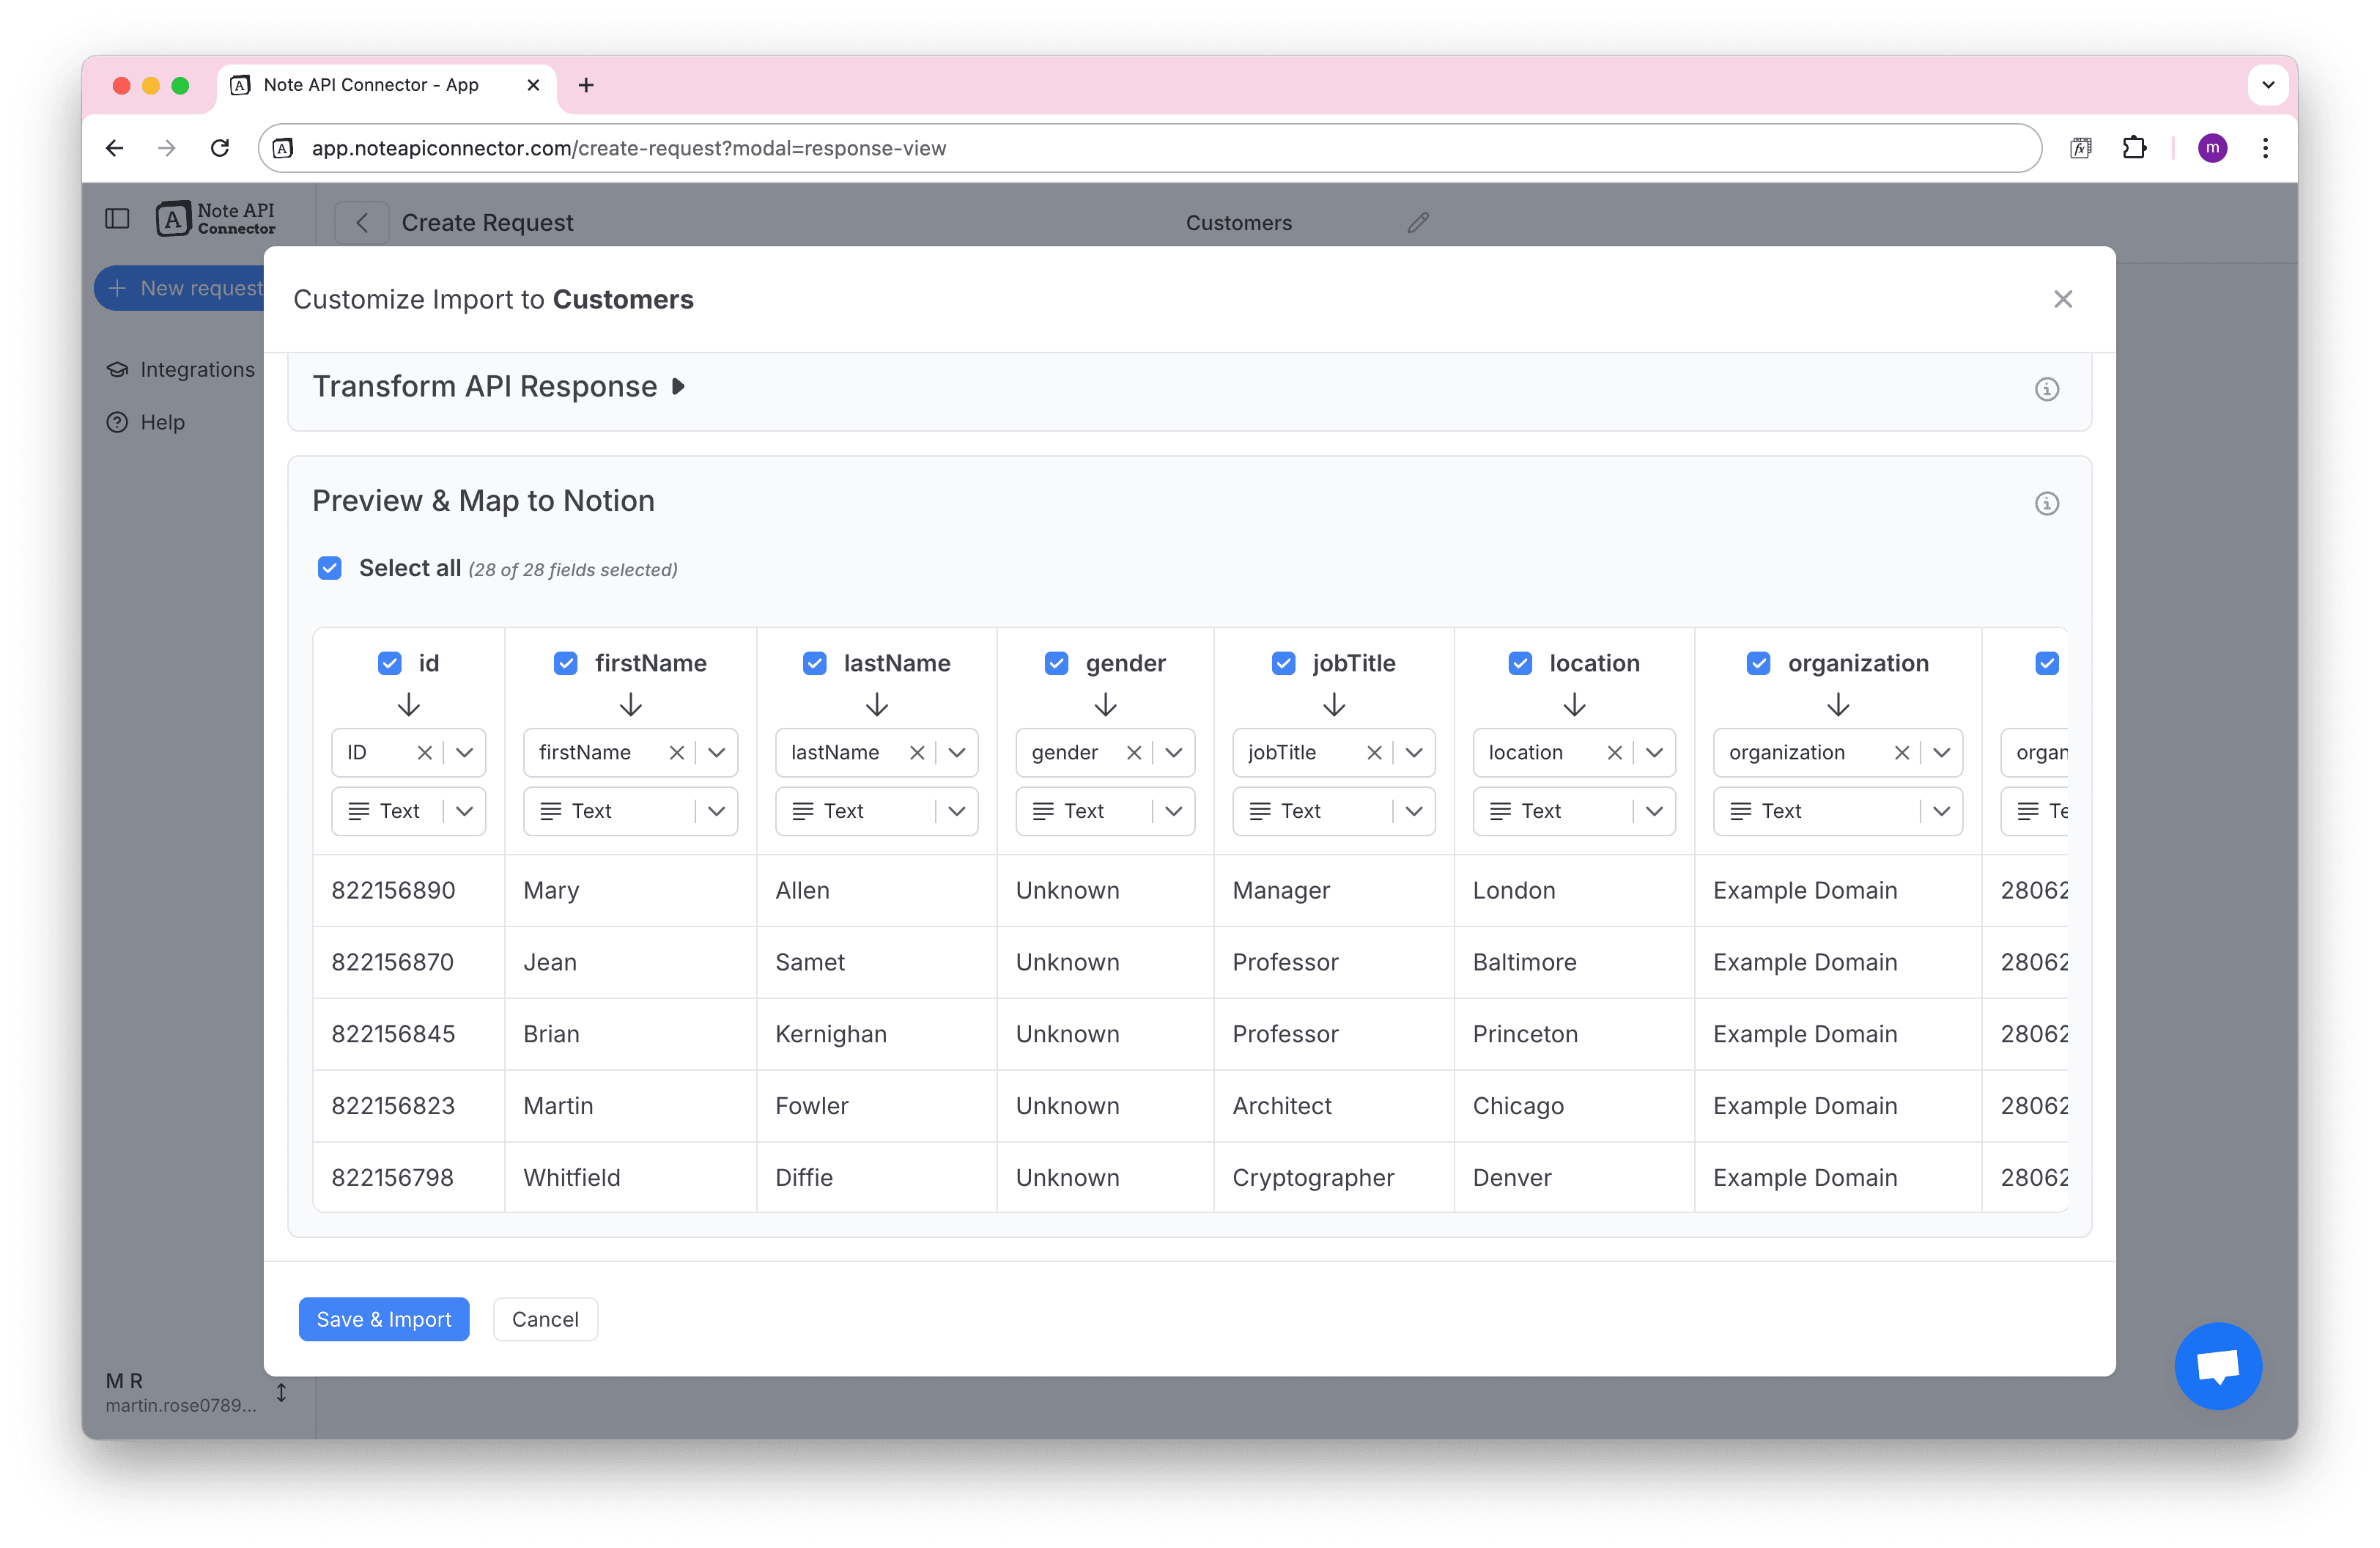
Click Run to fetch a preview. Review the fetched HelpScout customer data in the Response Field Mapping view.
Keep data in sync
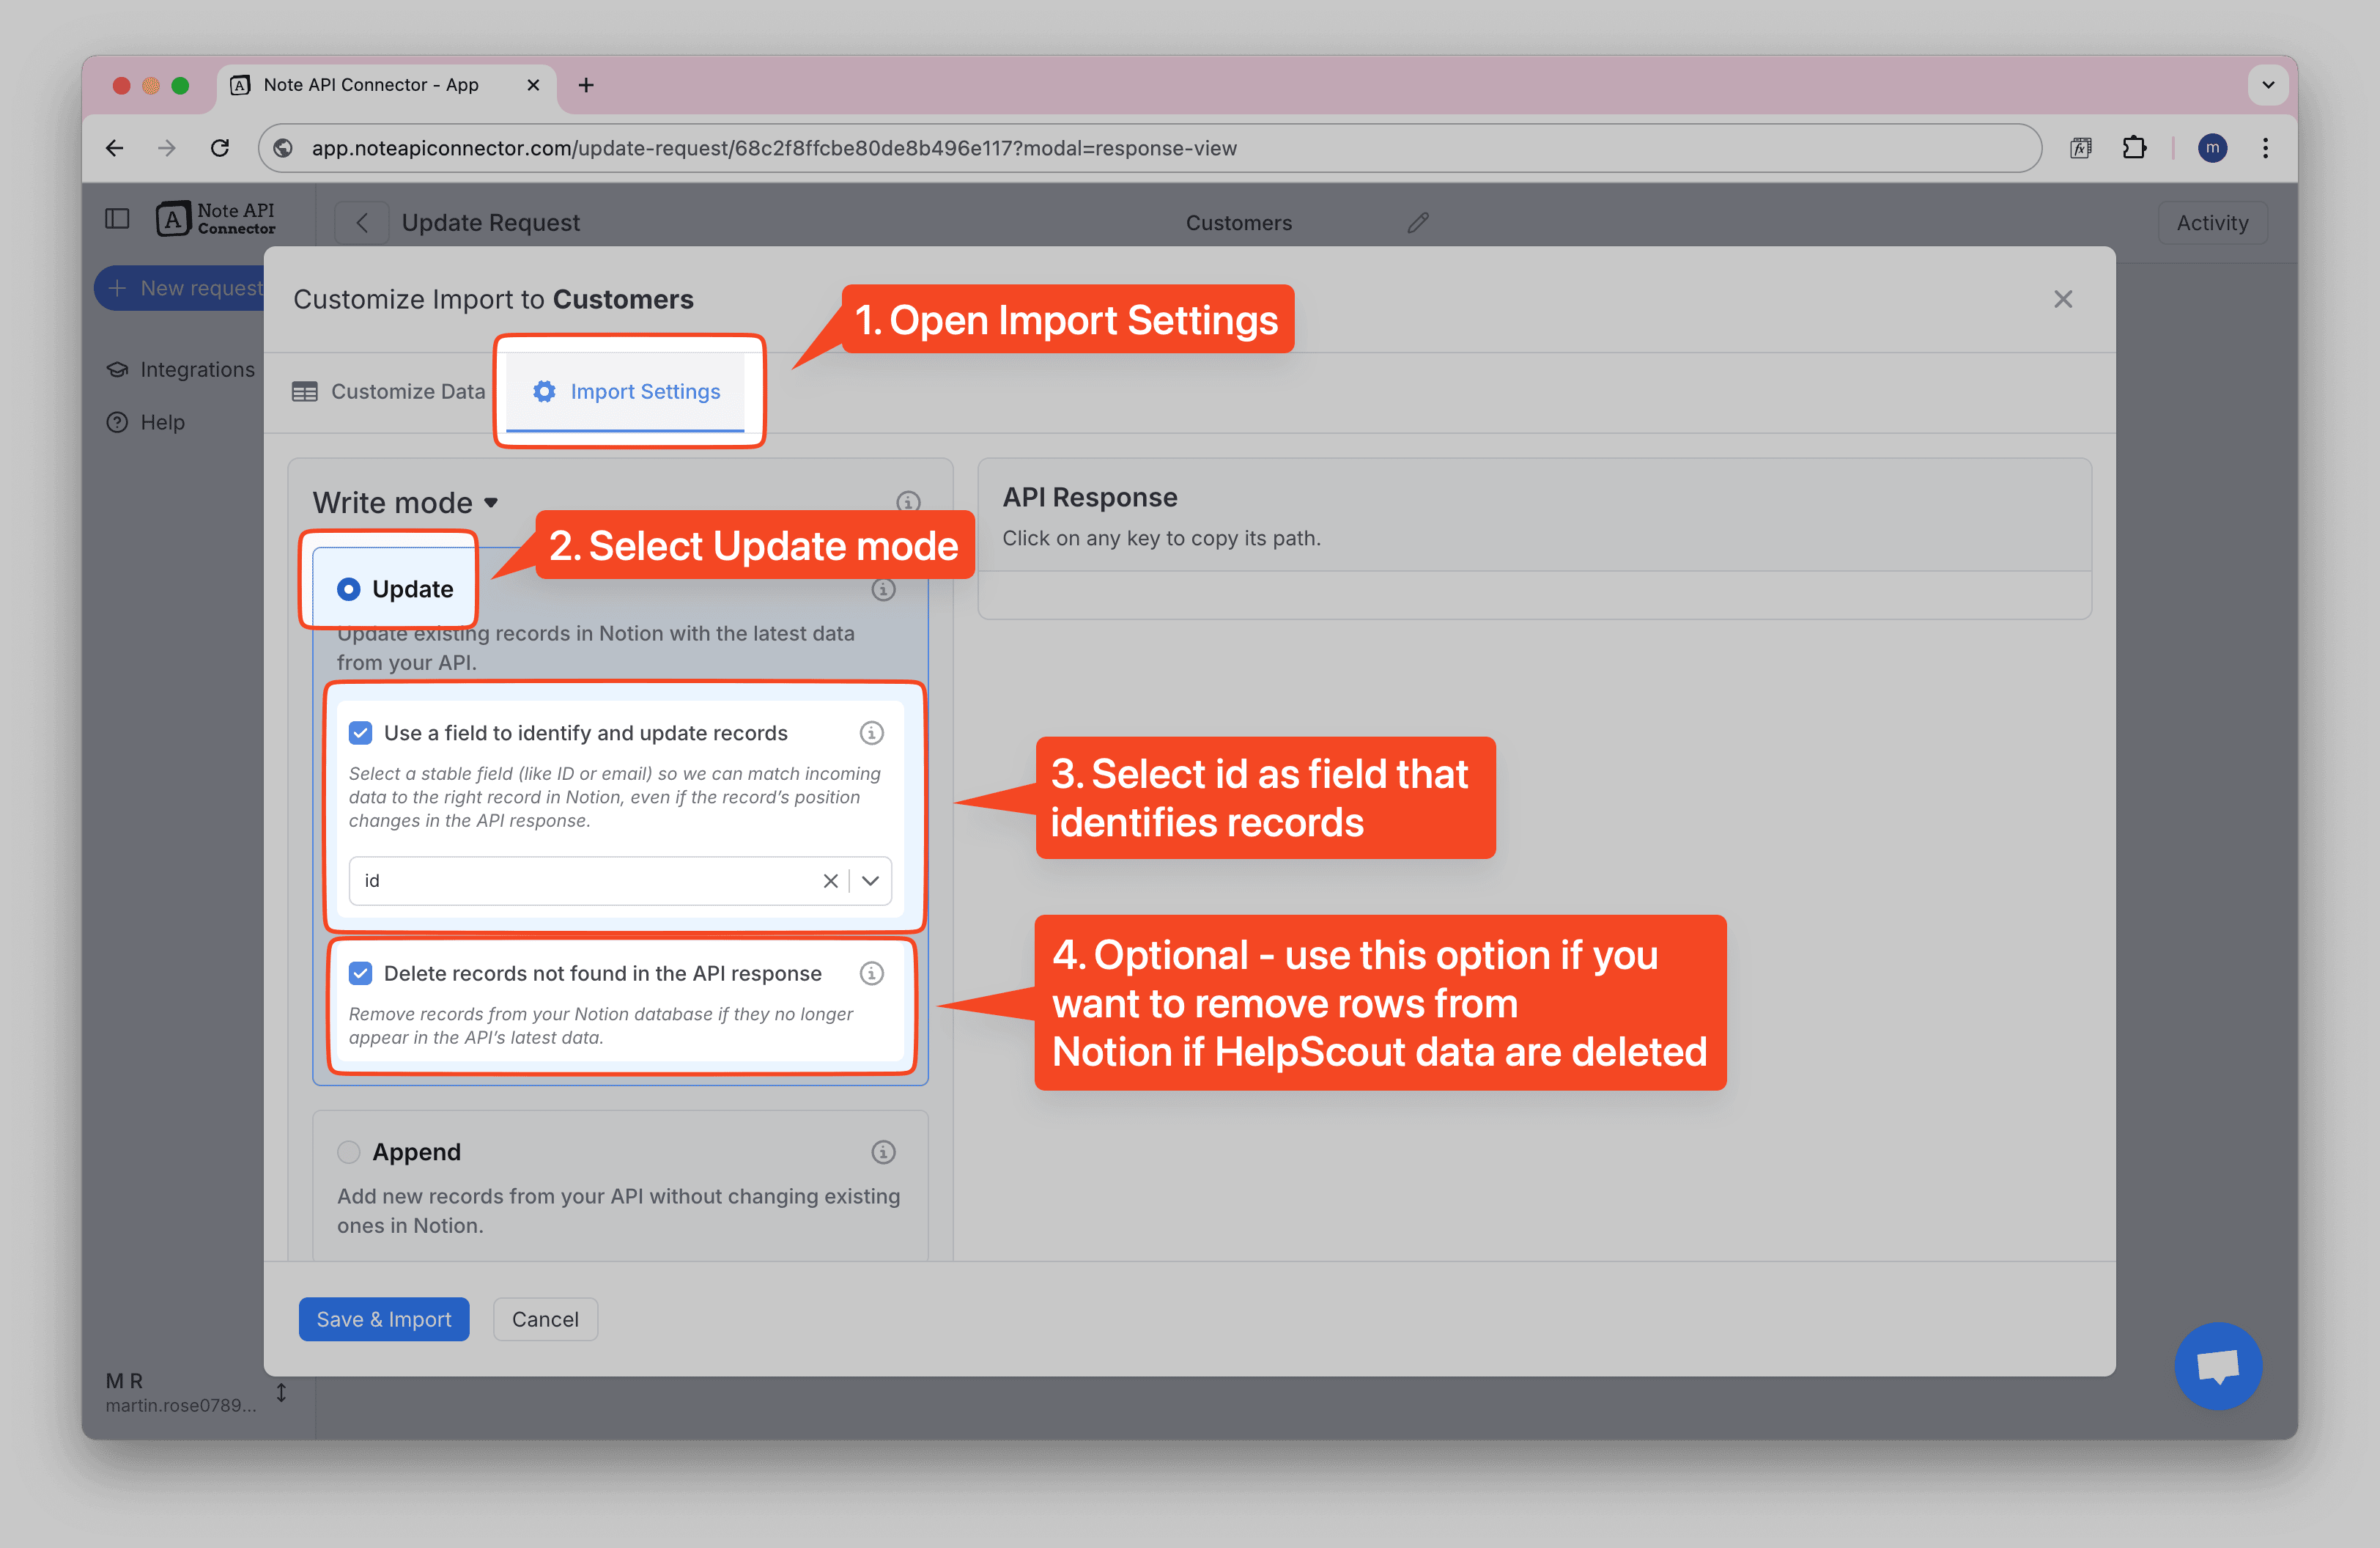
To keep your Notion data in sync, open
Import Settings and choose
Update mode.
Turn on both options. The first one creates new records and update existing ones and the other removes records
from Notion in case it's deleted from HelpScout. Set id as the
unique identifier
so future imports update the right customers.
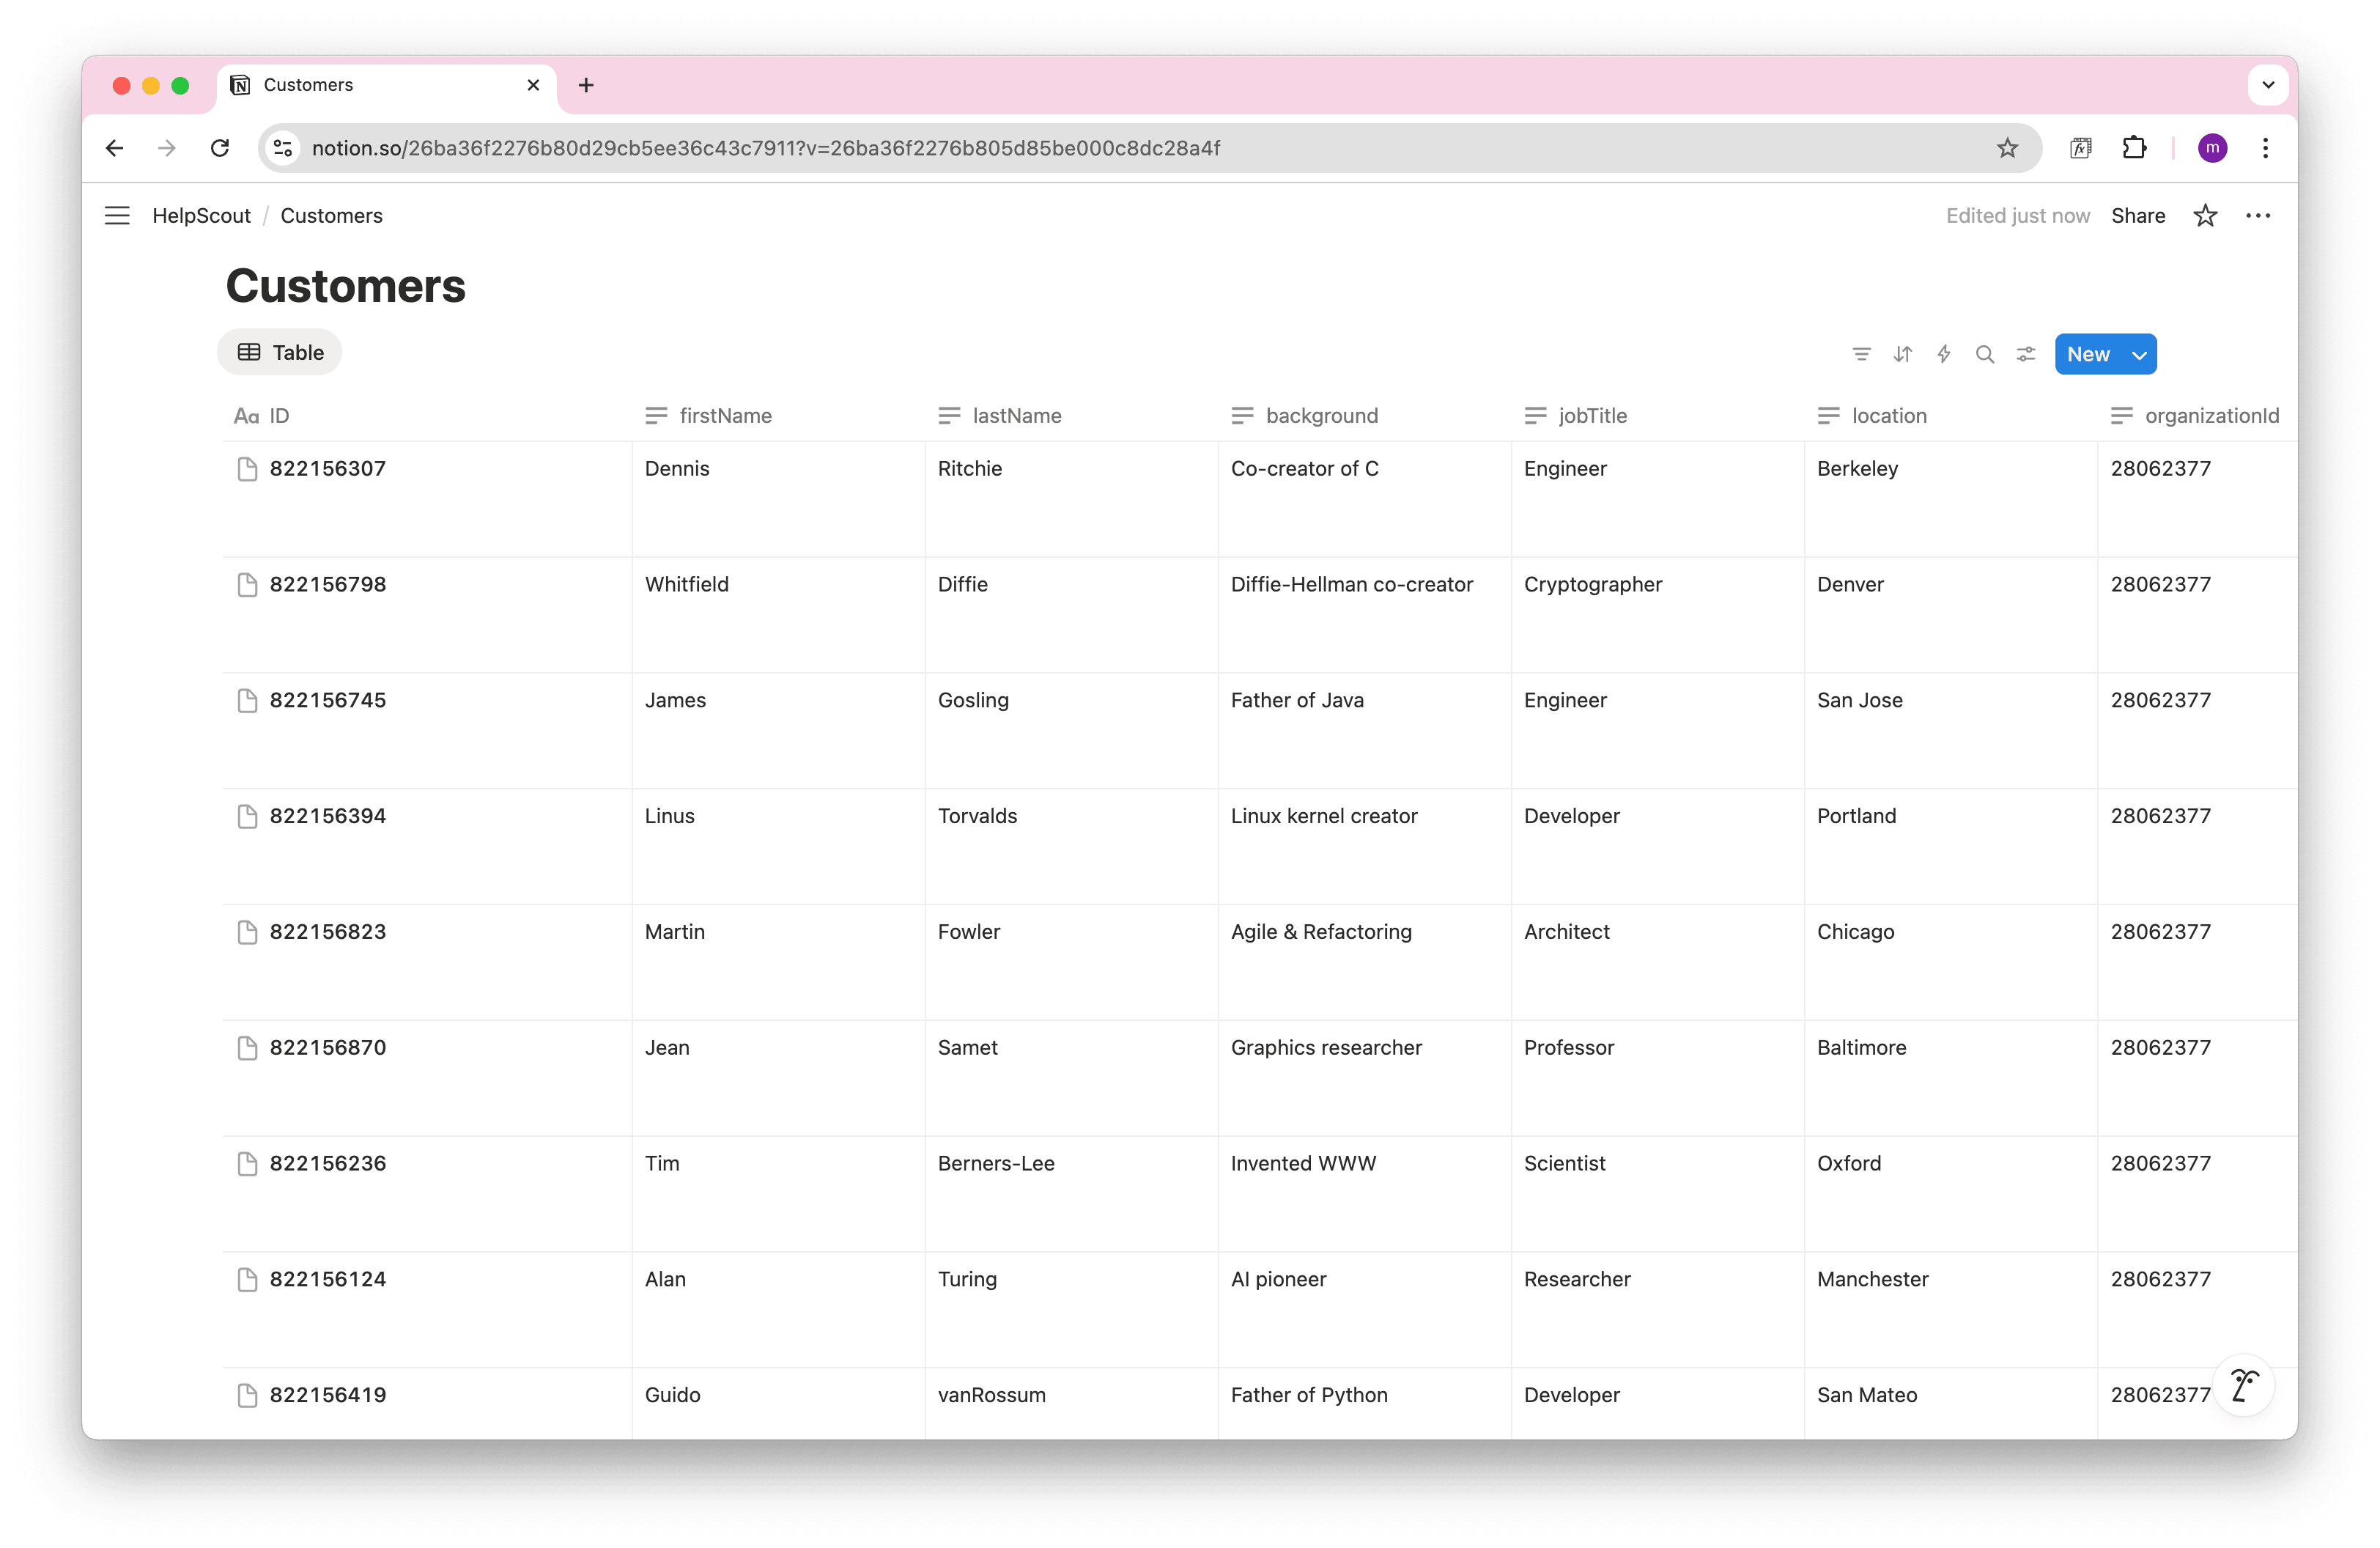
Finally, click Save & Import to store the customer data in your Notion database. ✅ Done. You’ve successfully imported HelpScout data to Notion and set it to stay in sync.
Step 3: Import HelpScout Conversations into Notion
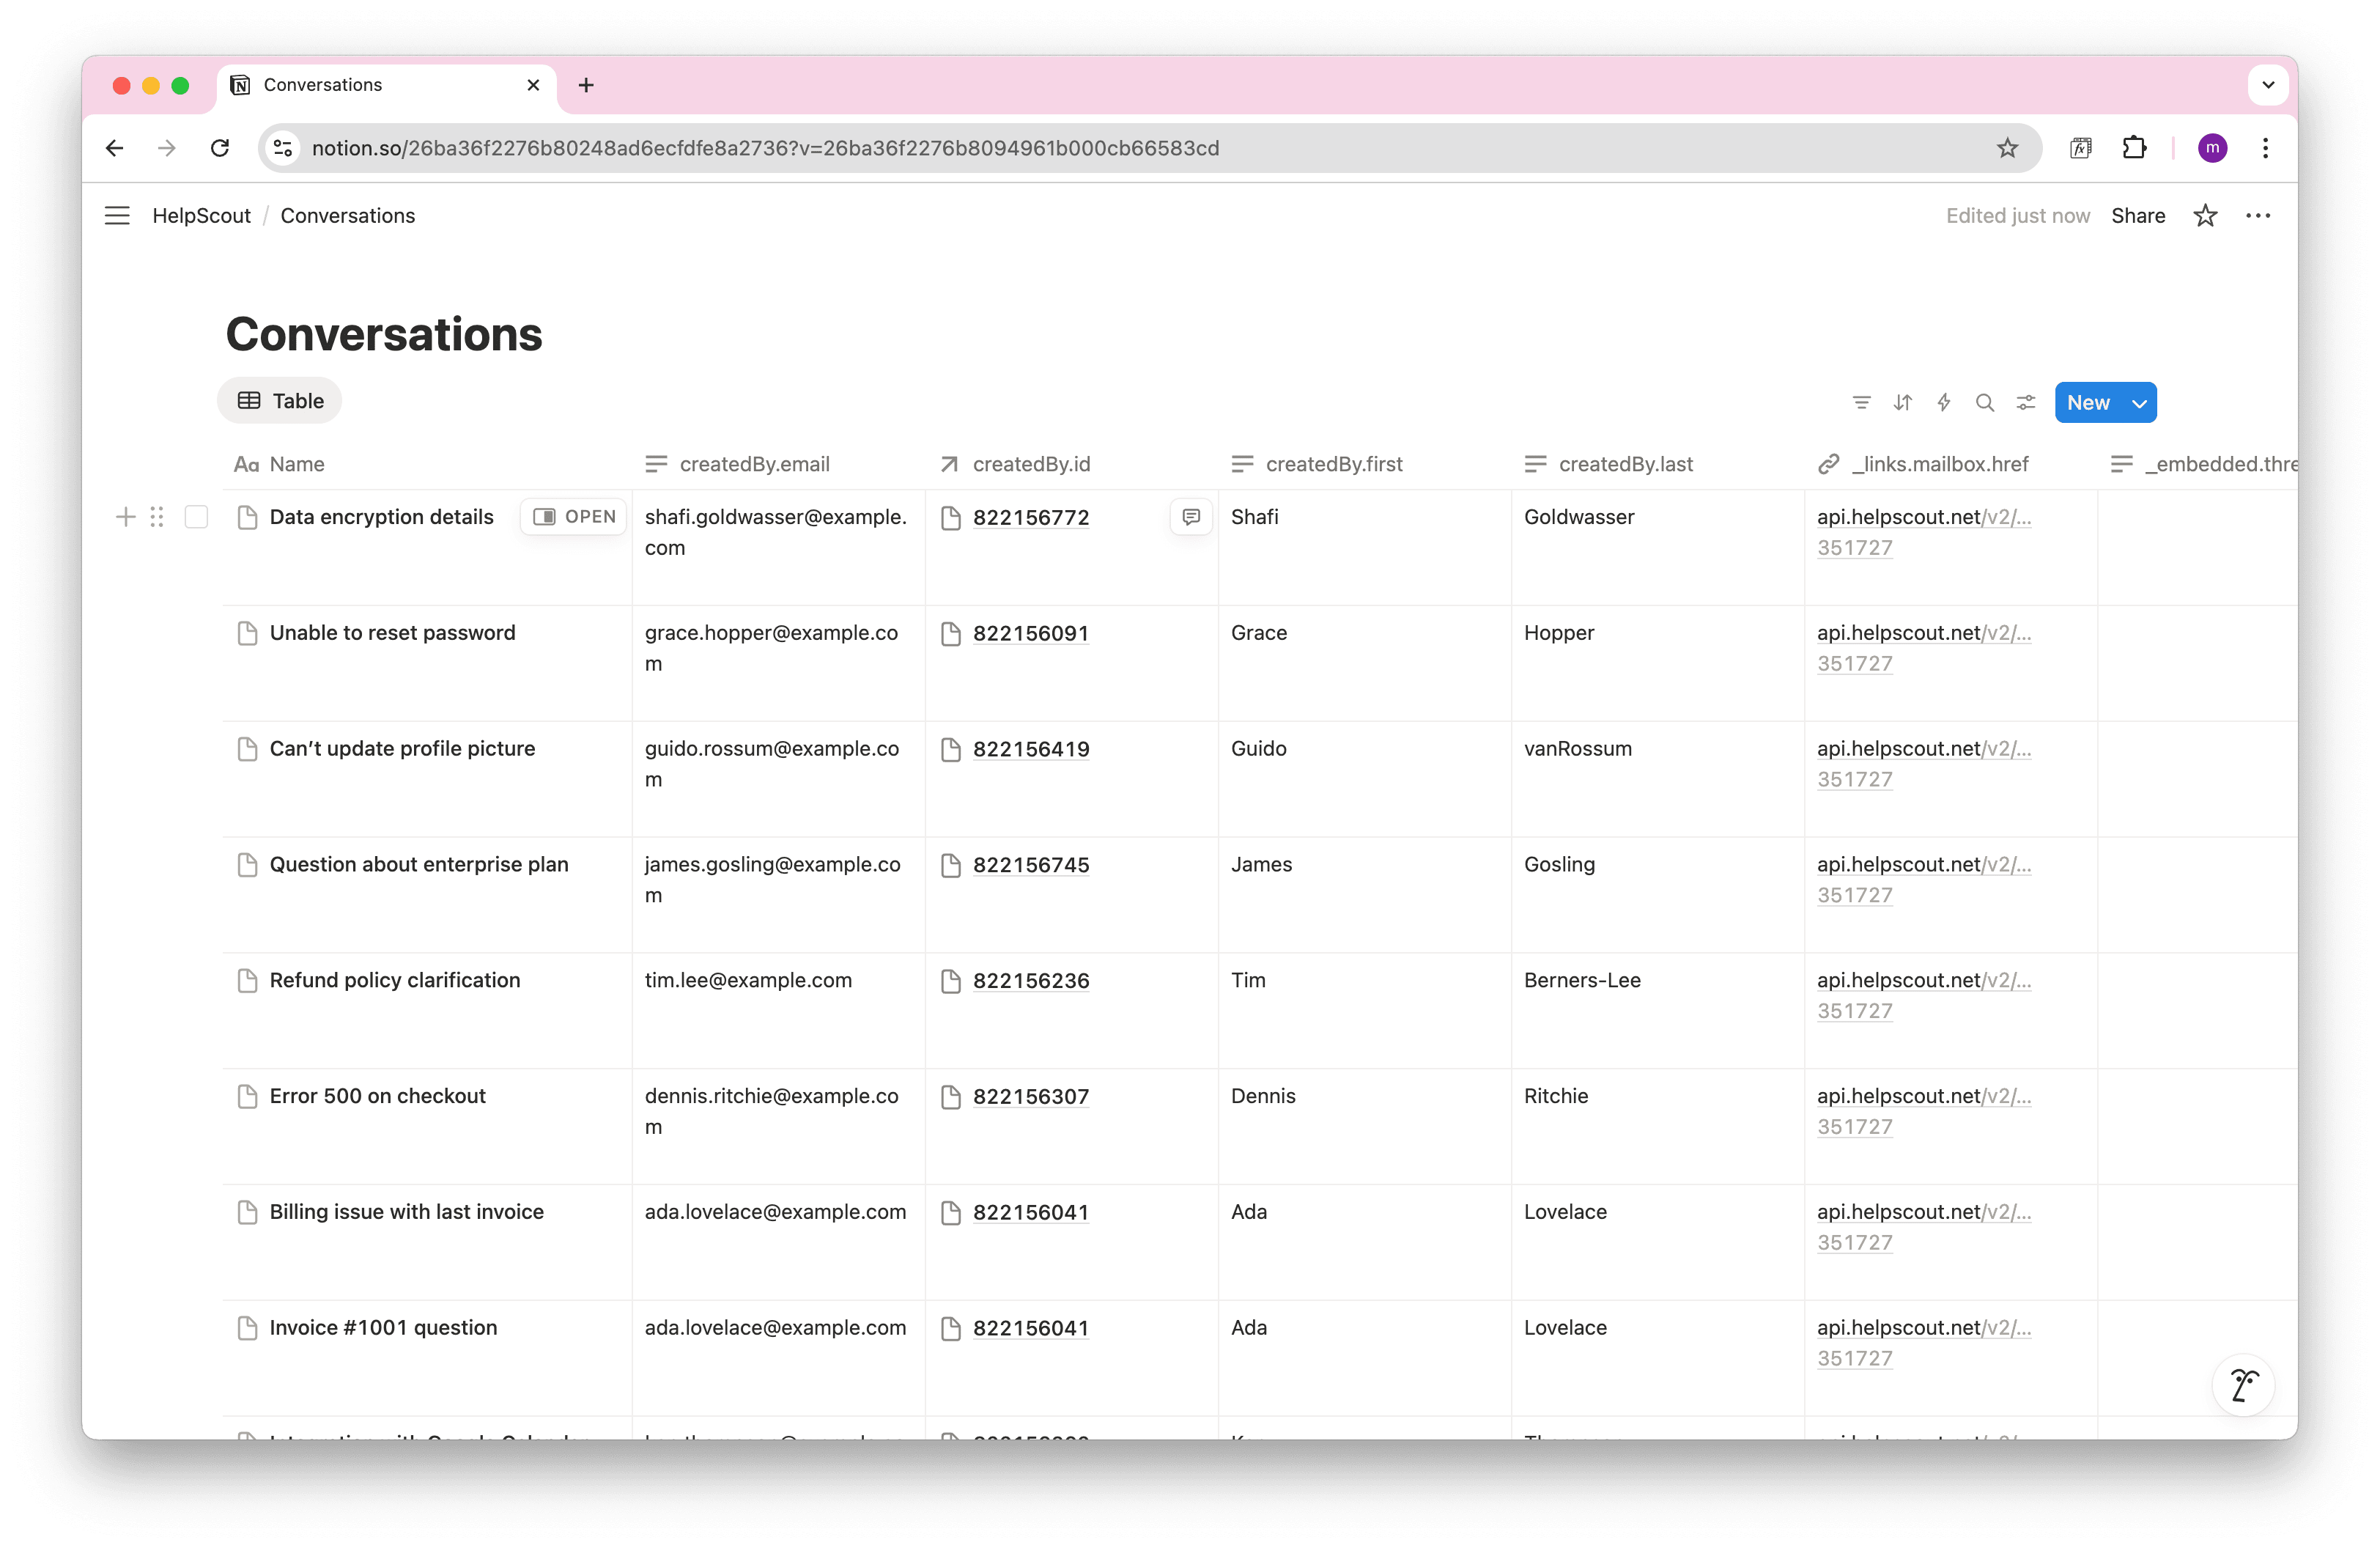
Next, let’s import HelpScout conversations into Notion. This gives you full visibility of every customer interaction right inside your Notion HelpScout integration.
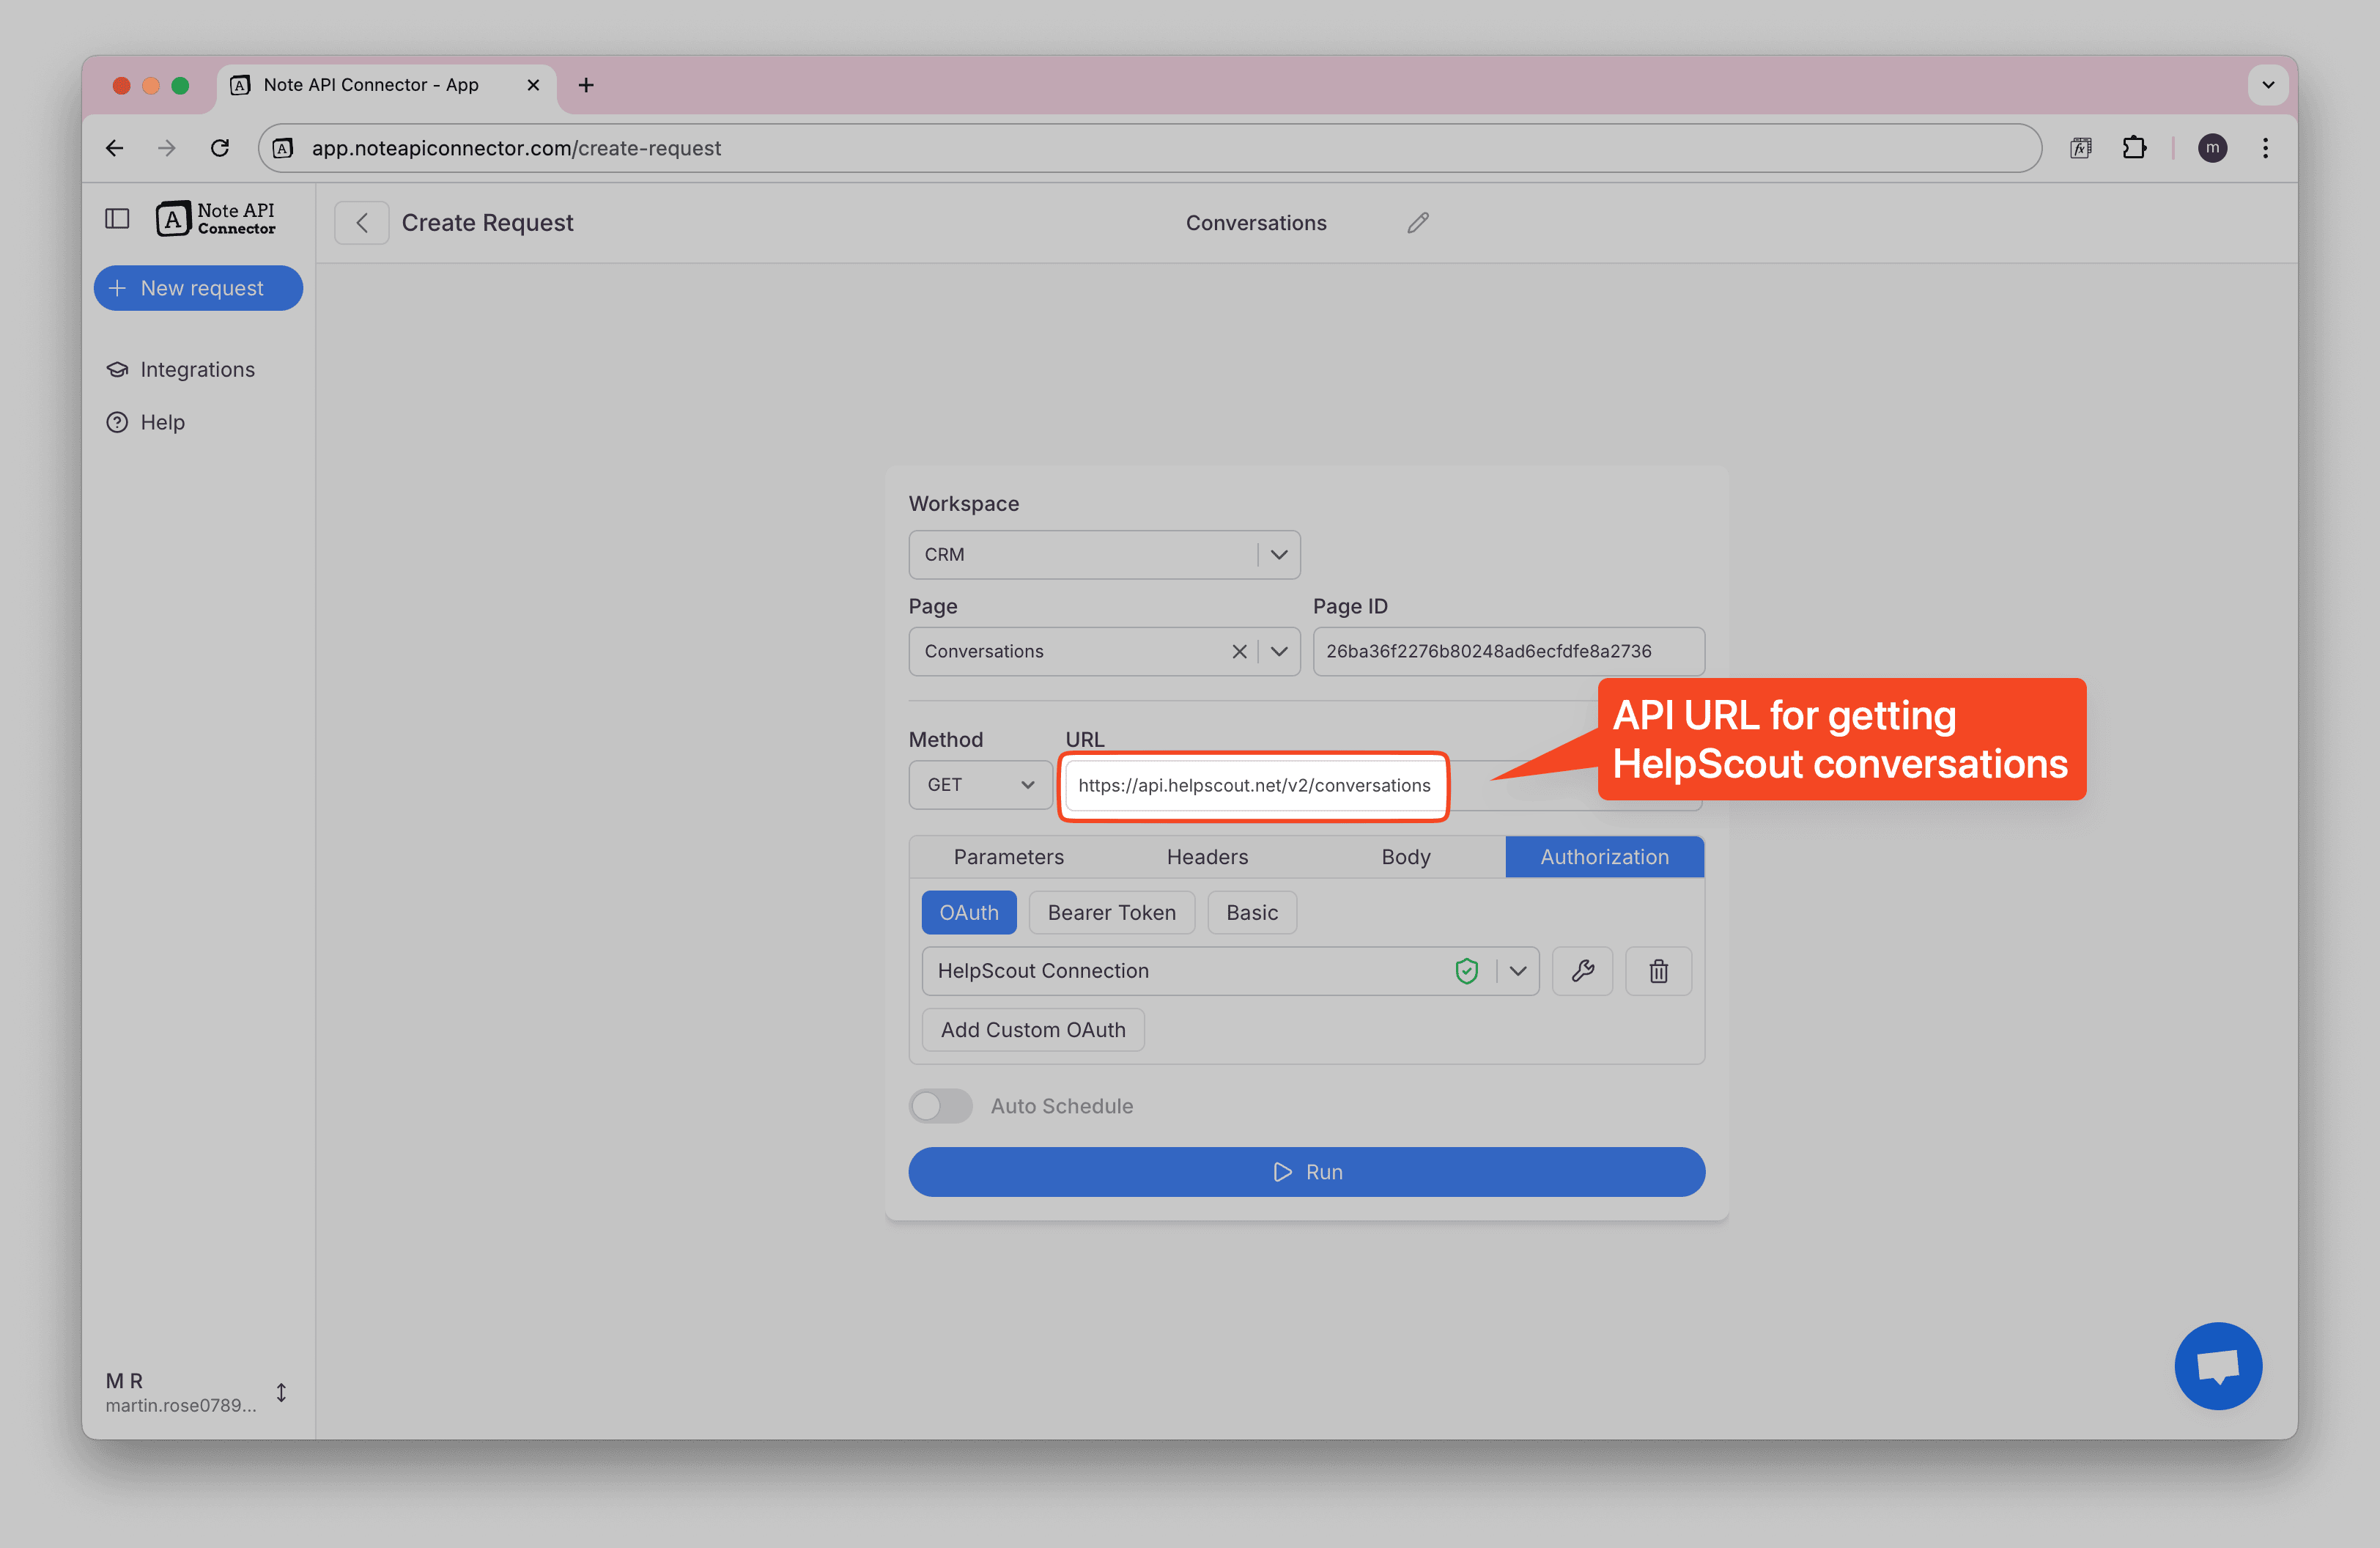
Use the Conversations API endpoint:
https://api.helpscout.net/v2/conversations
- Create a new request in Note API Connector and name it
Conversations. - Create a new Notion database just for conversations
- Paste the Conversations API URL into the request and select your HelpScout OAuth connection.
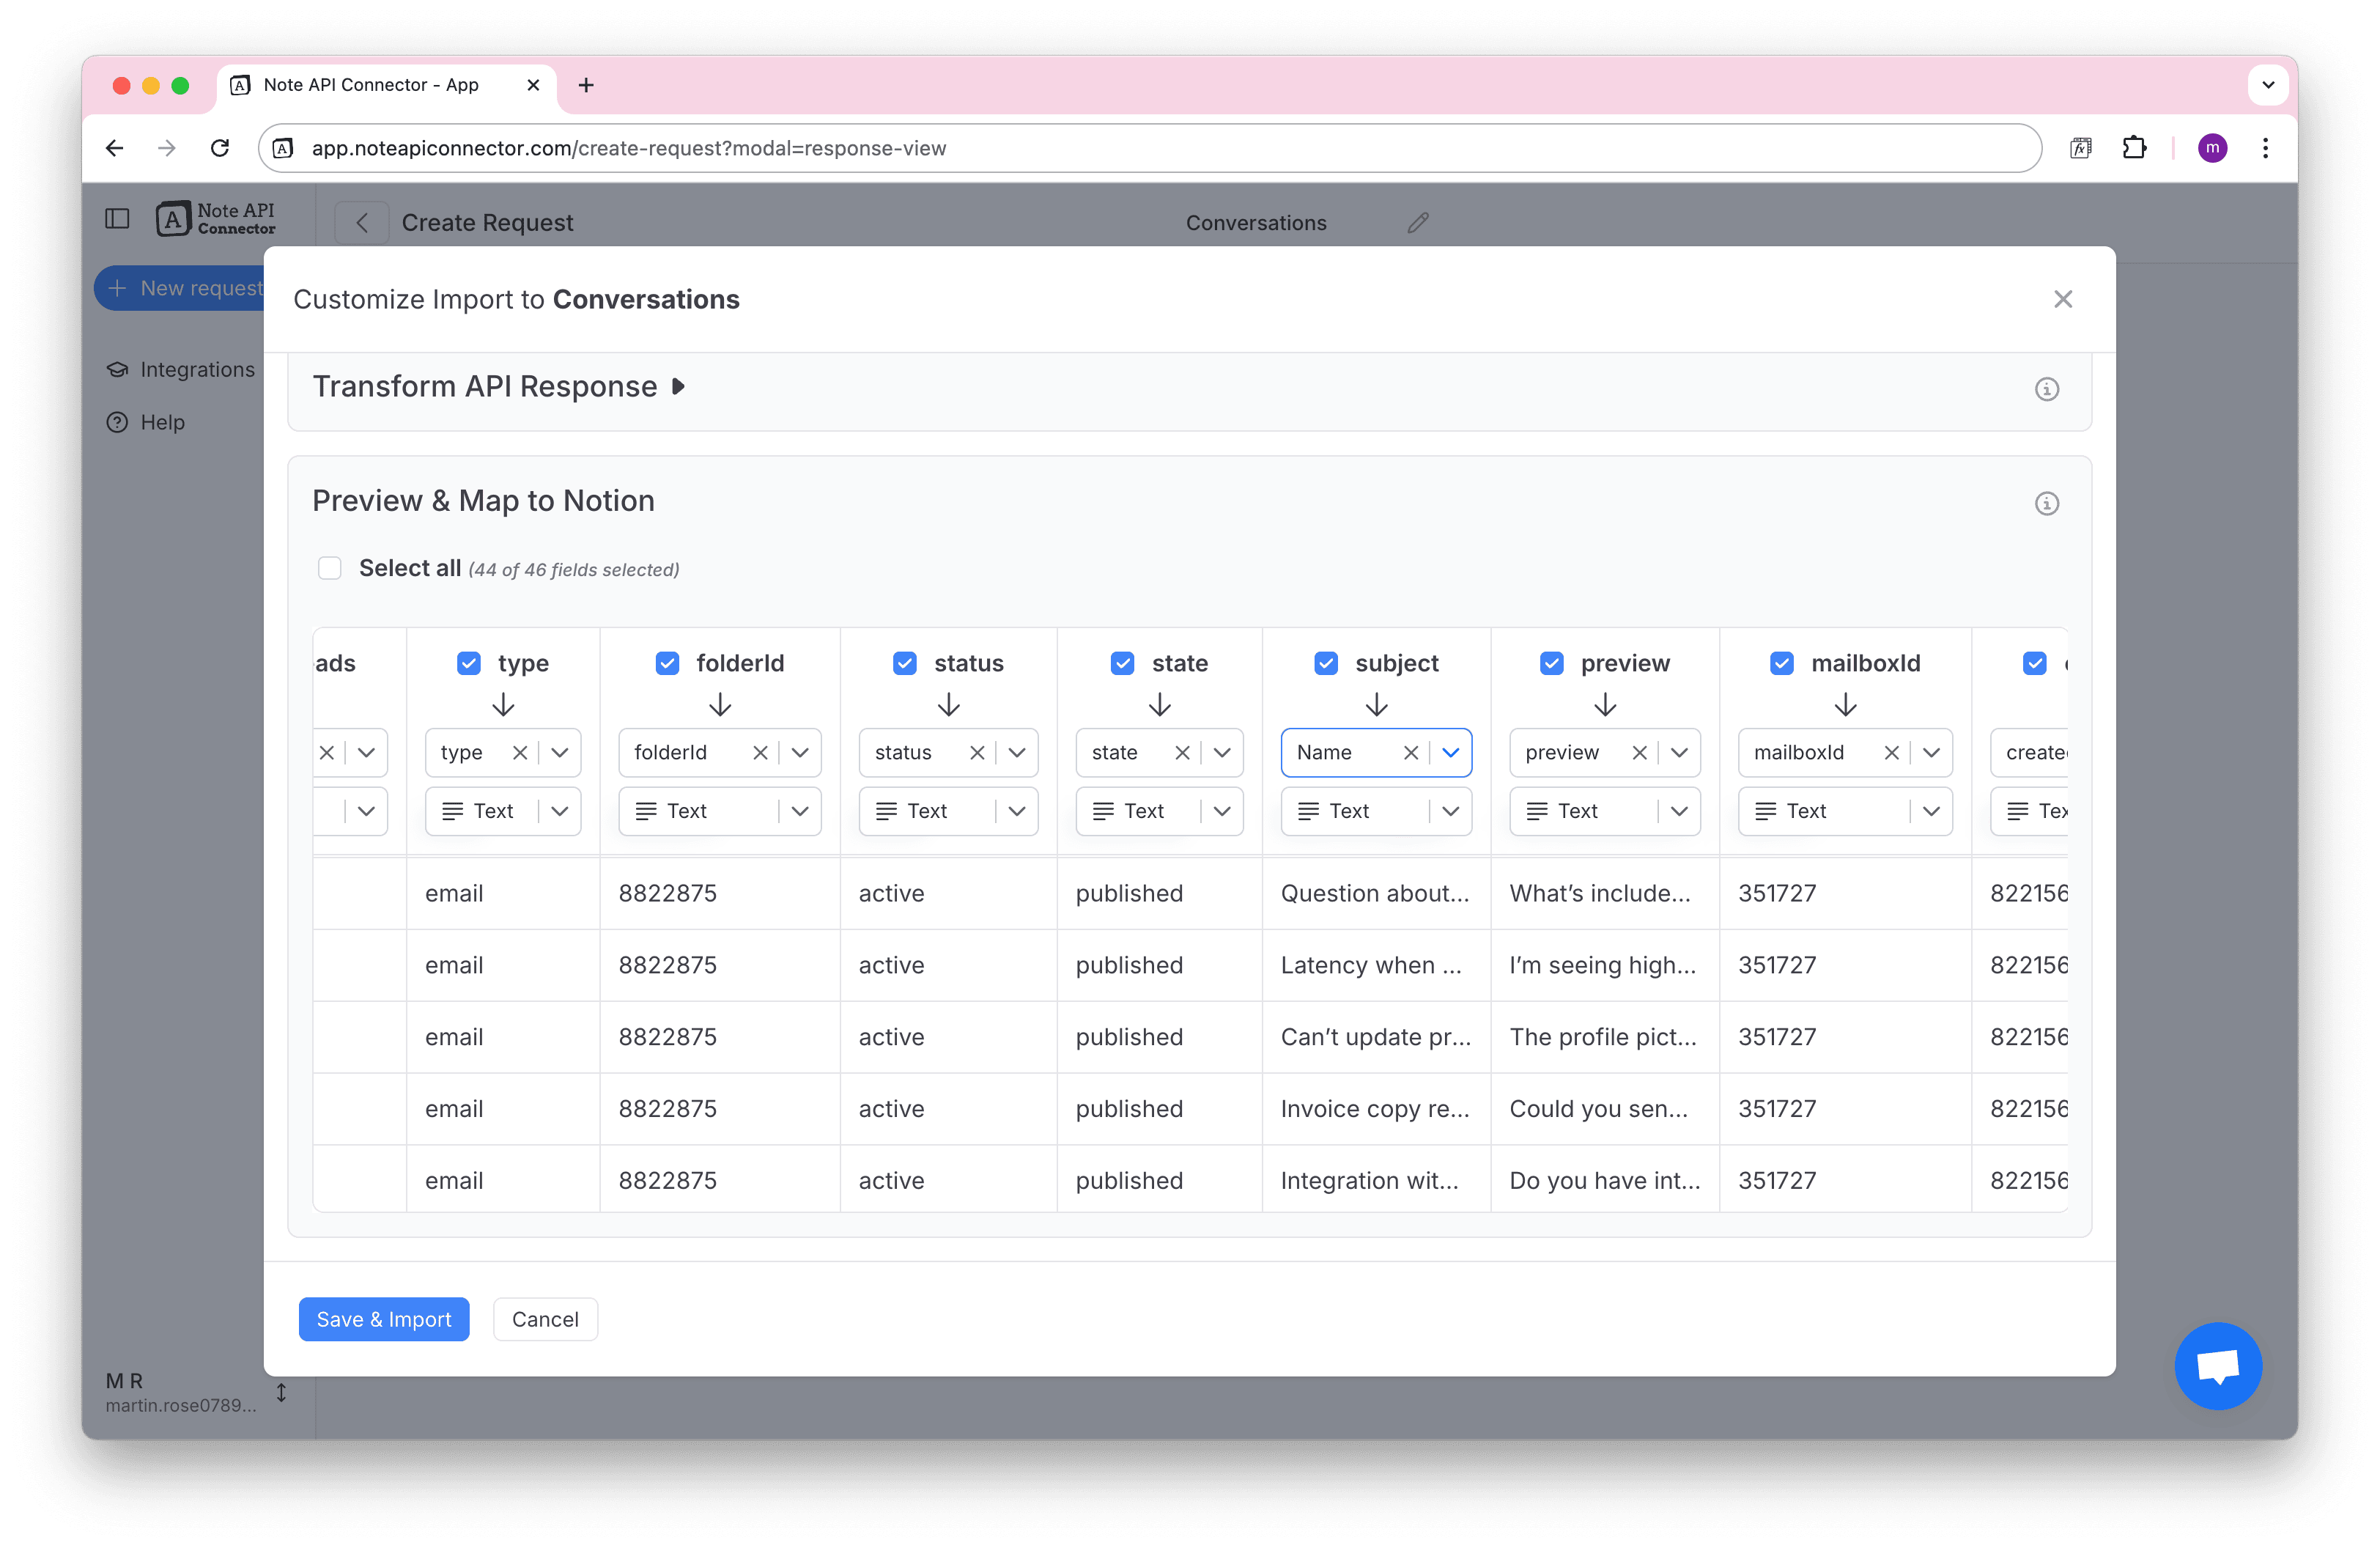
- Click Run to fetch a preview, then configure your field mapping so conversations display clearly in Notion.
Review the HelpScout conversation data in the Response Field Mapping view.
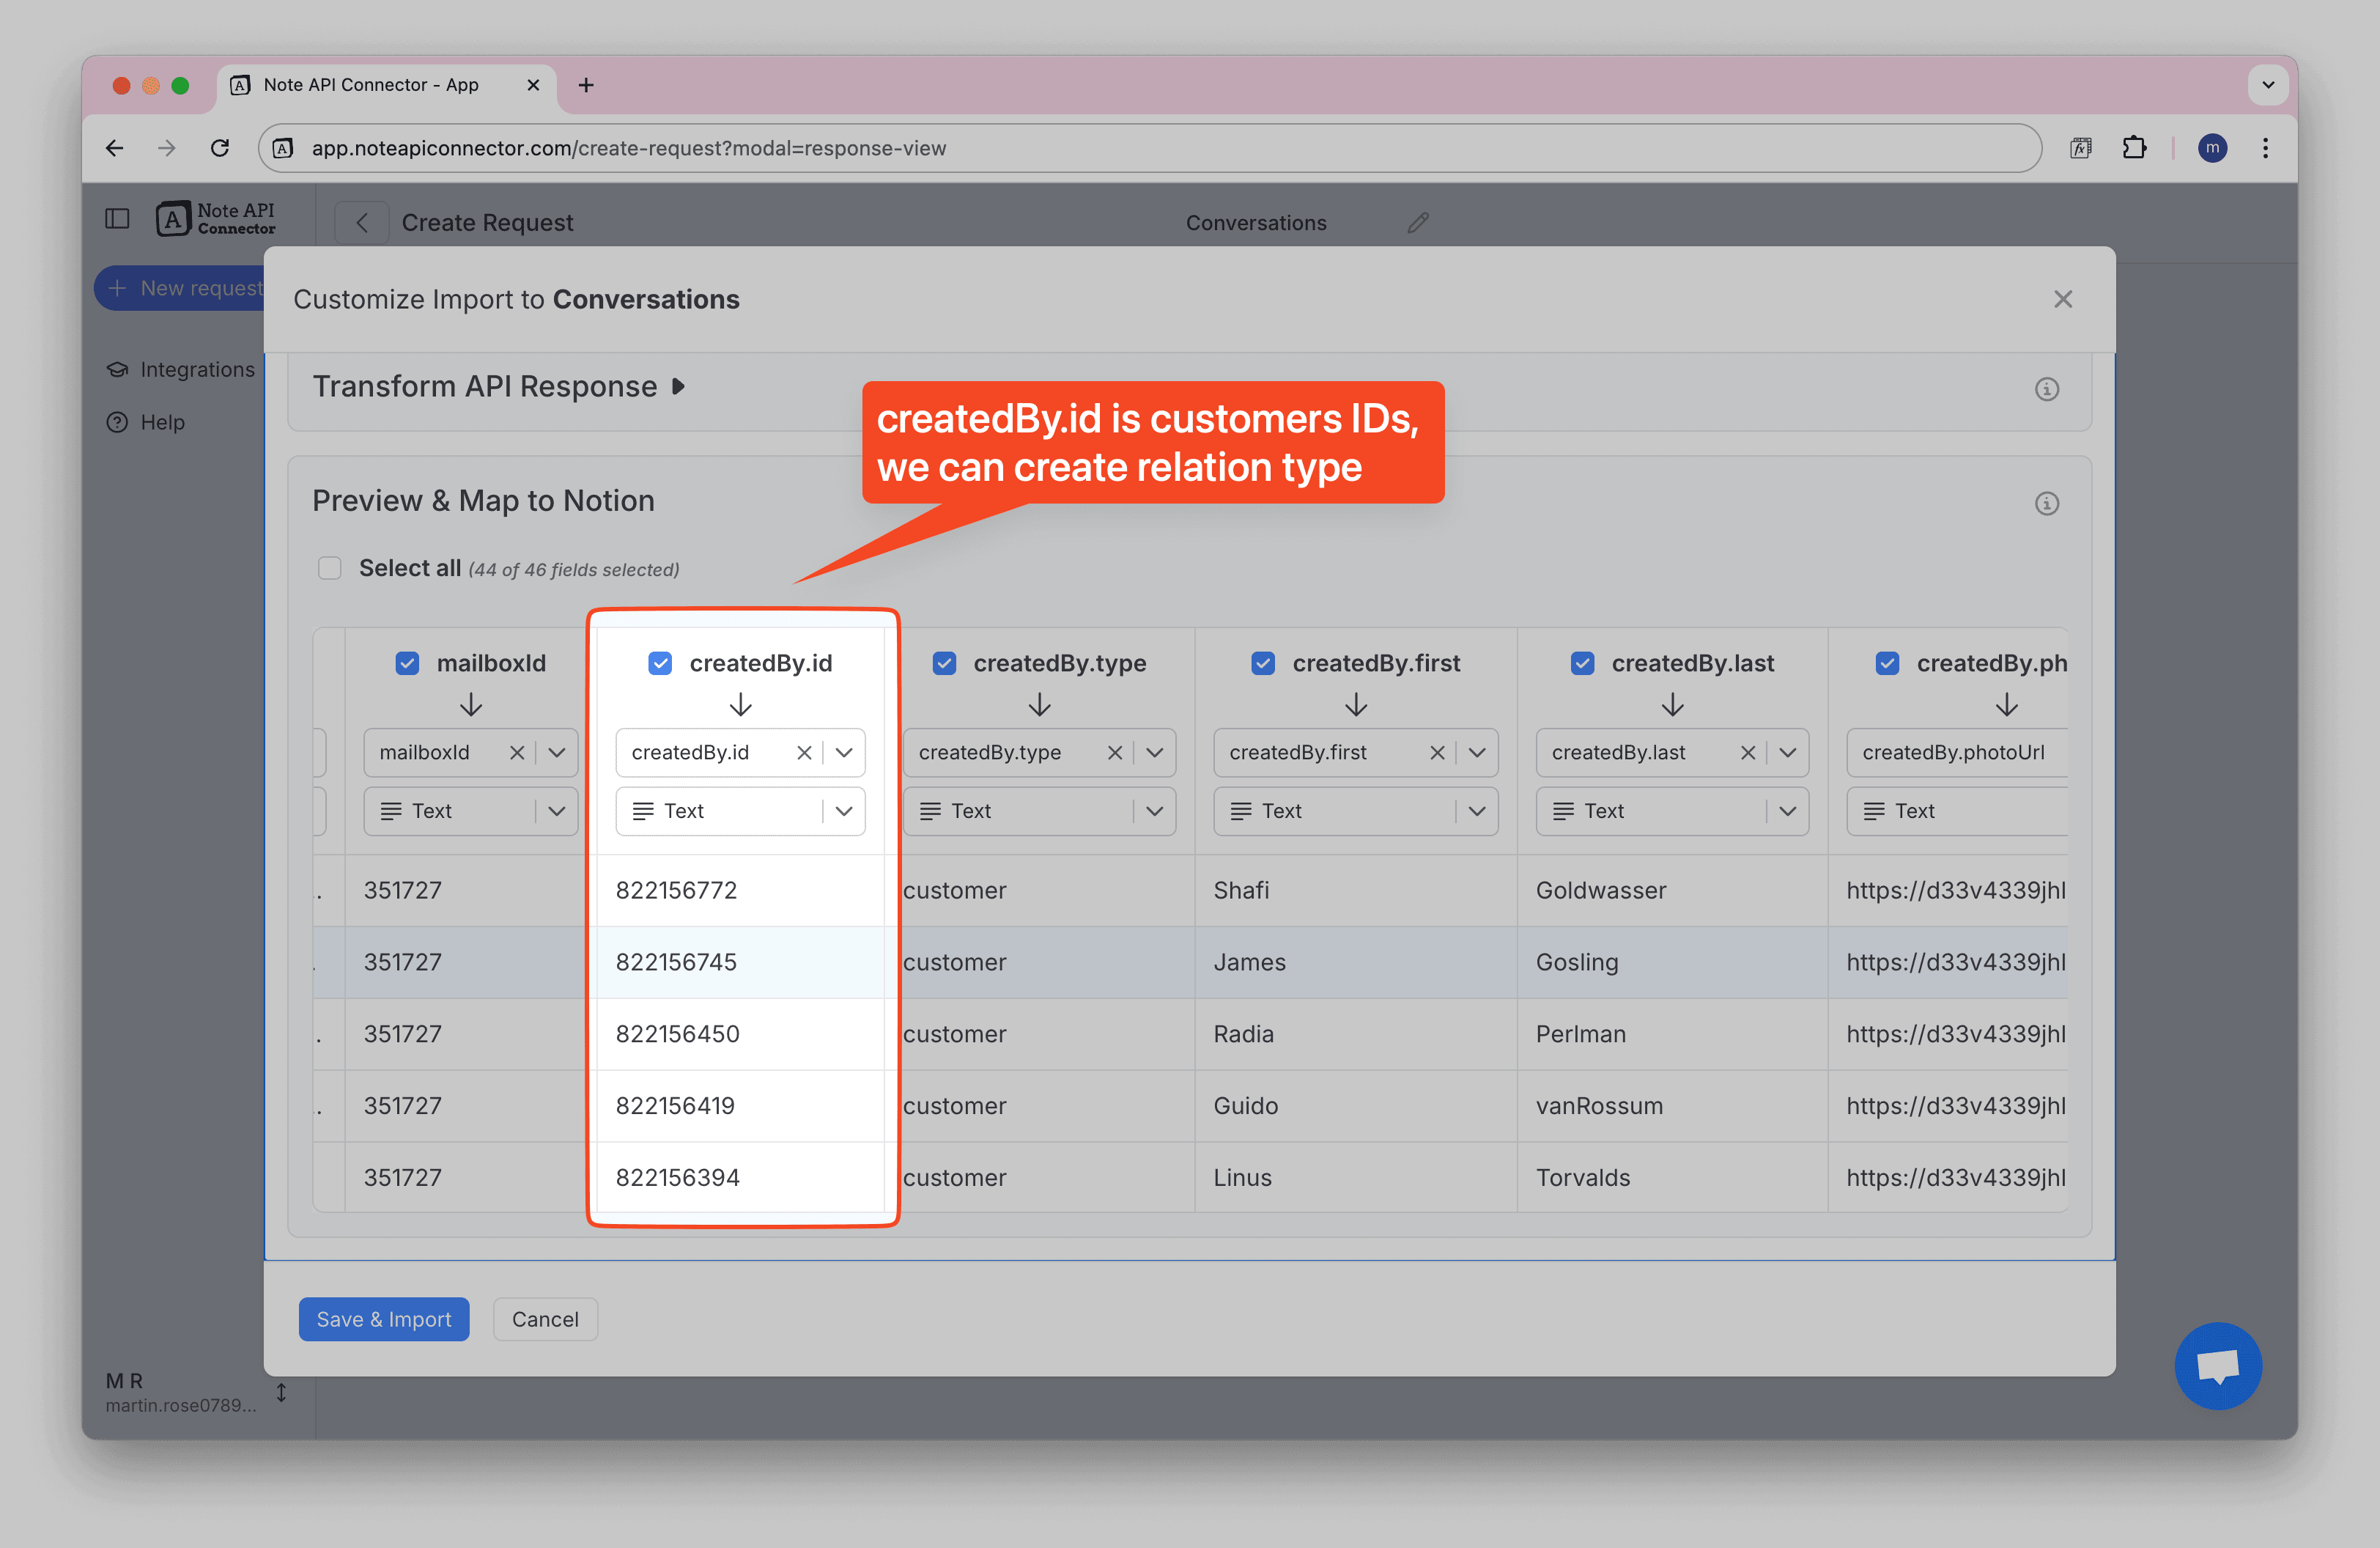
Step 4 (Optional): Link HelpScout Customers and Conversations in Notion
If you want a complete CRM-style view, you can link HelpScout customers with their conversations in Notion. This step is optional, but it makes your Notion HelpScout integration much more powerful.
👇 Show how to link customers and conversations
In your Notion database, add a Relation property. This lets you connect conversations from Step 3 with the right customers from Step 2.
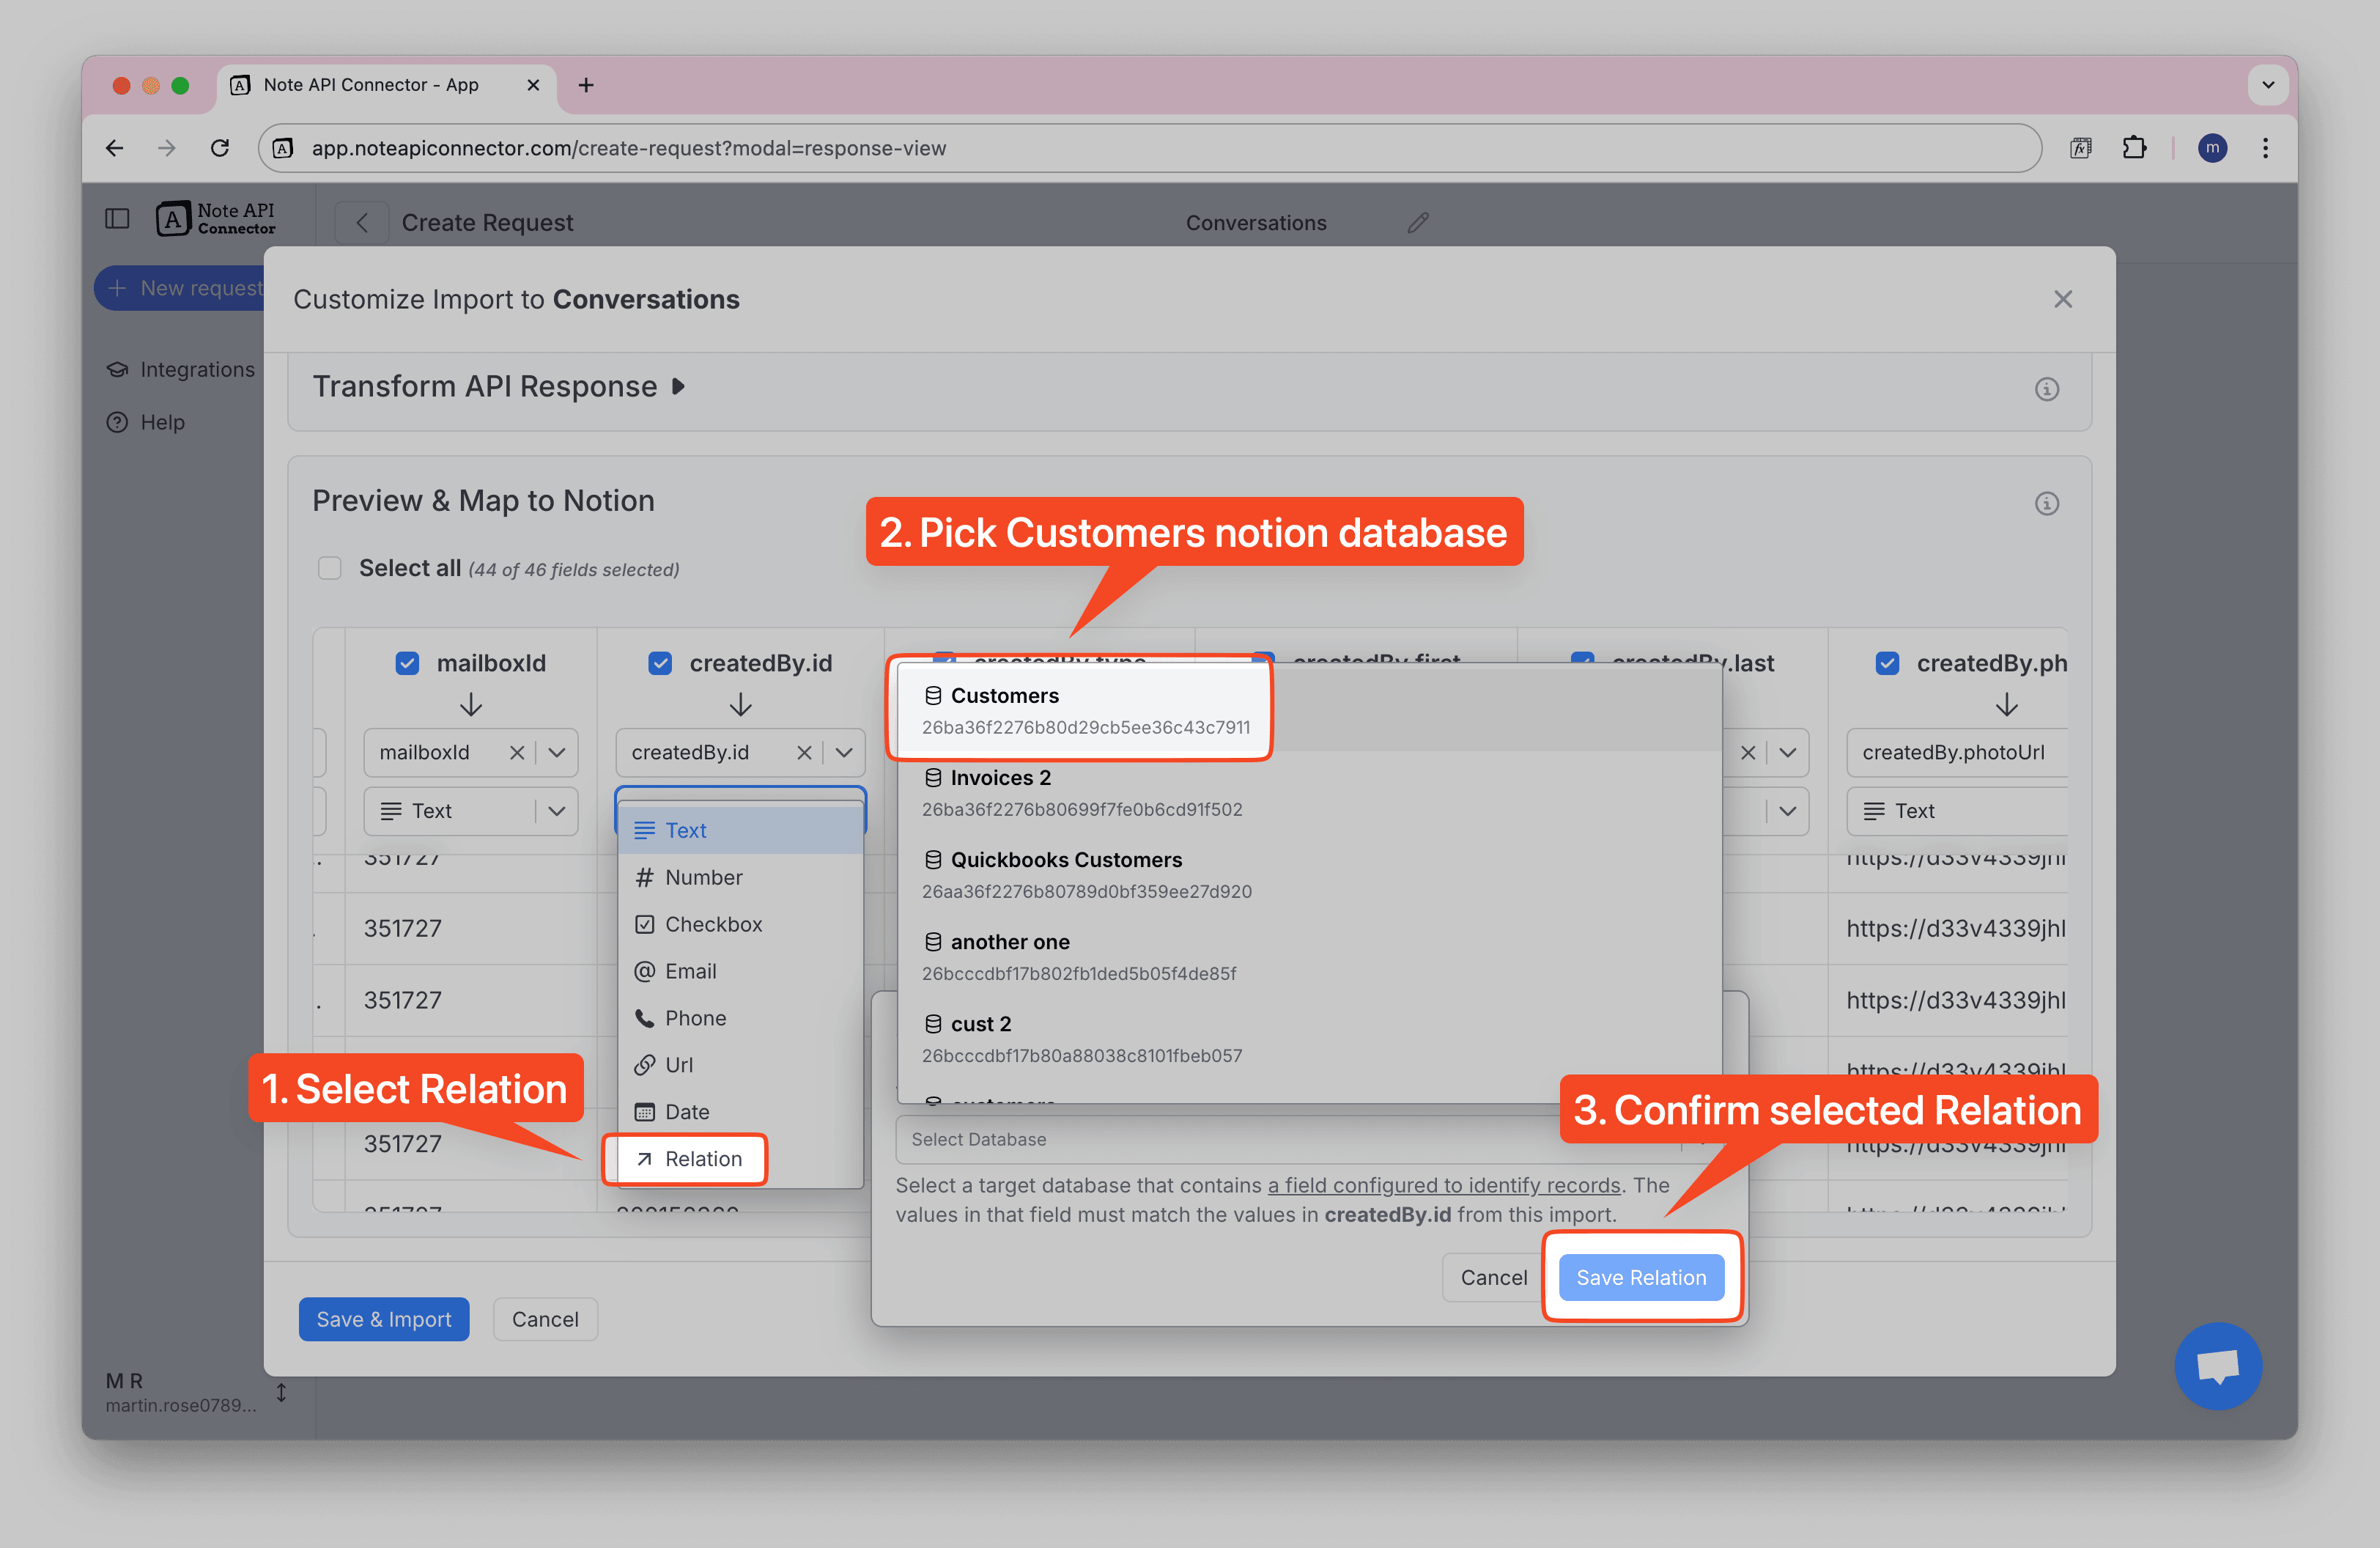
Once configured, your HelpScout data will be fully integrated in Notion with proper relationships.
Step 5: Automate HelpScout Data Updates in Notion
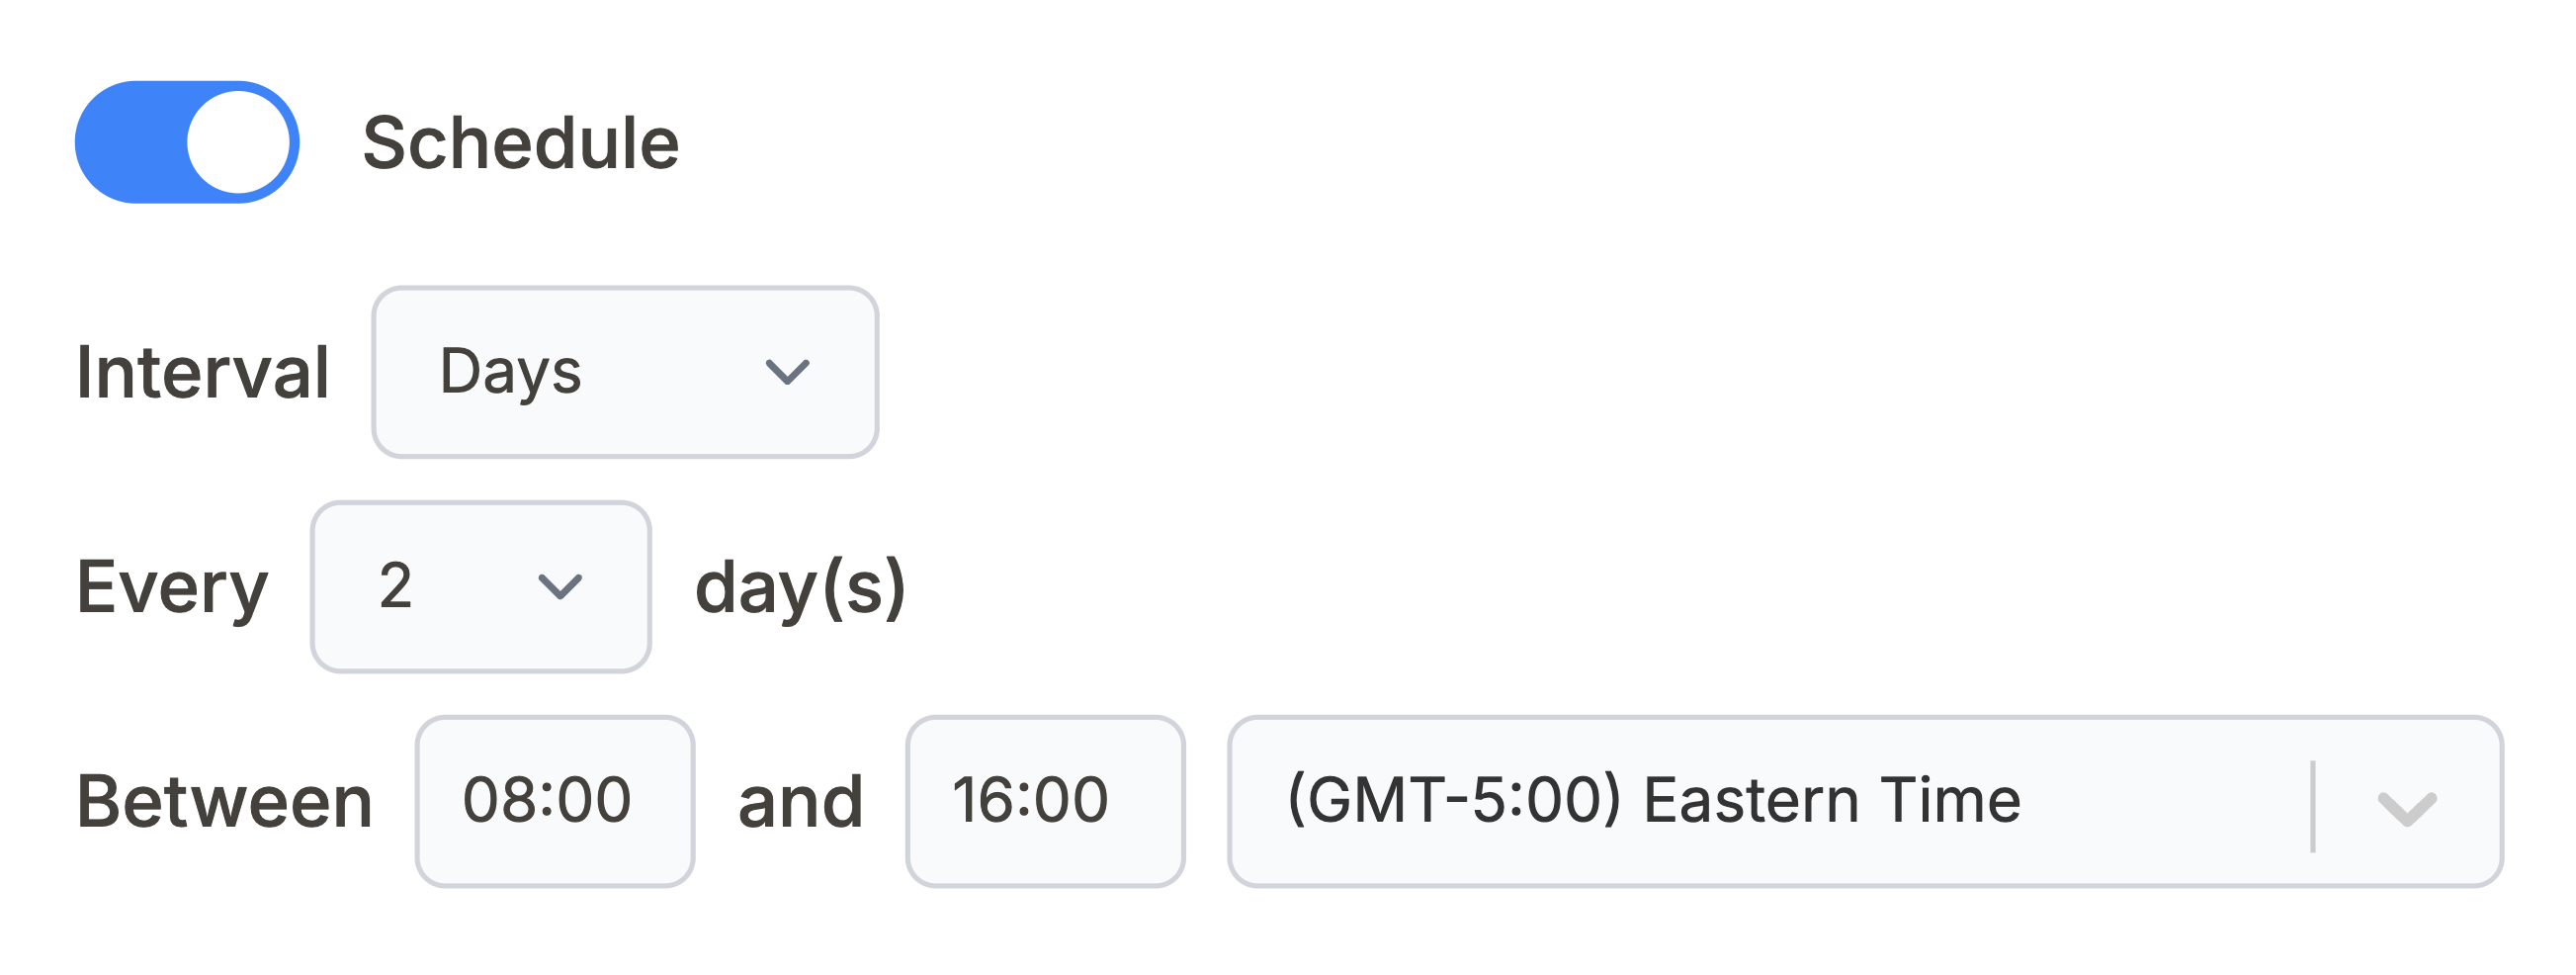
Manually refreshing your HelpScout data in Notion can be time-consuming, especially when tracking customer conversations, support tickets, and customer insights. With Note API Connector's scheduling feature, you can automate data updates , ensuring your Notion dashboard always reflects the latest HelpScout information.
Set it to refresh hourly, daily, or at custom intervals , so you never have to worry about outdated customer data again. Whether you're monitoring support performance, tracking customer satisfaction, or analyzing conversation trends, automated synchronization lets you focus on providing excellent customer support while your data stays current . With scheduling, you can sync HelpScout with Notion automatically, no more manual refreshes.
Copy-paste HelpScout API URLs for importing
Core objects
-
Customers
https://api.helpscout.net/v2/customers
-
Conversations
https://api.helpscout.net/v2/conversations
-
Mailboxes
https://api.helpscout.net/v2/mailboxes
-
Users (Team Members)
https://api.helpscout.net/v2/users
-
Tags
https://api.helpscout.net/v2/tags
Advanced insights
-
Workflows
https://api.helpscout.net/v2/workflows
-
Reports – Happiness (CSAT)
https://api.helpscout.net/v2/reports/happiness
-
Reports – Productivity
https://api.helpscout.net/v2/reports/productivity
-
Teams
https://api.helpscout.net/v2/teams
Conclusion
With Note API Connector , importing and updating HelpScout data into Notion is effortless and code-free. This Notion HelpScout Integration centralizes your customer support data, making it easier for teams to collaborate and access real-time customer insights. With this setup, you can import HelpScout data into Notion, build a complete Notion HelpScout integration, and keep everything in sync automatically.
Whether you're tracking customer conversations, monitoring support performance, or analyzing customer satisfaction, connecting HelpScout to Notion eliminates data silos and improves team productivity. The ability to create custom views, filters, and dashboards in Notion transforms your HelpScout data into actionable insights for better customer support.
Frequently Asked Questions
To import HelpScout data into Notion, use Note API Connector. First, create a HelpScout app and set up OAuth credentials, then create an API request in Note API Connector, and finally map the data to your Notion database.
No, Note API Connector is a no-code tool that allows you to connect HelpScout to Notion without any programming knowledge.
You can sync HelpScout with Notion automatically by turning on scheduling in Note API Connector. Choose hourly, daily, or custom refresh intervals so your data is always up to date.
Yes, Note API Connector follows secure authentication practices, and your credentials are not stored. You maintain full control over API access settings in HelpScout.
